Manuel de Instrucciones y Lista de Piezas PW1091
21 Sp
4
www.chpower.com
Operating Instructions and Parts Manual PW1091
Operation
USING YOUR SURFACE CLEANER
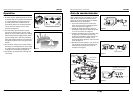
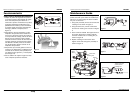
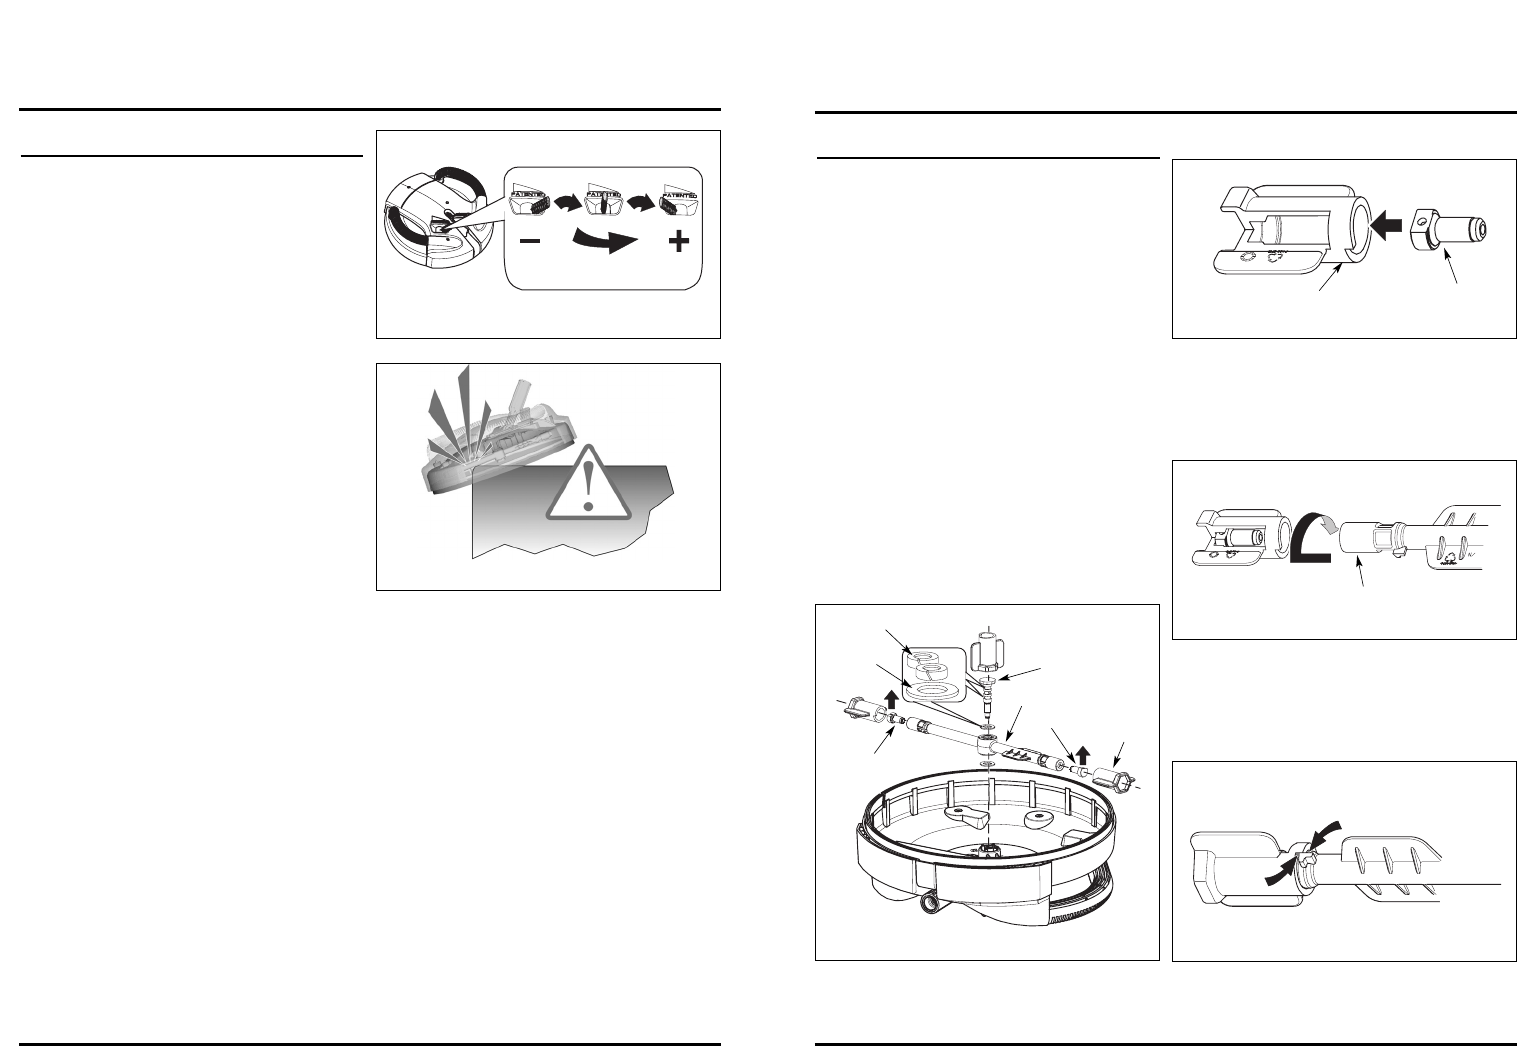
1. Find the pressure adjusting knob on the top
of surface cleaner. Use this knob to decrease
or increase pressure. Decreasing the pres-
sure will protect softer material such as
wood decks and fences. Increased pressure
can be used for concrete, brick or block
surfaces (see Figure 3).
2. For best results, pull the surface cleaner
toward you while spraying. If swirl marks
appear on work surface, reduce your pulling
speed. Always release trigger before finish-
ing the pulling action. This will avoid dam-
aging soft material surfaces. Also avoid left
to right movements when using the surface
cleaner.
3. Do not allow rotating arm to make contact
with sharp or hard objects (such as the edge
of a step). This may result in damage to the
rotating arm and nozzles (see Figure 4).
4. Use handles as needed when cleaning verti-
cal surfaces.
Figure 3
Less
pressure
More
pressure
Figure 4
Guía de mantenimiento
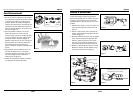
NOTA: Después de un uso reiterado o de
daño, cambie los sellos de plástico y la aran-
dela de nylon según sea necesario (vea la
Figura 5). Se han incluido sellos y arandelas
adicionales para su practicidad.
1. Con la herramienta que se proporciona,
retire el perno central y el brazo giratorio
como se muestra en la Figura 5.
2. Usando la misma herramienta, retire la
boquilla de cada extremo del brazo girato-
rio como se muestra en la Figura 5.
3. Limpie la boquilla según sea necesario. Vea
las figuras 6 y 7. Para una correcta alin-
eación de las boquillas, ajuste hasta que la
herramienta entre en contacto con la
lengüeta del brazo giratorio, como se mues-
tra en la Figura 8.
4. Reemplace el brazo giratorio y el perno cen-
tral. Ajuste el perno central usando la her-
ramienta que se proporciona, como se
muestra en la Figura 5.
Figura 5
Sello de plástico
Arandela
de nylon
Brazo giratorio
Perno central
Boquilla
Herramienta
Boquilla
Figura 6
Herramienta
Boquilla
Figura 7
Figura 8
Brazo giratorio
Apriete hasta que la her-
ramienta toque la lengüeta
sobre el brazo giratorio


