18
19
pliers and lift up. The shelves can be relocated along this track by
simply relocating the clips to the desired shelf location. To replace a
clip, insert the top lip of the clip into the appropriate slot in the track,
squeeze the clip together and insert the bottom lip of the clip into the
track. It is important that all clips supporting a particular shelf are
located at the same height to ensure that the shelf sits level.
Notice! The gun rack is fragile and can easily be broken when
aTTempTing To remove iT or insTall iT in a new locaTion. do noT
aTTempT To remove The gun rack by forcing iT ouT of The
reTainer clips. remove all Top clips before aTTempTing To move
The gun rack. supporT The enTire widTh of The gun rack before
removing iT.
FACTORY INSTALLED INTERIOR LIGHTS
Some safes include a factory-installed interior light package located in
the ceiling of the safe.
The inTerior lighT bulbs are hoT. To reduce The risk of fire,
damage, or injury please noTe The following:
•BulBgetshotquickly.Donottouchlens,guarDor
enclosure. Touch only The power swiTch/plug when
Turning on.
•keepcomBustiBlesawayfrominteriorlights.
•DonotoperatethelightsifDamageD,withoutthe
compleTe bulb (lamp) enclosure in place or if bulb
enclosure is damaged.
•DonotlookDirectlyatlighteDBulB.
•keepallitemsatleast3" from lighTs.
failure To follow These warnings could resulT in serious
injury, deaTh or cause damage To The safe or belongings.
H I N G E S
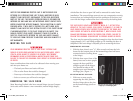
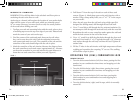
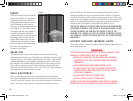
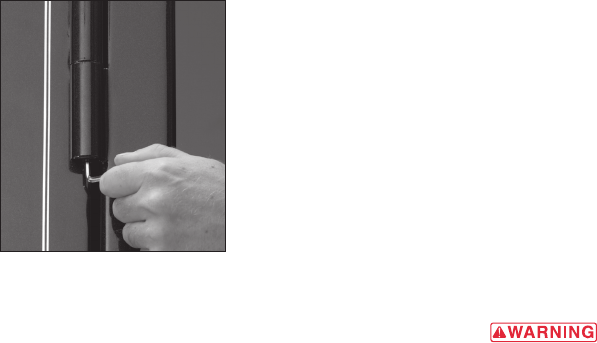
Your door height is adjusted at the
factory and should not require any
adjustment when new. However,
hinge adjustment bolts are located
on the bottom of each hinge to
allow you to make adjustments over
time (Figure 5). This allows you to
raise and lower the door slightly as
needed. Rotating the Allen bolt
counterclockwise (looking down at
the hinge) raises the door on its
hinges. Both Allen bolts (top and
bottom hinges) should be turned
the same amount when adjusting
the door. (Not applicable on
Compact Series safes.)
SHEAR PIN
The handle shaft of some safe models is attached to the locking
mechanism with a shear pin. The shear pin will snap if excessive force
is applied to your safe handle (approximately 175 ft/lb.). This feature
provides additional security against attempted break in. If the shear
pin is broken, the handle will spin within the safe door and you will
not be able to open your safe. Contact the Browning ProSteel Safe
Warranty Service line toll free at (877) 501-7233, ext. 14 for assistance
with replacement of the handle shear pin.
SHELF ADJUSTMENT
Prior to adjusting any shelf, first remove all items from that shelf.
Your shelves are held in place by several clips that secure them to four
“tracks” on the safe interior. Some are above the shelves and some are
below. To remove a clip, squeeze it together with hand pressure or
figure 5
Adjusting the hinges.
07-137-BSF_Safe OM.indd 18-19 7/21/08 11:13:09 AM


