65
USING ATTACHMENTS AND APPLICATIONS
USO DE ACCESORIOS Y APLICACIONES
GUARNIZIONI E APPLICAZIONI
Zipper Insertion
Pattern Stitch Length Foot
(Straight Stitch
2-3 Zipper Foot
(Center Needle Position)
)
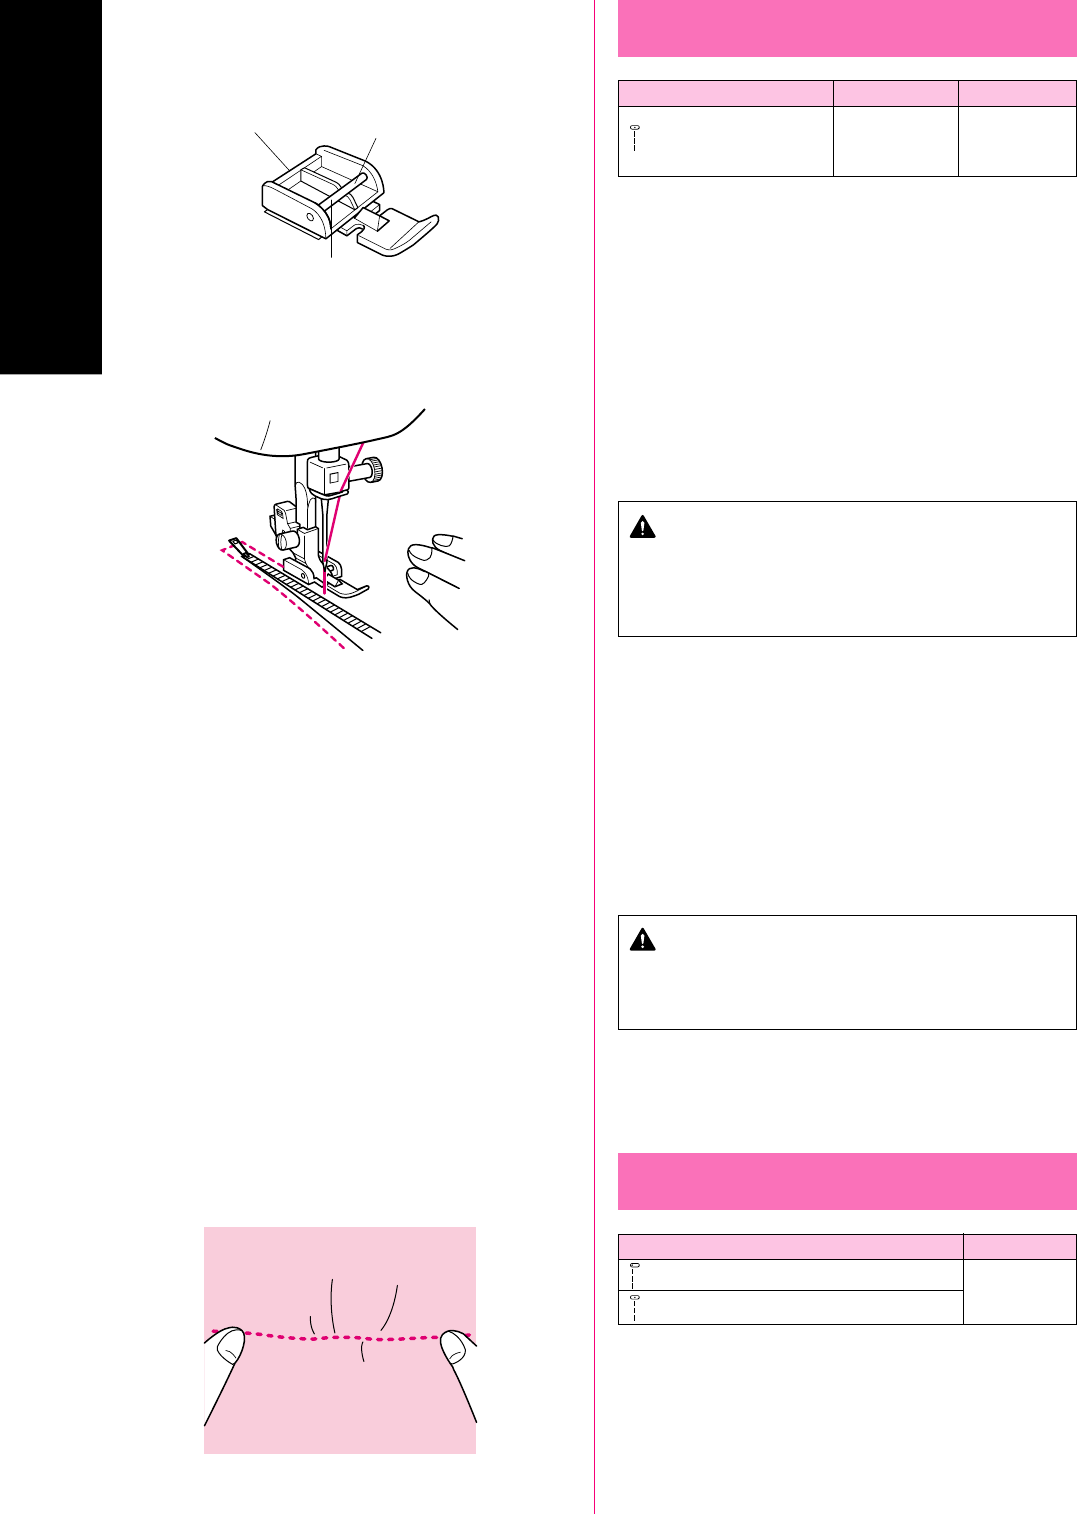
The zipper foot is used to sew various types of zippers and can
easily be positioned to the right or left side of the needle.
When sewing the right side of the zipper, attach the shank to the left
pin of the zipper foot. When sewing the left side of the zipper, attach
the shank to the right pin of the zipper foot. (See fig. A)
1. Set the Pattern Selection Dial to Straight Stitch (Center Needle
Position). Set the Stitch Length between 2 and 3.
2. Lower the presser foot lever and fix either the left or right pin of
the zipper foot onto the shank.
3. Fold the edge of the material 2 cm (3/4") and place the zipper
under the folded portion.
4. Lower the needle into the notch located either on the left or right
side of the zipper foot.
CAUTION
Turn the balance wheel to make sure the needle does not
strike the presser foot. If another stitch is selected, the
needle will strike the presser foot, causing the needle to
break, possibly leading to injury.
5. Sew from the bottom of the zipper toward the top on both sides.
The needle should be positioned on the zipper side of the foot
for best results. (See fig. B)
6. To sew the opposite side of the zipper, release
the foot by pressing the button located at the back of the presser
foot, install the zipper foot on the other side of the zipper and
continue sewing using the other side notch.
1 Zipper foot
2 Right pin for sewing the left side of the zipper
3 Left pin for sewing the right side of the zipper
CAUTION
Make sure the needle does not strike the zipper during
sewing. If the needle strikes the zipper, the needle may
break, leading to injury.
A
B
1
2
3
Gathering
Pattern Stitch Length
(Straight Stitch (Left Needle Position))
4
(Straight Stitch (Center Needle Position))
1. Set the Pattern Selection Dial to Straight Stitch.
2. Loosen the tension of the upper thread so that the lower thread
lies on the underside of the material.
3. Sew a single row or multiple rows of Straight Stitch(es).
4. Pull the lower thread(s) to gather the material.


