KNOWING YOUR SEWING MACHINE —————————————————————————————————————————————
—
20
5
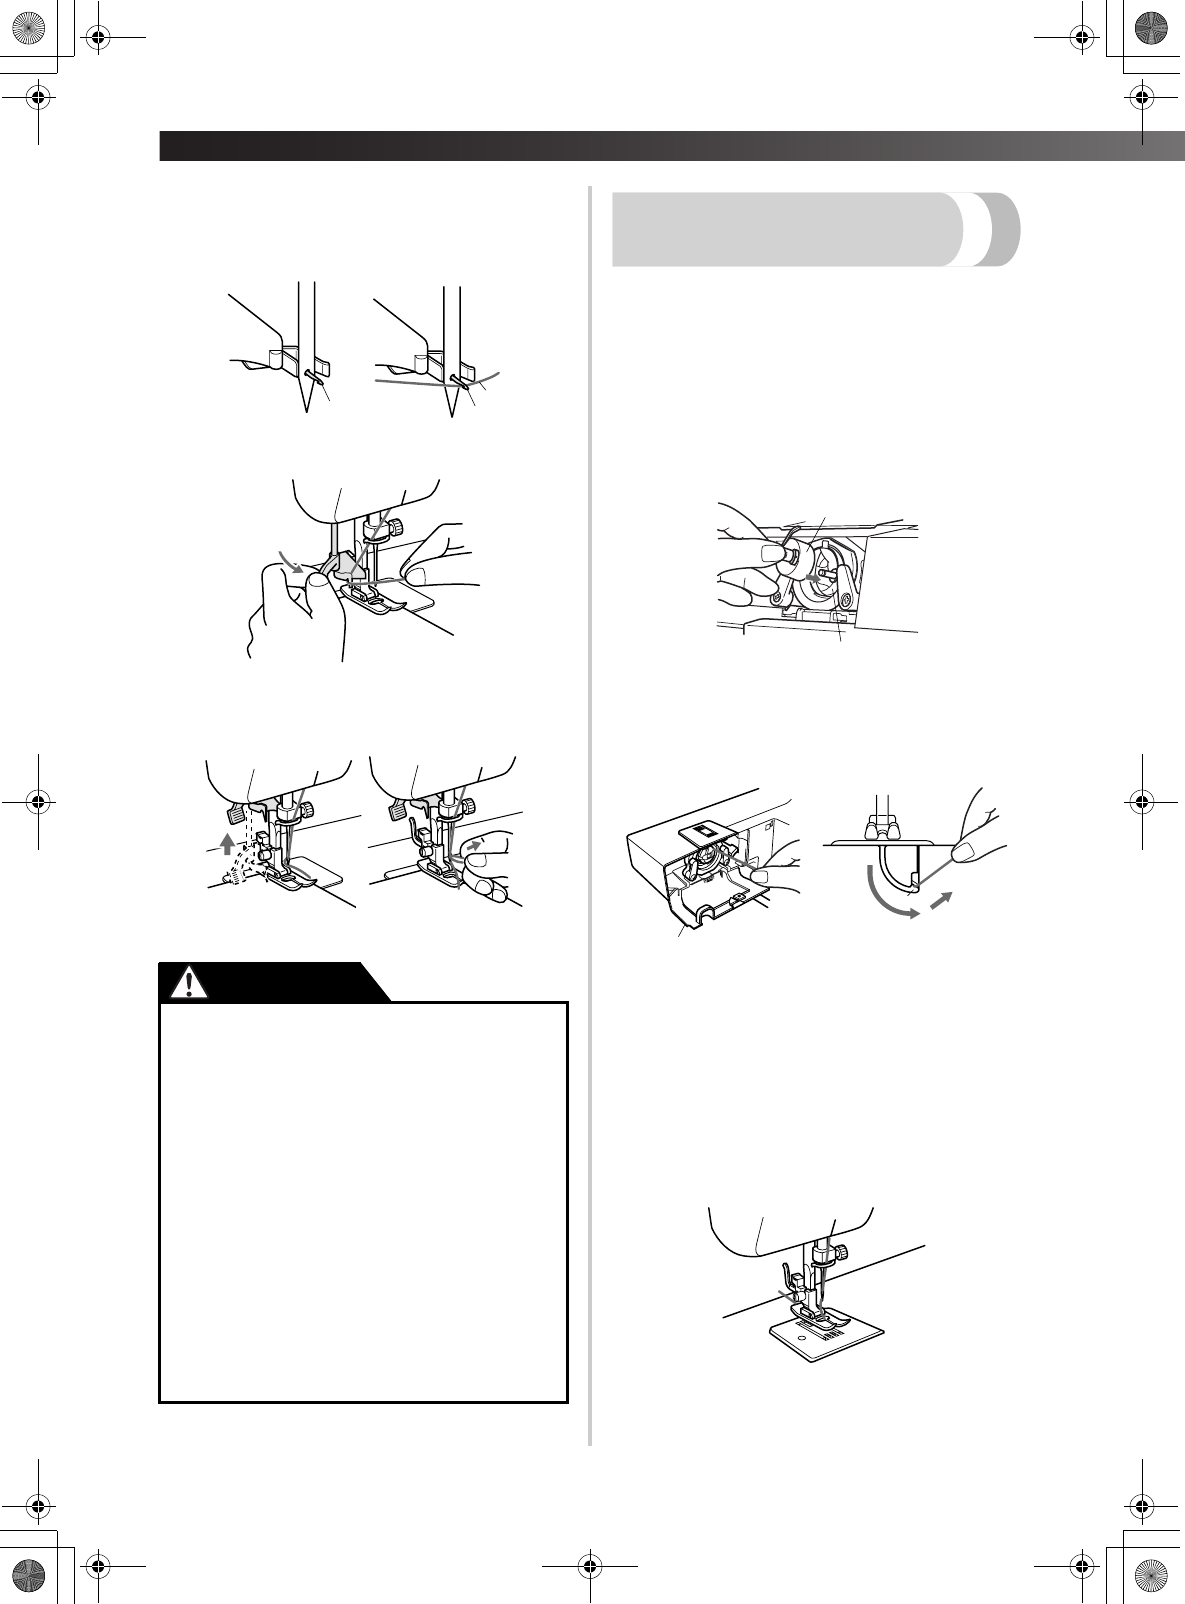
While lightly holding the thread, turn the
needle threader lever toward the front of the
machine (toward you). The hook will pull the
thread through the needle.
1 Hook
2 Thread
6
Raise the needle threader lever and pull out
about 5 cm (2") of thread through the needle
toward the back of the sewing machine.
Quick Thread-Setting System FAST START BOBBIN
(models equipped with a quick thread-setting system)
This new system allows you to start sewing
immediately after inserting the bobbin without pulling
up the lower thread. You can, however, draw up the
lower thread as explained in “Drawing up the lower
thread” if you wish.
Set the main power switch to “O”.
1
Hold the end of the bobbin thread and insert
the bobbin case into the shuttle.
1 Bobbin case
2 Shuttle
2
Close the shuttle cover while pulling the
thread through the slit in the cover.
1 Shuttle cover
2 Slit
3
Slide the thread down to the bottom of the
slit, pull it up, and then cut it on the cutter to
complete the lower threading.
4
Pull out about 15 cm (6") of the upper thread
as usual, and then pull it between the toes of
the presser foot and straight toward the back
of the machine.
5
Start sewing as usual. (It is not necessary to
draw up the bobbin thread.) (Refer to page 21.)
● The needle threader can only be used
with home sewing machine needles size
75/11-100/16. Check the table on
page 24 for the appropriate needle and
thread combinations. If you are using
transparent nylon mono-filament thread,
you can only use needles in the range of
90/14-100/16.
● You cannot use the needle threader if
you are using decorative threads or
speciality needles, such as the twin
needle and wing needle.
If you are using these types of threads or
needles, thread the needle by hand. Make
sure the main power switch is off when
threading the needle by hand.
1
1
2
CAUTION
1
2
1
2
XL5000us.book Page 20 Tuesday, November 11, 2003 9:25 AM


