10
— — — — — — — — — — — — — — — — — — — — — — — — — — — — — — — — — — — — — — — — — — — — — — — — — — —
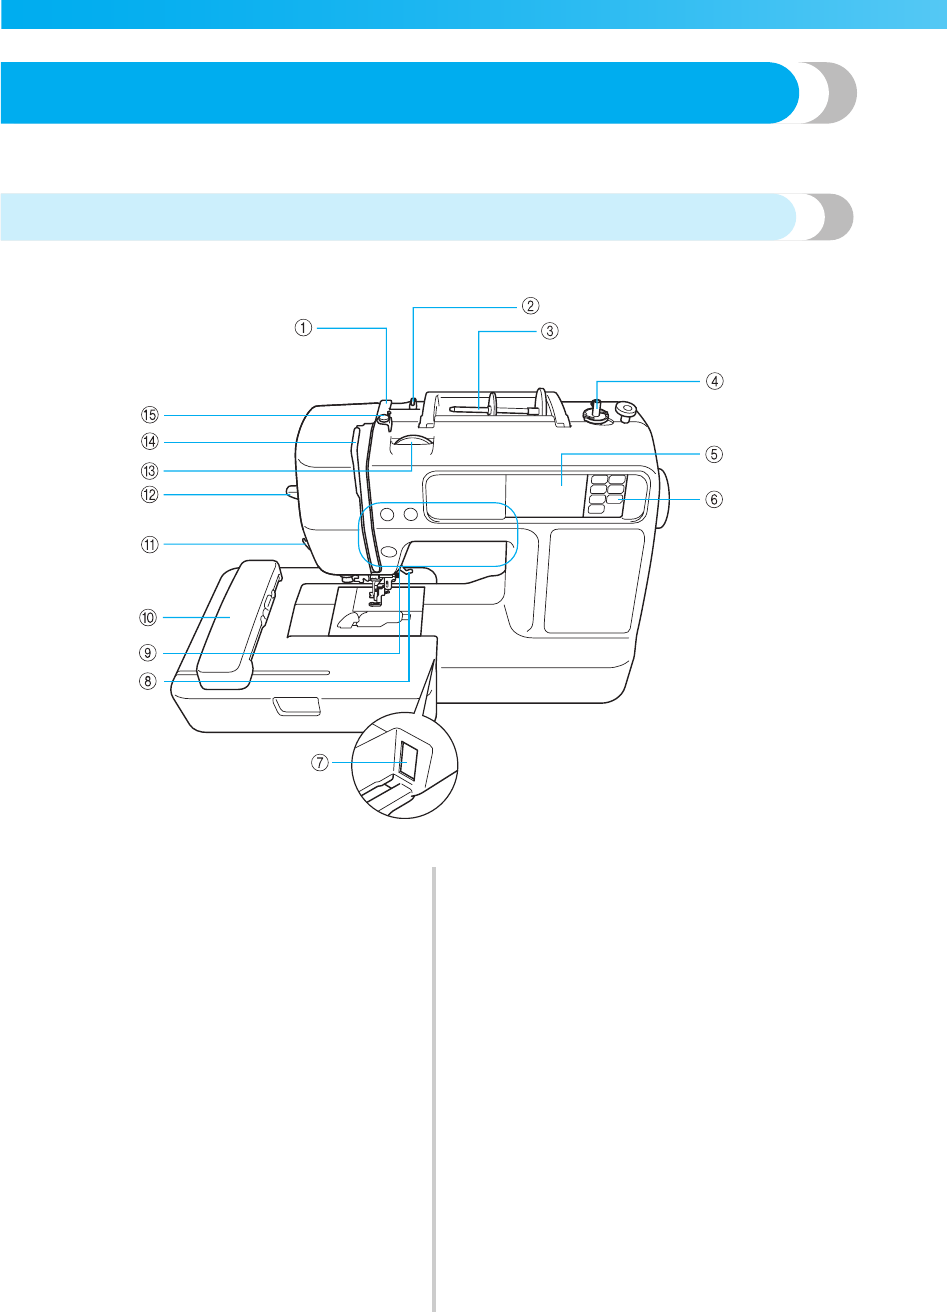
Names of Machine Parts and Their Functions
The names of the various parts of the machine and their functions are described below. Before using the
machine, carefully read these descriptions to learn the names of the machine parts.
Front view
a Thread guide cover (page 31, 39)
Pass the thread under this thread guide cover when
winding the bobbin thread and threading the machine.
b Thread guide (page 31, 39)
Pass the thread under this thread guide when winding
the bobbin thread and threading the machine.
c Spool pin (page 30, 38)
Place a spool of thread on the spool pin.
d Bobbin winder (page 29)
Use the bobbin winder when winding the bobbin.
e LCD (liquid crystal display) (touch panel) (page 22)
Setting for the selected pattern and error messages
appear in the LCD.
f Operation panel (page 13)
Use the keys on this panel to select embroidery patterns,
or check how to use the machine, etc.
g Embroidery unit connector slot (page 20)
Plug in the connector for the embroidery unit.
h Presser foot lever (page 28)
Raise and lower the presser foot lever to raise and lower
the embroidery foot .
i Operation buttons (page 12)
Use these buttons to operate the machine.
j Embroidery unit (page 19)
Attach the embroidery unit to the machine, and then
attach the embroidery frame.
k Thread cutter (page 40)
Pass the threads through the thread cutter to cut them.
l Needle threader lever (page 41)
Use the needle threader lever to thread the needle.
m Thread tension dial (page 63)
Adjust the upper thread tension with this dial.
n Thread take-up lever (page 40)
o Bobbin-winding thread guide and pretension disc
(page 31)
Pass the thread under this thread guide and around the
pretension disc when winding the bobbin thread.
introduction1 Page 10 Tuesday, August 19, 2008 4:54 PM


