


14
KNOWING YOUR SEWING MACHINE
CONOZCA SU M
ÁQUINA DE COSER
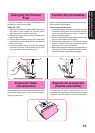
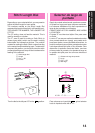
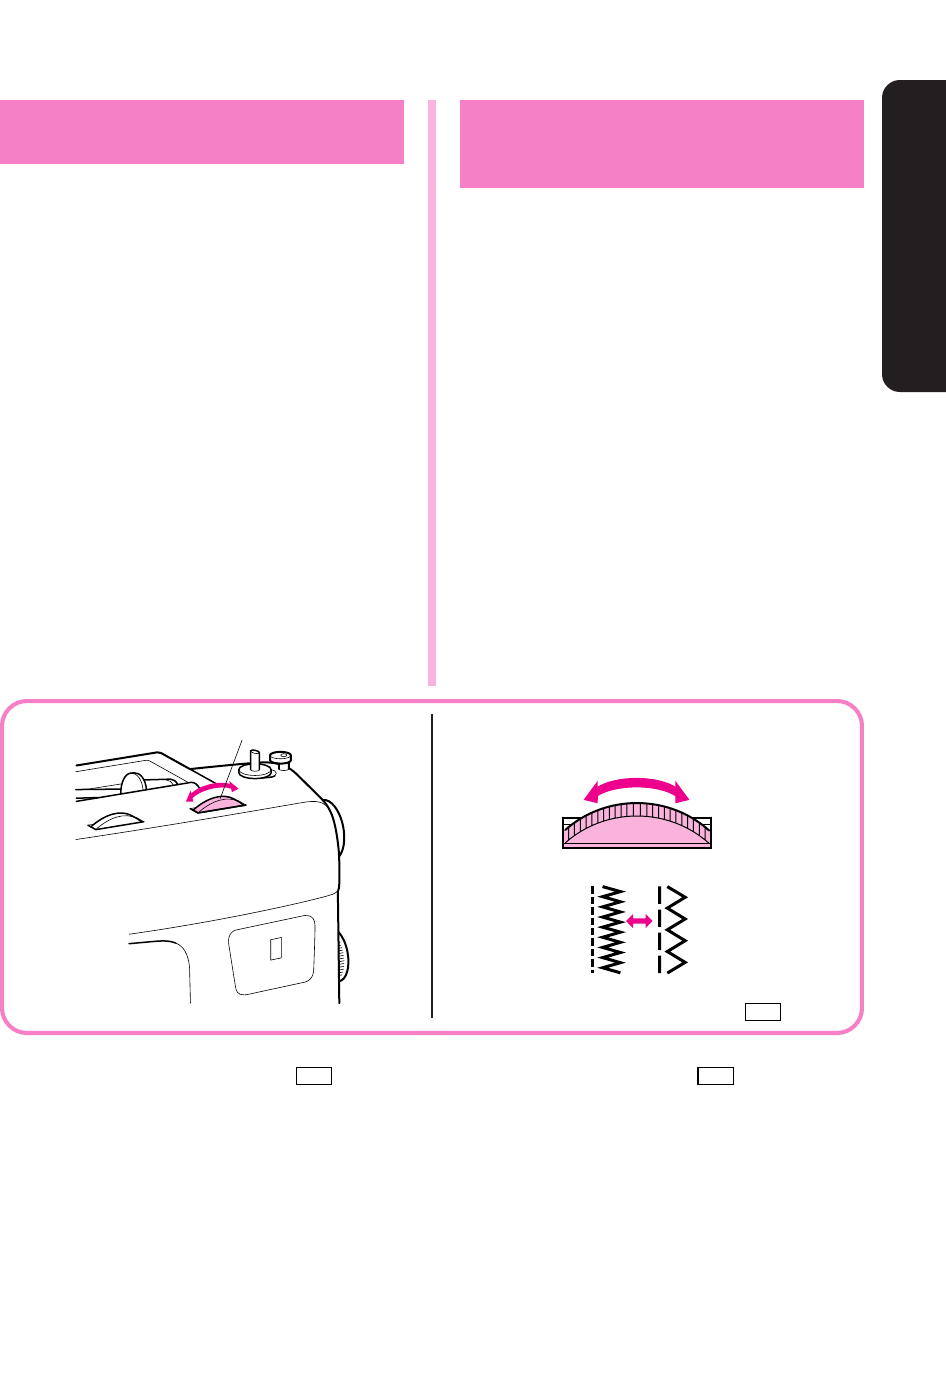
Selector de largo de
puntada
Según la puntada seleccionada, puede ser necesa-
rio ajustar su largo para lograr mejores resultados.
Los números indicados en el disco representan el
largo de las puntadas en milímetros.
CUANTO MAS ALTO EL NUMERO, MAS LARGA
LA PUNTADA.
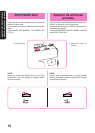
El ajuste “O” no alimenta el tejido. Sirve para coser
un botón.
La zona "F" se usa para realizar bordados de realce
(una puntada densa en zigzag), que puede servir
para coser ojales o como puntadas decorativas. La
posición necesaria para realizar puntadas de realce
varia dependiendo del tejido e hilo utilizados. Para
determinar la posición exacta del botón, conviene
primero probar la puntada y los ajustes de largo en
un pedazo de tejido para ver como se alimenta el
material.
1
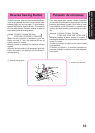
Selector de largo de puntada
2
Largo
3
Fina
→
SS
4
Más largo
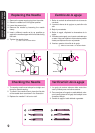
Stitch Length Dial
Depending on your selected stitch, you may need to
adjust the stitch length for best results.
The numbers marked on the Stitch Length Dial
represent the length of the stitch in millimeters (mm).
THE HIGHER THE NUMBER, THE LONGER THE
STITCH.
The “O” setting does not feed the material. This is
used for sewing on a button.
The “F” area is used for making a Satin Stitch (a
dense zigzag stitch) which can be used in making
buttonholes and decorative stitches. The position
needed for making the Satin Stitch varies according
to the material and thread being used. To determine
the exact dial position, you should first test the stitch
and length settings on a scrap of fabric to observe the
feeding of the material.
1 Stitch length dial
2 Length
3 Fine → SS
4 Coarse
1
3
2
1
2
34
4 3 2 1 - F - O ...................
SS
Para colocarse en la posición
SS
, gire el selector
hacia la izquierda más allá de "O".
Turn the dial to the left past “O” for the
SS
position.