


UTILITY STITCHES —————————————————————————————————————————————————
—
31
BUTTONHOLE SEWING
Buttonholes can be sewn and buttons can be sewn on.
Buttonholes are sewn from the front of the presser
foot to the back, as shown below.
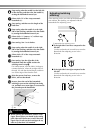
a Reinforcement stitching
Making the buttonhole
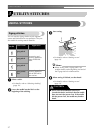
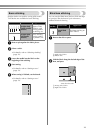
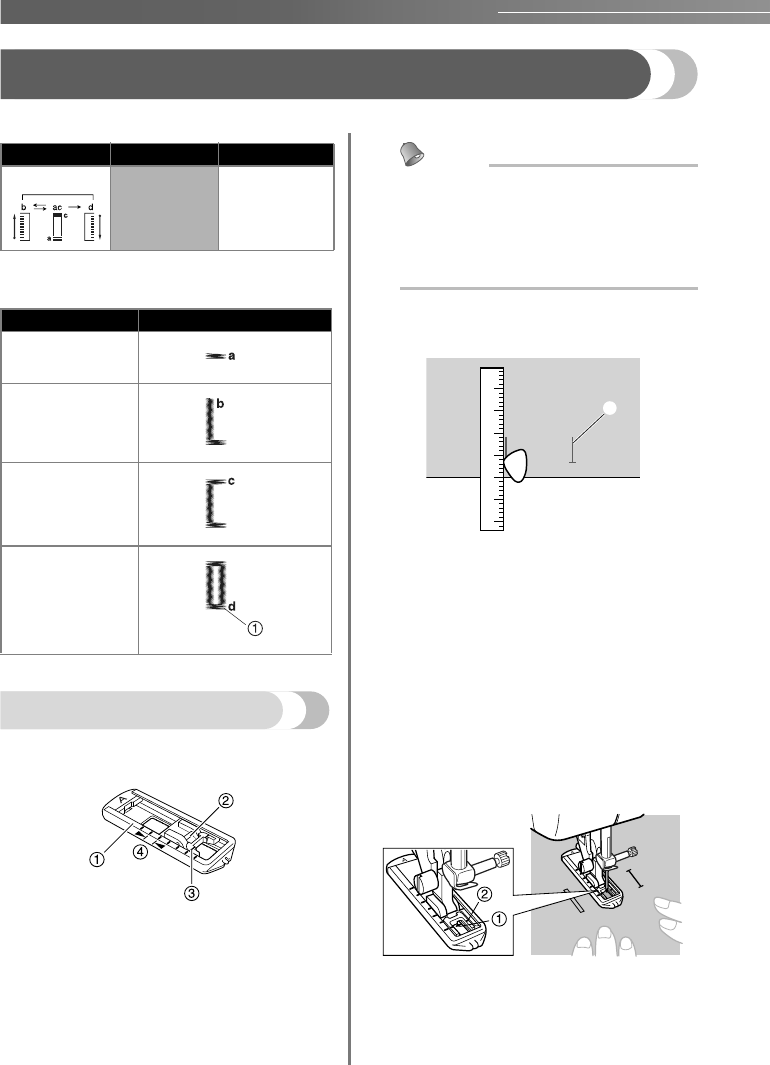
The names of parts of buttonhole foot “A”, which is
used for sewing buttonholes, are indicated below.
a Presser foot scale
b Pin
c Marks on buttonhole foot
d 5 mm (3/16 inches)
Memo
● Before sewing buttonholes, check the stitch
length and width by sewing a trial
buttonhole on a scrap piece of fabric.
● When sewing buttonholes on stretch
fabrics, place stabilizer material under the
fablic.
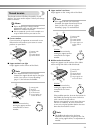
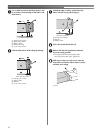
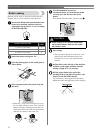
a
Use chalk to mark the position and length of
the buttonhole on the fabric.
a Marks on fabric
b
Attach buttonhole foot “A” and push the
outside frame back until the sliding insert
reaches the front of the outside frame.
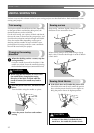
c
Select stitch “a” of the 4-step automatic
buttonhole (1).
d
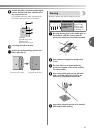
Position the fabric under the presser foot so
that the middle of the front chalk line is
directly in the center of the presser foot and
aligned with the two red lines on the insert.
Pass the upper thread down through the hole
in the presser foot.
a Mark on fabric
b Red marks on the sliding insert
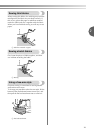
e
Start sewing. Sew 5 to 6 stitches.
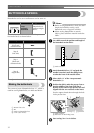
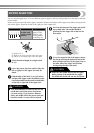
Number on dial Stitch name Application
1
4-step
automatic
buttonhole
Buttonholes on
medium weight
fabrics.
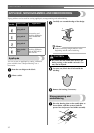
Step Sewn portion
Step a
(Front end
of button hole)
Step b
(Left side)
Step c
(Back end
of button hole)
Step d
(Right side)
1