


38
CONTENTS
KNOWING YOUR
SEWING MACHINE
STRAIGHT AND ZIGZAG
STITCHING
BUILT-IN STITCHES
USING ATTACHMENTS
AND APPLICATIONS
BUTTONHOLE
AND
BUTTON SEWING
MAINTENANCE
INDEX
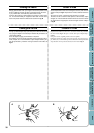
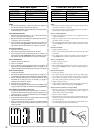
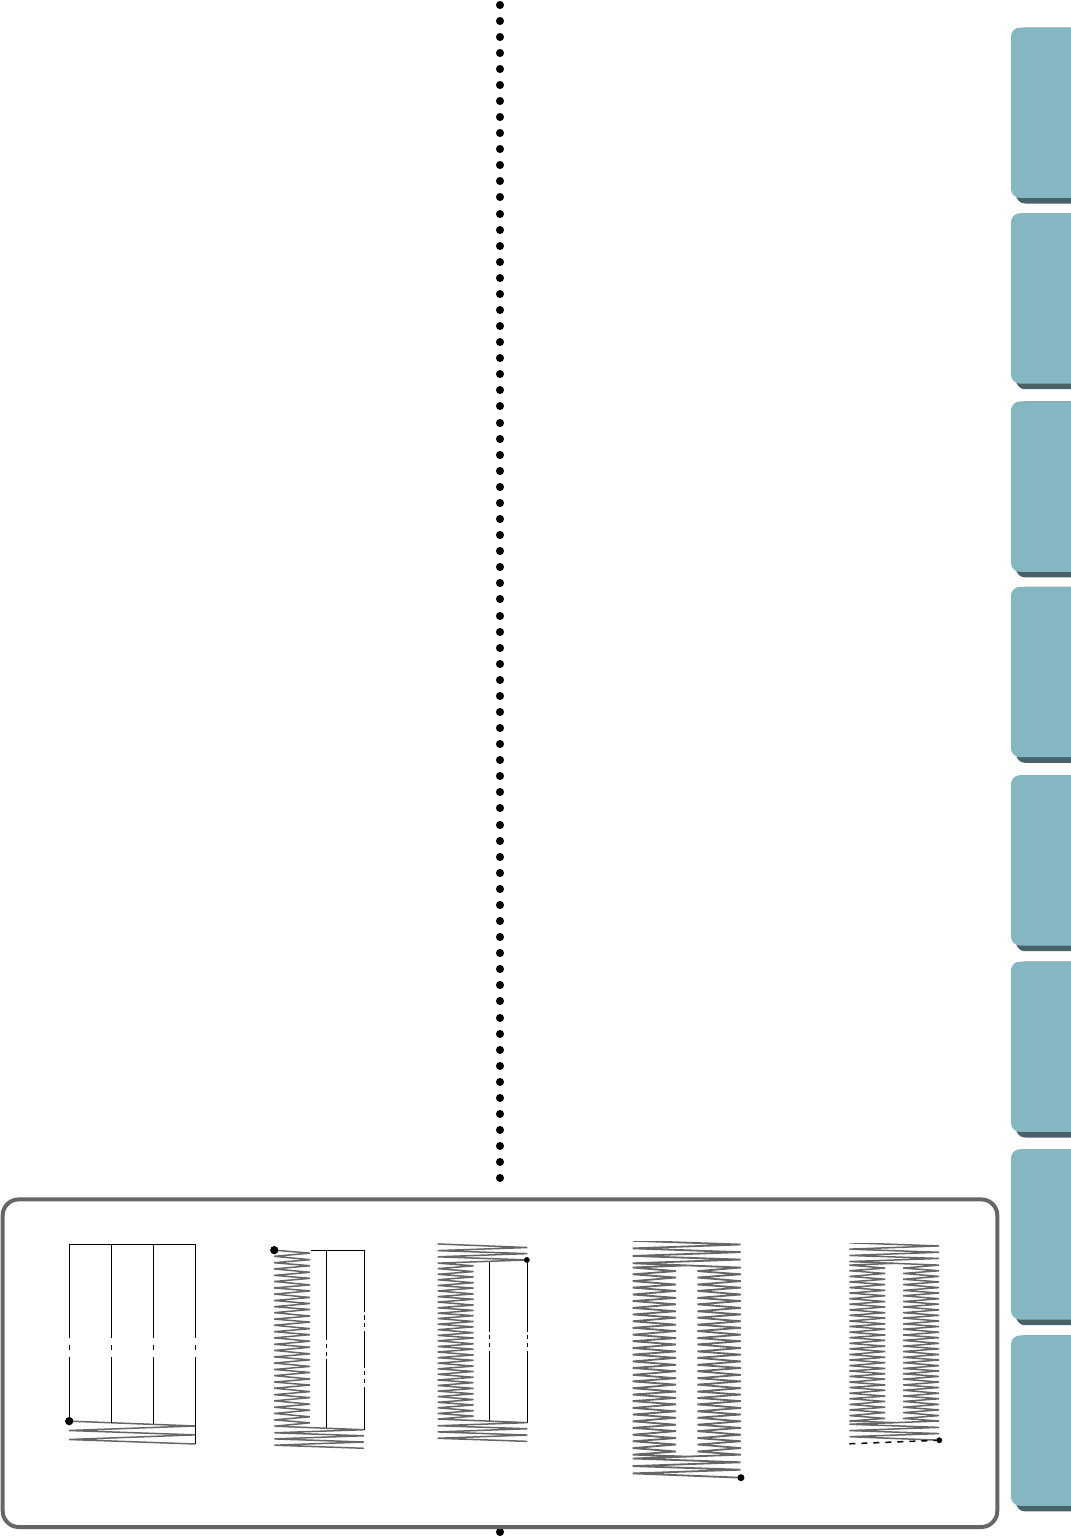
OPTIONAL PROCEDURE FOR BUTTONHOLES
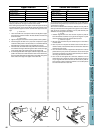
Step A: Bar Tack
1. Set the needle position at L, stitch width at 5 and stitch length at 0.
2. Lower the presser foot and sew 3 to 4 stitches.
3. Stop the machine when the needle is in the fabric and at the left
side of the stitches. (position A)
Step B: Left Row
1. Set the stitch width at 2 and stitch length at F.
2. Sew the desired length in reverse.
3. Stop the machine when the needle is in the fabric at the left side of
the stitches. (position B)
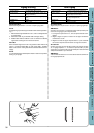
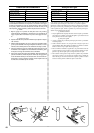
Step C: Final Bar Tack
1. Set the stitch width at 5 and stitch length at 0.
2. Sew 3 to 4 stitches.
3. Stop the machine when the needle is in the fabric and at the right
side of the stitches. (position C)
Step D: Right Row
1. Set the needle position at R, stitch width at 2 and stitch length at F.
2. Sew until the needle reaches the other bar tack.
3. Stop the machine when the needle is in the fabric and at the right
side of the stitches. (position D)
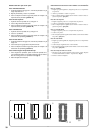
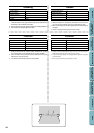
Step E: Securing Buttonhole Stitch
1. To secure stitching, set the stitch width to 0. Turn the fabric 90
degrees counterclockwise and sew 5 - 6 straight stitches. (fig. E)
2. Remove the fabric from the machine.
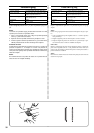
METHODE FACULTATIVE POUR LES BOUTONNIERES
Etape A: barre d’arrêt
1. Régler l’aiguille sur L , la largeur de point sur 5 et la longueur de
point sur 0.
2. Abaisser le pied-de-biche et faire 3 à 4 points.
3. Arrêter la machine lorsque l’aiguille se trouve dans le tissu et à
gauche des points (emplacement A).
Etape B: côté gauche
1. Régler la largeur de point sur 2 et la longueur de point sur F.
2. Coudre la longueur désirée en marche arrière.
3. Arrêter la machine lorsque l’aiguille se trouve dans le tissu et à
gauche des points (emplacement B).
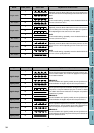
Etape C: dernière barre d’arrêt
1. Régler la largeur de point sur 5 et la longueur de point sur 0.
2. Faire 3- 4 points.
3. Arrêter la machine lorsque l’aiguille se trouve dans le tissu et à
droite des points (emplacement C).
Etape D: côté droit
1. Régler la position de l’aiguille sur R, la largeur de point sur 2 et la
longueur de point sur F.
2. Coudre jusqu’à ce que l’aiguille atteigne l’autre barre d’arrêt.
3. Arrêter la machine lorsque l’aiguille se trouve dans le tissu et à
droite des points (emplacement D).
Etape E: Consolider les points de la boutonnière
1. Pour consolider les points, régler la largeur de point sur 0. Faire
pivoter le tissu de 90 degrés dans le sens contraire des aiguilles
d’une montre et faire 5 - 6 points droits (fig. E).
2. Retirer le tissu de la machine.
A
B
C
D
(E)