UTILITY STITCHES ——————————————————————————————————————————————————————
—
66
GETTING READYCONTENTS SEWING BASICS UTILITY STITCHES APPENDIX INDEX
6
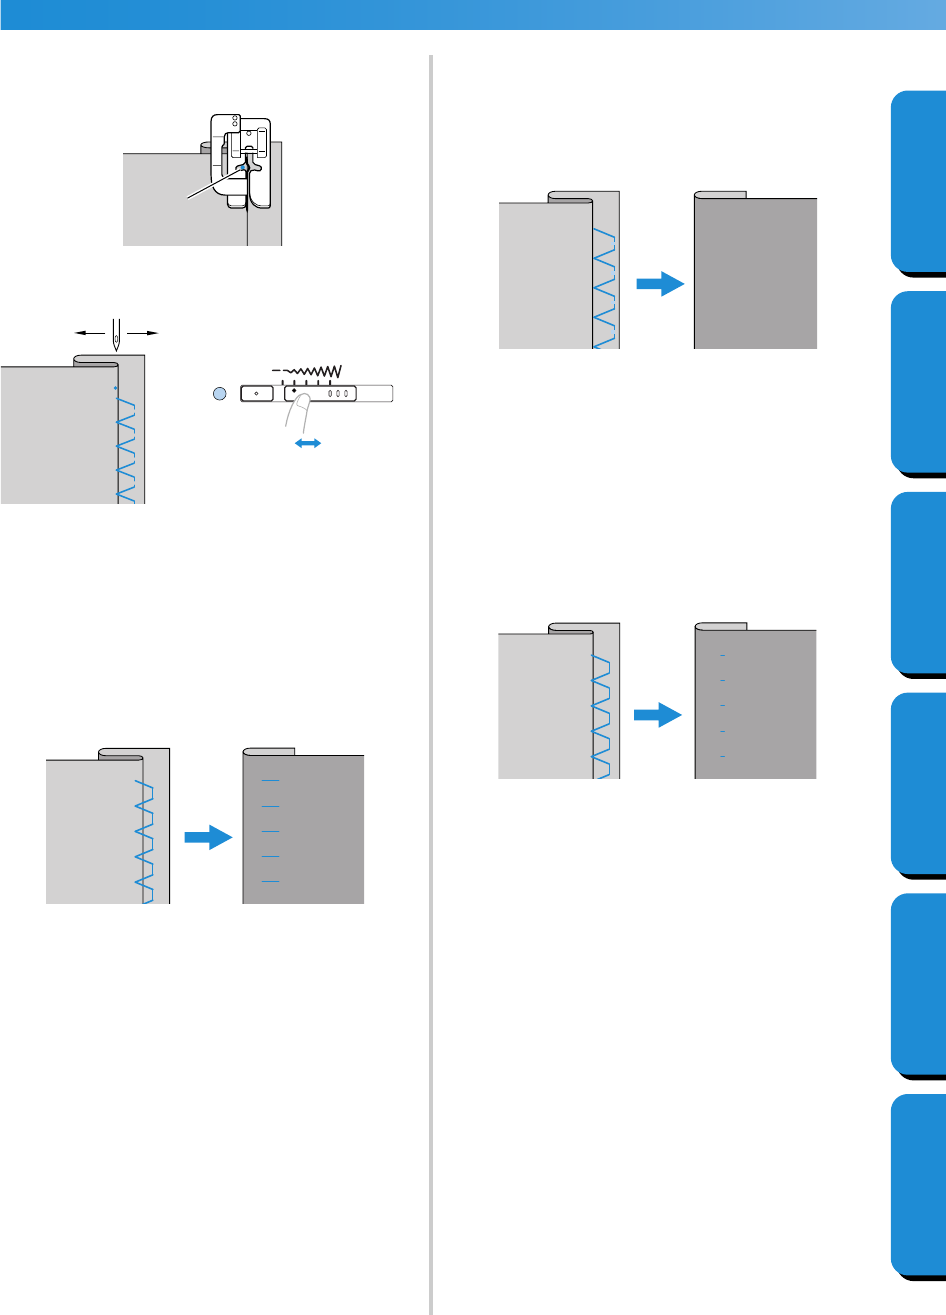
Adjust the stitch width until the needle
slightly catches the fold of the hem.
1 Needle drop point
1 Needle drop point
2 Wider stitch
3 Narrower stitch
■ If the needle catches too much of the hem
fold
If the needle catches too much of the hem
fold, move the stitch width adjustment lever
to the left. This makes the stitch narrower to
move the needle away from the fold.
1 Wrong side of fabric
2 Right side of fabric
■ If the needle does not catch the hem fold
If the needle does not catch enough of the
hem fold, move the stitch width adjustment
lever to the right. This makes the stitch wider
to move the needle closer onto the fold.
1 Wrong side of fabric
2 Right side of fabric
• For details on changing the stitch width,
refer to “Adjusting the Stitch Width and
Length” (page 51).
7
Sew with the fold of the hem against the
presser foot guide.
8
Remove the basting stitching.
1 Wrong side of fabric
2 Right side of fabric
R
1
1
23
3
2
1
2
1
2
1
2
S2_brotherE.book Page 66 Wednesday, May 14, 2003 8:05 PM


