


SEWING BASICS ——————————————————————————————————————————————————
—
28
Starting to sew
a
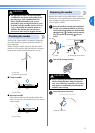
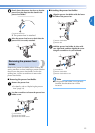
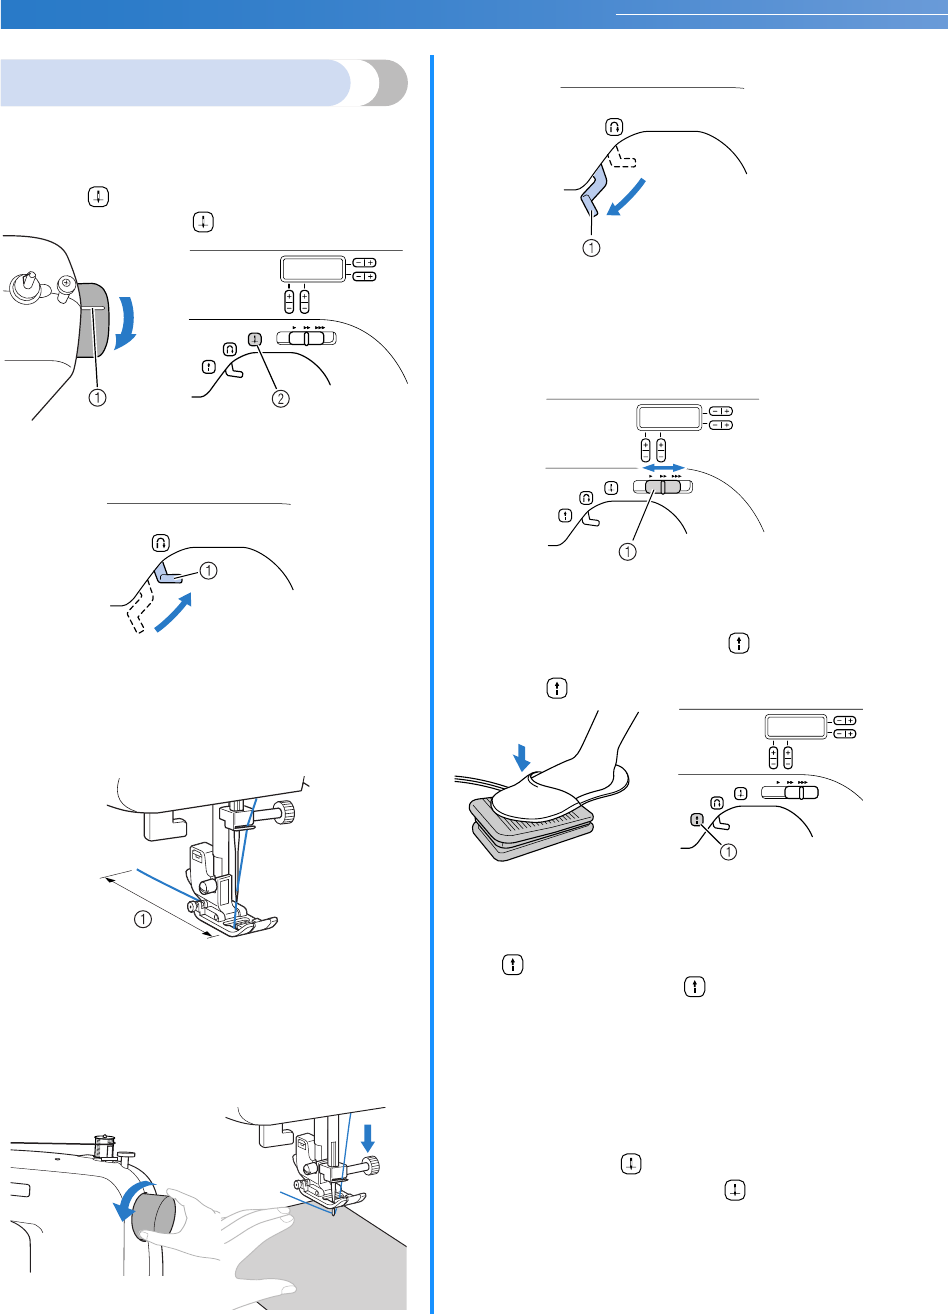
Raise the needle by turning the handwheel
toward you (counterclockwise) so that the mark
on the wheel points up. (With models equipped
with (needle position button), raise the
needle by pressing once or twice.)
b
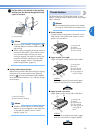
Raise the presser foot lever.
a Presser foot lever
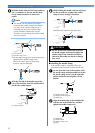
c
Place the fabric under the presser foot, pass
the thread under the presser foot, and then
pull out about 5 cm (2 inch) of thread toward
the rear of the machine.
a 5 cm (2 inch)
d
While holding the end of the thread and the
fabric with your left hand, turn the handwheel
toward you (counterclockwise) with your
right hand to lower the needle to the starting
point of the stitching.
e
Lower the presser foot lever.
a Presser foot lever
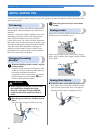
f
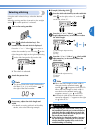
On models equipped with a sewing speed
controller, slide the sewing speed controller
to the left or right to adjust the sewing speed.
Refer to “Sewing speed controller” (page 10).
a Sewing speed controller
g
Slowly press down on the foot controller.
(With models equipped with (start/stop
button), if the foot controller is not connected,
press once.)
a Start/stop button
X The machine starts sewing.
h
Take your foot off the foot controller, or press
(start/stop button) once (if the machine
was started by pressing (start/stop button))
(for models equipped with the start/stop
button).
X The machine stops sewing.
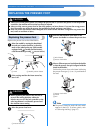
i
Raise the needle by turning the handwheel
toward you (counterclockwise) so that the
mark on the wheel points up. (With models
equipped with (needle position button),
raise the needle by pressing once or
twice.)
j
Raise the presser foot lever.
a Mark b Needle position button
or
or