


42
——————
—————————————————————————————————————————————————————————————————————————————————————————
—
————————————————————————————————————————————————————————————————————————————————————————————————————————————————————————————————————————————————————————————————————————————————————
5
5
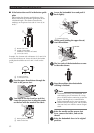
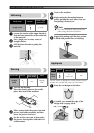
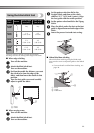
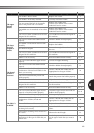
Use both hands to keep the fabric firmly
stretched and move the fabric to sew over
the drawn design.
1 Quilting design
6
The length of the stitch depends on how
quickly you move the fabric and on the
machine’s sewing speed. Sew while
moving the fabric slowly.
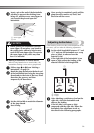
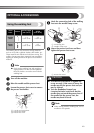
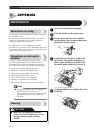
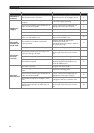
Using the 1/4-inch
quilting foot
You can use the 1/4-inch quilting foot to sew seams
when piecing together a quilt.
1 Seam allowance 6.5 mm (1/4 inch)
1
Turn off the machine.
2
Set the pattern selection dial to the
Straight Stitch. Set the stitch length
between “2” (1/16 inch) and “2.5” (3/
32 inch). Set the stitch width at “2.5” (3/
32 inch) (center).
3
Attach the 1/4-inch quilting foot.
Turn on the machine.
4
Position the presser foot over the fabric
and sew as shown in the following
illustrations.
■ Achieving an accurate seam allowance
1 Beginning of stitching
2 Align this mark with the edge of the fabric.
3 End of stitching
4 Align this mark with the edge of the fabric.
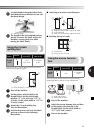
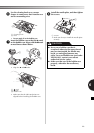
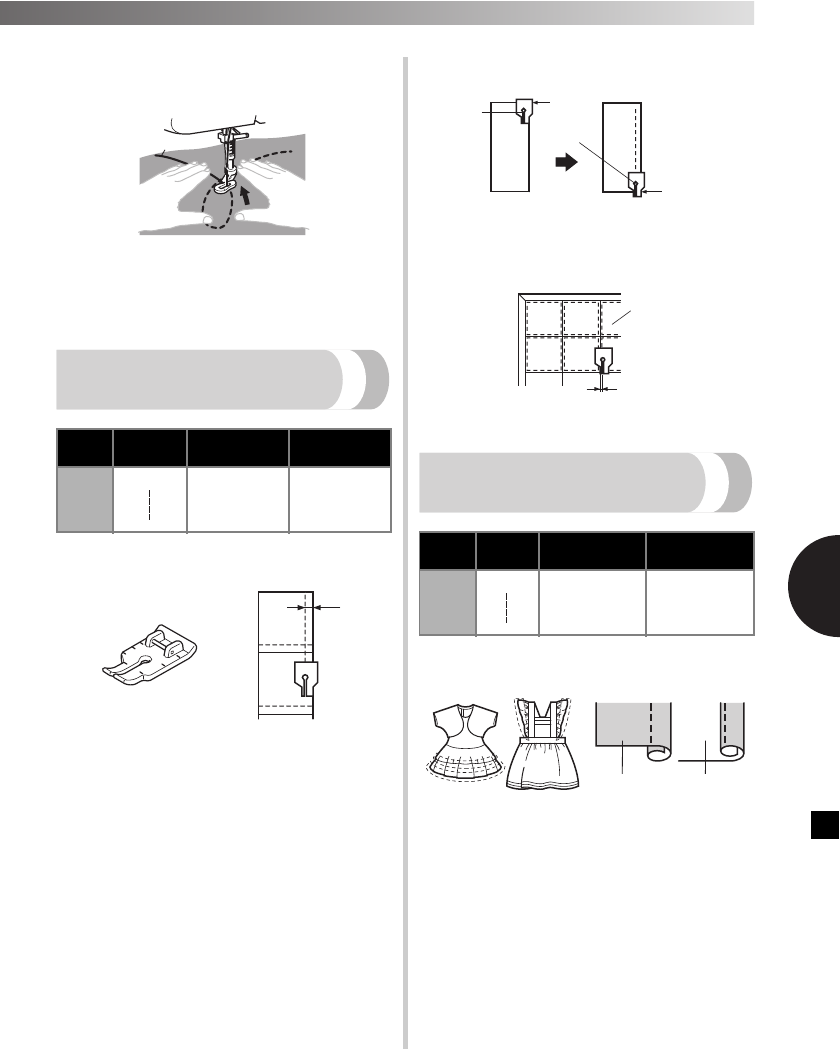
■ Stitching the top of a quilt
1 Top of fabric
2 Seam 3.2 mm (1/8 inch)
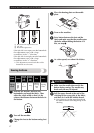
Using the narrow hemmer
foot
You can use the narrow hemmer foot for binding
lightweight fabrics and for narrow rolled hems.
1 Right side of fabric
2 Wrong side of fabric
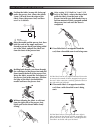
1
Turn off the machine.
2
Attach the narrow hemmer foot and then
set the pattern selection dial to the
Straight Stitch. Set the stitch width at
“2.5” (3/32 inch) (center).
3
Turn on the machine.
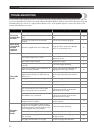
Stitch
Name
Pattern
Stitch Length
[mm (inch)]
Stitch Width
[mm (inch)]
Straight
Stitch
2-2.5
(1/16-3/32)
2.5 (center)
(3/32)
1
2
1
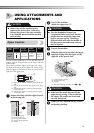
Stitch
Name
Pattern
Stitch Length
[mm (inch)]
Stitch Width
[mm (inch)]
Straight
Stitch
Any
2.5 (center)
(3/32)
2
1
3
4
1
2
2
1 2