


77
3
——
—————————————————————————————————————————————————————————————————————————————————————————————————————————————————————
ADJUSTING STITCHES (for models equipped with character stitches)
Your stitch pattern may sometimes turn out poorly, depending on the type or thickness of fabric, the stabilizer
material used, sewing speed, etc. If your sewing does not turn out well, sew trial stitches using the same
conditions as the real sewing, and adjust the stitch pattern as shown below.
Memo
● The character stitches “034” (No. 31 + No.
34+ No. 35) are used for making
adjustments.
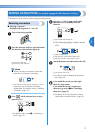
a
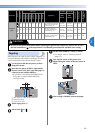
Attach monogramming foot “N”.
• For details, refer to “Replacing the presser
foot” (page 34).
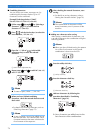
b
Combine the character stitches “034” (No. 31
+ No. 34 + No. 35).
• For details, refer to “Combining characters”
(page 74).
X When you have finished creating the
combination, the following is displayed
on the LCD.
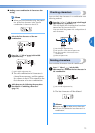
c
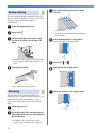
Sew the combination of characters and check
how it turns out.
• For details, refer to “Sewing the character
stitches” (page 76).
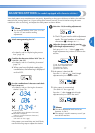
A: Correctly sewn
(with proper spaces between characters)
B: Bunched or shapeless
(There is no space between characters.)
C: Overstretched
(The stitch “0” has a gap.)
If the pattern you sewed does not look like A,
use the following steps to adjust the stitches.
d
Select No. 59 (for making adjustments).
X The LCD goes into the stitch adjustment
mode. The total number of combined
characters (1) changes to
“--“.
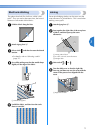
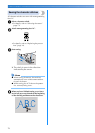
e
Adjust the character stitches by pressing
(stitch length adjustment key).
Each press of “+” or “-” side of (stitch
length adjustment key) widens or narrows the
stitches.
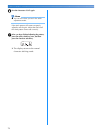
a No. for making adjustments
b The stitch adjustment level
c Widens the stitches
d Narrows the stitches
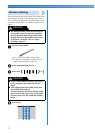
If the pattern is bunched (B)
Press the “+” side of (stitch length
adjustment key) to widen the stitch.
If the pattern is overstretched
(The stitch “0” has a gap.) (C)
Press the “-” side of (stitch length
adjustment key) to narrow the stitch.
Memo
● The stitch adjustment level can be set
between -9 and 9.
● The setting is saved in memory even if you
turn off the machine.
N
A
B
C