


- 6 -
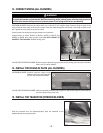
3. INSTALL BACKSPLASH (OPTIONAL)
It is recommended to install the backsplash before the custom hood insert. The custom hood will cover the backsplash
top mounting screws. In order to be able to install the backsplash, make sure you have at least 18’’ clearance between
bottom of custom hood and range control panel or cooktop. (See instructions packed with backsplash.)
4. CUSTOM HOOD PREPARATION
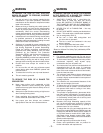
WARNING
When building a custom hood, always follow all applicable construction codes and standards.
!
The custom hood frame must be sized to the shape and total weight of the insert assembly. Refer to the table below
for total weight of the insert, according to the type of blower choosen.
INSERT MODEL WITH P5 INT. BLOWER WITH P8 INT. BLOWER WITH IN-LINE OR EXT. BLOWERS (ROUGH-IN PLATE ONLY)
RMIP33 41
LB 49 LB 27 LB
RMIP45 49 LB 57 LB 35 LB
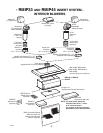
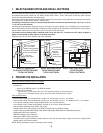
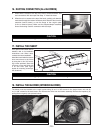
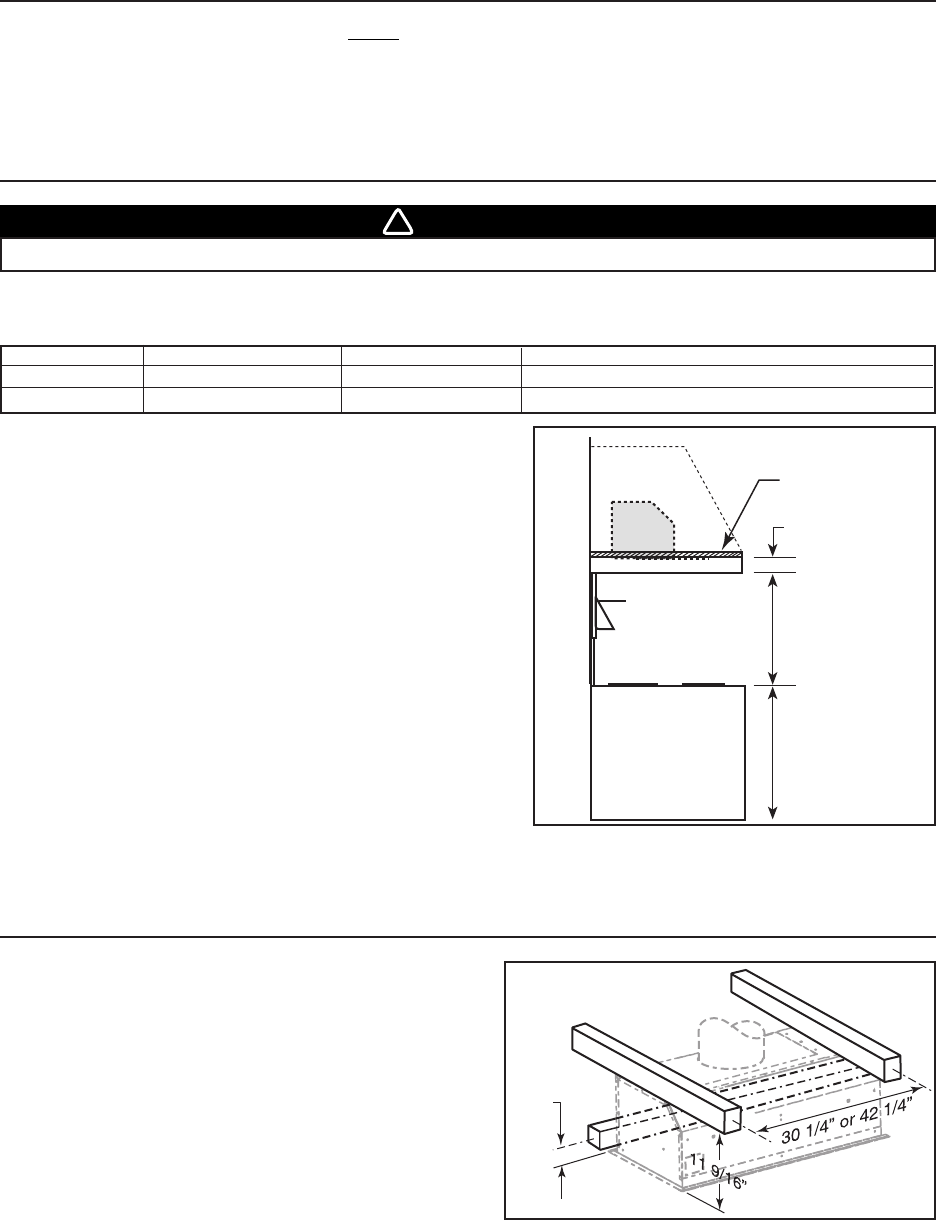
Start with the custom hood base, because its position will
determine the height of the insert. We recommend the base of the
custom hood should be 3/4 inch thick plywood. If an optional
custom hood liner will be installed, we recommend the sides and
front of the custom hood to be 3/4 inch thick, assuming standard
cabinet widths. If the optional custom hood liner will not be
installed, the custom hood side and front thickness is at the
installer’s discretion.
Run power cable to installation location. Stub out a 4 foot length
of electrical cable below the custom hood.
If the RMIPWC optional remote control will be installed, run
electrical cable from the insert to the remote control location. Stub
out a 6 inch length from the remote control wall location. Refer to
the remote control installation instruction.
Standard 36” h.
cooktop
Backsplash
(Optional)
HH0037A
24” to 30” above
cooking surface
Plywood base
thickness: 3/4”
4” for liner
installation
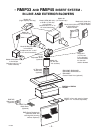
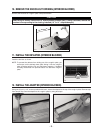
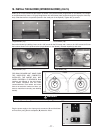
5. SUGGESTED CUSTOM HOOD INTERNAL FRAMEWORK
The mounting holes for the 2 top stud supports are located at
11
9
/16” up from the insert base. The on center distance between
the 2 studs is 30
1
/4” for the RMIP33 insert model and 42
1
/4” for
the RMIP45 insert model.
The mounting holes for the rear stud support are located at
1
1
/2” up from the insert base. See illustration beside.
Once the custom hood base and frame are done, finalize the
custom hood.
HH0040A
1 1/2”