


4
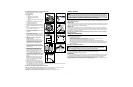
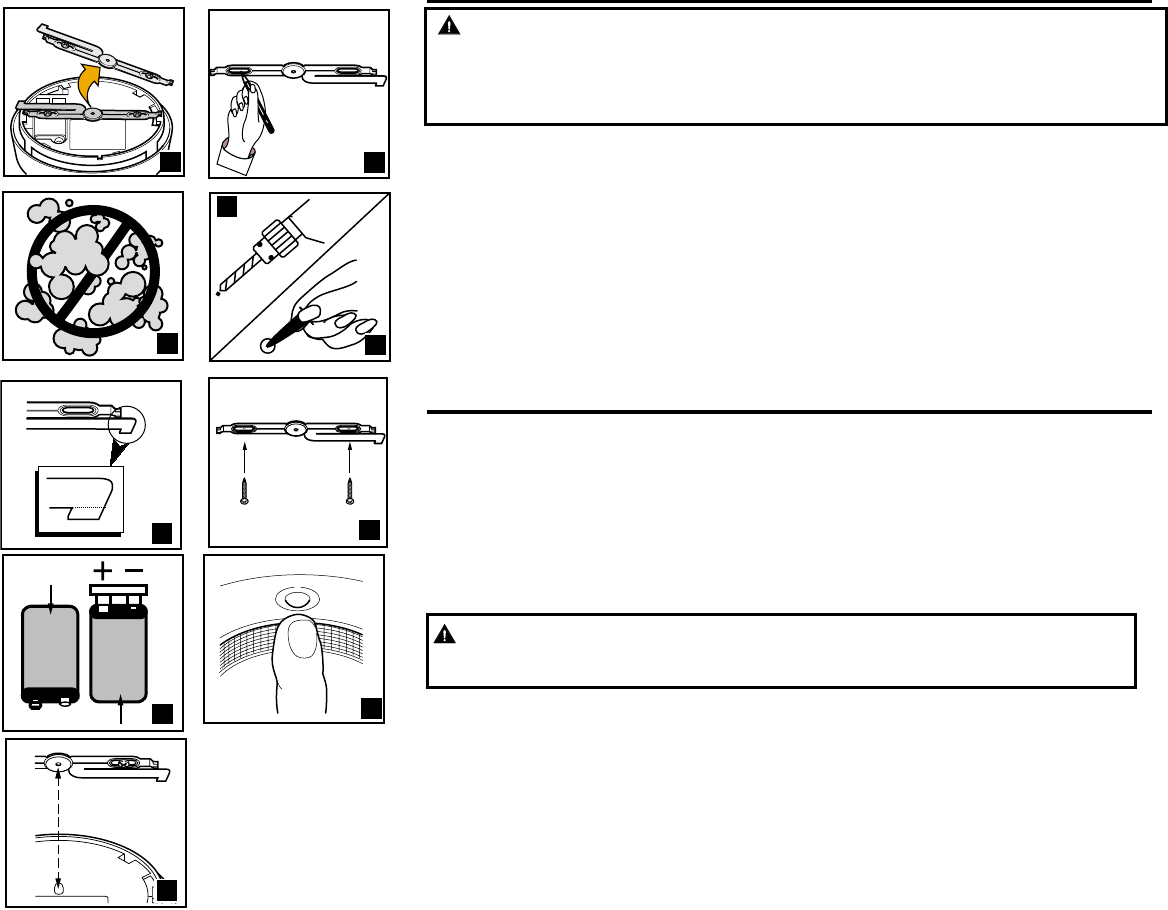
To install this smoke alarm, follow these steps:
This unit is designed to be mounted on the ceiling, or
on the wall if necessary.
Tools you will need:
• Pencil
• Drill with 3/16” (5 mm) drill bit
• Standard/Flathead screwdriver
• Hammer
• Pliers (to activate optional “tamper-resistant”
feature)
1. Hold base firmly and twist the metal mounting
bracket counterclockwise (left)
to separate it from the base.
2. Hold the mounting bracket against the ceiling (or
wall) and trace around the inside of the mounting
slots.
3. Put the unit where it won’t get covered with dust
when you drill the mounting holes.
4. Using a 3/16” (5 mm) drill bit, drill a hole through
the center of the oval outlines
you traced.
5. Insert the plastic screw anchors (in the plastic
bag with screws) into the holes.
Tap the screw anchors gently with a hammer, if
necessary, until they are flush with the ceiling or
wall.
6. OPTIONAL: To make the smoke alarm
“tamper-resistant”
Making the unit “tamper-resistant” makes
it more difficult to remove it from the mounting
bracket, and prevents easy battery removal.
Using pliers, break off the flanged end of the
“tamper-resistant” tab along the score line.
7. Fasten the mounting bracket to the ceiling (or
wall) using the two screws provided. Make sure
the dome faces out towards you. Tighten both
screws all the way.
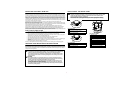
8.
Activate the battery before you attach the
smoke alarm to the mounting bracket!
Remove and reposition the battery so the
terminals on the battery match the terminals in
the battery compartment. Match “+” to “+” and
“-” to “-.” Make sure the battery snaps in
completely, and cannot be shaken loose, or the
alarm cannot receive battery power. It is normal
for the unit to beep briefly when you install the
battery.
NOTE:
After you install the battery, the power
indicator light will blink once about every 45
seconds. If the unit alarms, the light will blink
rapidly, once every second.
9. Test the smoke alarm. See “Weekly Testing.”
10.Attach the smoke alarm to the bracket. Line up
the mounting post on the alarm’s base with the
hole in the center of the “dome” on the mounting bracket. When the post is in the hole, turn the base clockwise
(right) until it snaps into place. Re-test the alarm.
To remove the smoke alarm from the bracket:
Units with “Tamper-resistant” feature activated:
Insert a flat screwdriver blade under the remaining part of the
“tamper-resistant” tab, and push up while turning the alarm base counterclockwise (left).
Units without “Tamper-resistant” feature activated:
Turn the alarm base counterclockwise (left).
WEEKLY TESTING
It is important to test this unit every week to make sure it is working properly. Using the test button is the
recommended way to test this smoke alarm. During an alarm, you will hear a loud, repeating horn pattern: 3
beeps, pause, 3 beeps, pause.
Models 2002
Press and hold the test button on the cover of the unit for 5-20 seconds, or until the alarm sounds (the unit may continue
to alarm for a few seconds after you release the button). If it does not alarm, make sure the unit is receiving power and
test it again. If it still does not alarm, replace it immediately.
Models 3001
These smoke alarms have TWO test buttons. Press and hold EACH test button for 5-20 seconds, or until the alarm
sounds (the unit may continue to alarm for a few seconds after you release the button). If testing both sensors does not
trigger an alarm, make sure the unit is receiving power and test it again. If testing both sensors still does not trigger an
alarm, replace the smoke alarm immediately.
You must press and hold both test buttons independently until the alarm sounds to test the photoelectric
and ionization sensors.
REGULAR MAINTENANCE
This unit has been designed to be as maintenance free as possible, but there are a few simple things
you must do to keep it working properly.
• Test it at least once a week.
• Gently vacuum off any dust on the cover at least once a month using your vacuum’s soft brush
attachment. Test the unit after vacuuming the cover.
• Never use water, cleaners or solvents since they may damage the unit.
• Relocate the unit if it sounds frequent unwanted alarms. See “Where Not To Install Smoke Alarms.”
• When the battery becomes weak, the smoke alarm unit will “chirp” about once a minute (the low battery warn-
ing). This low battery warning should last for 30 days, but you should replace the battery immediately to con-
tinue your protection.
Choosing a replacement battery:
Your smoke alarm requires one standard 9V battery. The following batteries are acceptable as replacements: Eveready
#216, (Energizer) #522, #1222; Duracell #MN1604; Gold Peak #1604P, #1604S; Rayovac 1604, D1604. You may also
use a Lithium battery like the Ultralife U9VL-J for longer service life between battery changes.
These batteries are available at many local retail stores.
IMPORTANT!
Most carbon zinc batteries have an average service life of 1 year; most alkaline batteries have an average service life
of 1-2 years; most Lithium batteries have an average service life of 6-10 years. Actual service life depends on the
smoke alarm and the environment in which it is installed. All the batteries specified above are acceptable
replacement batteries for this unit. Regardless of the manufacturer’s suggested battery life, you MUST replace the
battery immediately once the unit starts “chirping” (the “low battery warning”).
5
4
7
8
2
6
10
3
1
9
WARNING!
NEVER use an open flame of any kind to test this unit. You might accidentally damage or set fire to the unit or to
your home. The built-in test switch accurately tests the unit’s operation as required by Underwriters Laboratories,
Inc. (UL). If you choose to use an aerosol smoke product to test the smoke alarm, be certain to use one that has
been listed to Underwriters Laboratories, Inc. Safety Standards, and use it only as directed. Use of non-UL listed
products or improper use of UL listed products may affect the smoke alarm’s sensitivity.
WARNING!
Use only the replacement batteries listed. The unit may not operate properly with other batteries.
Never use rechargeable batteries since they may not provide a constant charge.