


273v29,35 - page 12 (Black)
Screen angle and frequency: 45.0000, 150.0000
12
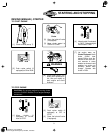
MAINTENANCE
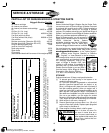
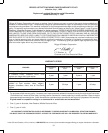
CHANGING OIL FILTER
Change oil filter after every 100 hours or every season.
[1] Drain engine oil and remove oil filter.
[2] Before installing new filter, lightly oil filter gasket
with fresh, clean oil.
[3] Screw filter on by hand until gasket contacts oil
filter adapter. Tighten 1/2 to 3/4 turn more.
[4] Add fresh oil. Fill to FULL line on dipstick.
[5] Start and run engine at idle to check for leaks.
[6] Stop engine. Re-check oil level. Add oil if required.
OIL FILTER P/N
SEE PAGE 15
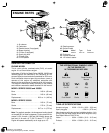
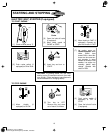
OIL PRESSURE
If oil pressure drops below 1-4 psi (.1-.2 kg/cm
2
), an oil
pressure switch (if engine is equipped) will either activate a
warning device or stop the engine. Check oil level with
dipstick. If oil level is between ADD and FULL mark on
dipstick, Do not try to restart engine. Contact an Authorized
Briggs & Stratton Service Dealer. Do not operate engine
until oil pressure is corrected.
If oil level is below ADD mark on dipstick, add oil to bring
level to FULL mark. Restart engine and check oil pressure.
If pressure is normal, continue to operate engine.
Note: Oil pressure gauge, if engine is equipped, is supplied
by manufacturer of equipment.
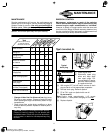
AIR CLEANER
All engines have a round air cleaner cartridge. In addition,
some engines have a pre-cleaner.
CLEANING PRE-CLEANERS AND CARTRIDGES
CAUTION: Do not use pressurized air or solvents to
clean cartridge. Pressurized air can damage
cartridge; solvents will dissolve cartridge.
Pre-cleaner
To clean pre-cleaner (if equipped), separate it from
cartridge and wash in liquid detergent and water. Squeeze
dry in a clean cloth. Saturate in engine oil. Squeeze in
clean, absorbent cloth to remove all EXCESS oil.
Cartridge
To clean cartridge, gently tap on a flat surface.
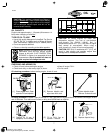
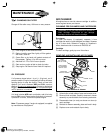
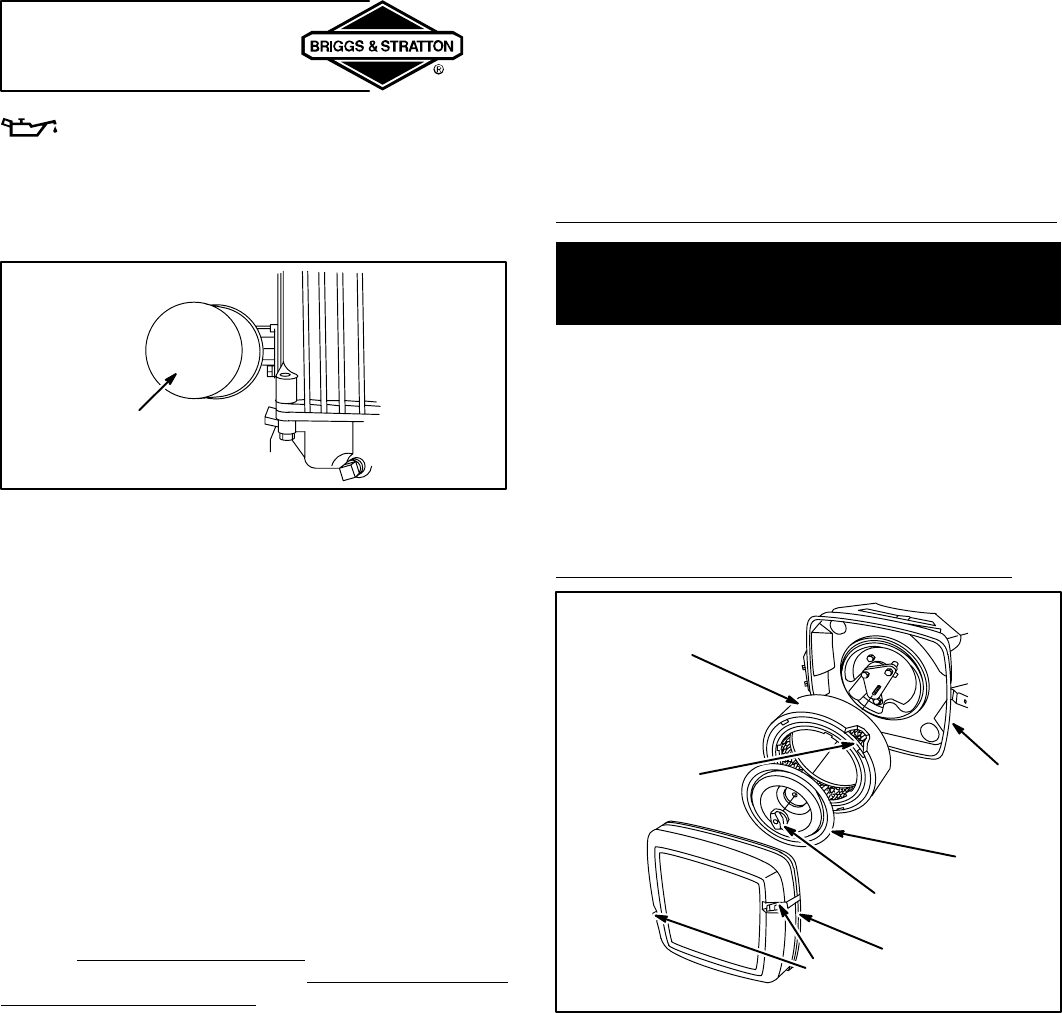
REMOVING AND INSTALLING AIR CLEANER
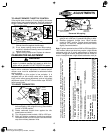
Dual element air cleaner
COVER
CARTRIDGE
PART NO. 394018
FOAM
PRE-CLEANER
PART NO. 272490
CLIPS
PRE-CLEANER
and CARTRIDGE
PART NO. 5050
BODY
PLATE
KNOB
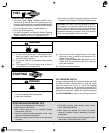
[1] Unhook clips on both sides of cover and remove cover.
[2] Remove knob and plate. Carefully remove air cleaner
assembly to prevent debris from entering carburetor.
[3] Reassemble clean (or new) pre-cleaner on clean (or
new) cartridge.
[4] Reinstall air cleaner assembly, plate and knob in body.
[5] Replace cover and reattach clips to body.