


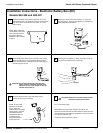

Faucet Operation
Aerada 1000 Series Gooseneck Faucet Installation Instructions
6 9/23/04 Bradley Corporation • 215-1559 Rev. A; EN 04-216A
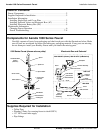
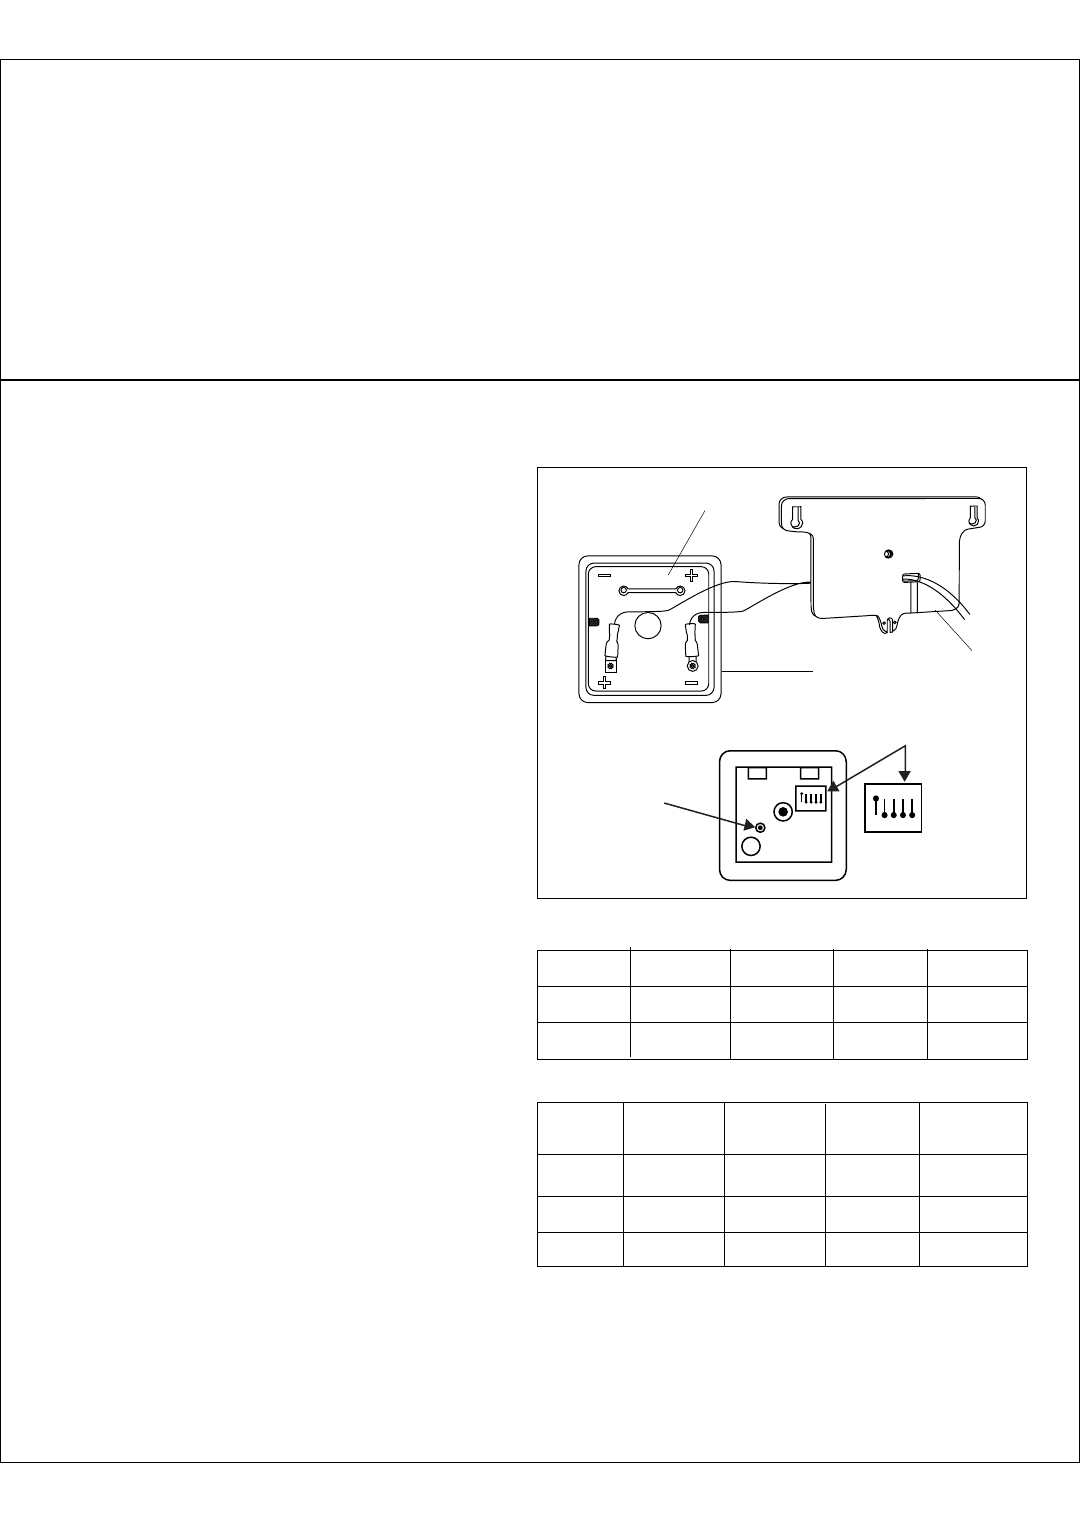
Changing Faucet Operation
In order to change any faucet option, the DIPswitch must be
used (located inside the electronics cover assembly, see
illustration this page).
Checking/Changing DIPswitch Settings
1. Remove the electronics cover (1) from the baseplate
(2).
2. Lift the partition (3) out to expose the circuit board and
DIPswitch.
3. To change a DIPswitch setting, use a small pointed
object to move the appropriate DIPswitch to ON or
OFF.
Faucet range and mode settings along with their
corresponding DIPswitch settings are outlined in Table 1 and
Table 2
Resetting Faucet Electronics
In order to reset the faucet electronics, a reset button located
inside the electronics cover assembly must be pushed in
(see illustration this page).
To reset faucet electronics:
1. Remove hex screw holding the electronics cover to the
baseplate and remove cover.
2. Lift the partition out to expose the circuit board and
reset button.
3. Make sure there are no objects in front of the collar
sensor, then push the button to reset.
4. Wait 30 seconds for faucet to automatically calibrate to
the environment.
5. Activate water flow by placing your hand in front of the
sensor.
6. Place partition into the electronics cover.
7. Place the electronics cover onto the baseplate and
secure with the hex screw.
NOTE: Resetting the faucet electronics causes loss of virtual
settings and time in use, and will also start the 8-minute
timer where the LED on the electronics box will blink and an
audible indicator chirps twice per second whenever hand
presence is detected.
ON
ON
OFF
OFF
1 2 3 4 5
1 2 3 4 5
MANUAL
RESET
BUTTON
DIPSWITCHES
Electronics Cover Assembly & DIPswitch
Range Short Normal Far Maximum
Switch 1 off on on off
Switch 2 off off on on
Table 1 - Faucet Range
Normal Scrub Meter Water Saver
Modes Mode Mode Mode Mode
Switch 3 off on off off
Switch 4 off off on off
Switch 5 off off off on
Table 2 - Faucet Mode
Operating Modes
• Normal Motion Detecting Mode: water flows within 1/4
second after activating sensor (i.e., putting hands in
front of collar) and continues to stay on as long as
motion is detected. Maximum time is 45 seconds
(factory default setting).
• Scrub Mode: water continues to flow for 60 seconds
(default) after deactivating the sensor (removing
hands).
• Metered Mode: water flows for 10 seconds (default)
from first hand detection.
• Water Saver Mode: water flows for a maximum of
5 seconds starting from first hand detection and
immediately turns off when hands are removed.
Additional Operating Features
• 12-second, no-motion turn off in normal mode
• “Low battery” indication
• Battery life up to one year depending on frequency
of use.
3
1
2