


Page 25
Pilot Inspection, Testing and Replacement (cont’d)
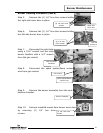
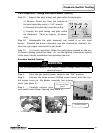
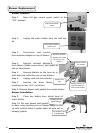
Step 15. Inspect the pilot tubing and pilot orifice for blockages:
a) Remove ferrule nut from the bottom of
the pilot assembly using a 7/16" wrench.
b) Remove the pilot tube and pilot orifice.
c) Inspect the pilot tubing and pilot orifice
for blockages. Clean or replace, as neces-
sary.
Step 16. Reassemble the pilot assembly and install it on the main
burner. Reinstall the burner assembly into the combustion chamber. Re-
store the gas supply and check for gas leaks.
Step 17. To resume operation, follow the instructions located on the wa-
ter heater lighting instruction label. Or, use the lighting instructions located
in the water heater installation and operating manual.
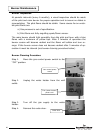
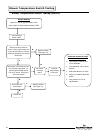
Pressure Switch Testing
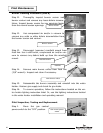
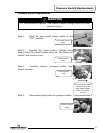
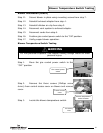
Step 1. Move the gas control power switch to the “OFF” position.
Step 2. Remove the three screws (Phillips screw driver) from the con-
trol access cover on the blower assembly and remove
cover (see photo 1).
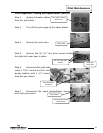
Step 3. Carefully remove pres-
sure switch from blower housing (see photo 2).
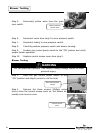
Pressure Switch Testing
Gas control power
switch
WARNING
115 volt potential exposure. Use caution making voltage checks to avoid
personal injury.
1 2
Pressure Switch
25