


SAVE THESE INSTRUCTIONS.
FOR HOUSEHOLD USE ONLY.
IMPORTANT SAFETY INSTRUCTIONS
WARNING:
READ AND UNDERSTAND ALL
INSTRUCTIONS. FAILURE TO FOLLOW ALL
INSTRUCTIONS LISTED BELOW, MAY RESULT IN
ELECTRIC SHOCK, FIRE AND/OR SERIOUS
PERSONAL INJURY.
a) Read all instructions before using the appliance.
b) To reduce the risk of injury, close supervision is necessary when an appliance is
used near children.
c) Do not use outdoors.
WARNING: This product contains chemicals, including lead, known to the State of
California to cause cancer, and birth defects or other reproductive harm. Wash hands after
handling.
SAFETY WARNINGS AND
INSTRUCTIONS: CHARGING
1. This manual contains important safety and operating instructions.
2. Before using battery charger, read all instructions and cautionary markings on (1) battery
charger, (2) battery, and (3) product using battery.
3.
CAUTION: To reduce the risk of injury, charge only Black & Decker
Power Packs. Other types of batteries may burst causing personal injury and damage.
4. Do not expose charger to rain or snow.
5. Use of an attachment not recommended may result in a risk of fire, electric shock, or
injury to persons.
6. Use only the supplied charger when charging. The use of any other charger could
damage the battery or create a hazardous condition.
7. Do not attempt to open the charger. There are no customer serviceable parts inside.
Return to any authorized Black & Decker service center.
8. DO NOT incinerate the battery packs even if they are severely damaged or
completely worn out. The batteries can explode in a fire.
9. A small leakage of liquid from the battery cells may occur under extreme usage,
charging or temperature conditions. This does not indicate a failure. However, if the outer
seal is broken and this leakage gets on your skin:
a. Wash quickly with soap and water.
b. Neutralize with a mild acid such as lemon juice or vinegar.
c. If the battery liquid gets in your eyes, flush them with clean water for a minimum of 10
minutes and seek immediate medical attention. MEDICAL NOTE: The liquid is a
25-35% solution of potassium hydroxide.
BATTERY CAP INFORMATION
Battery storage and carrying caps are provided for use whenever the battery is out of the tool
or charger. Remove cap before placing battery in charger or tool.
WARNING: Do not store or carry battery so that metal objects can
contact exposed battery terminals. For example, do not place battery in aprons, pockets,
tool boxes, product kit boxes, drawers, etc. with loose nails, screws, keys, etc. without
battery cap. Transporting batteries can possibly cause fires if the battery terminals
inadvertently come in contact with conductive materials such as keys, coins, hand tools
and the like. The US Department of Transportation Hazardous Material Regulations (HMR)
actually prohibit transporting batteries in commerce or on airplanes (i.e. packed in
suitcases and carryon luggage) UNLESS they are properly protected from short circuits. So
when transporting individual batteries, make sure that the battery terminals are protected
and well insulated from materials that could contact them and cause a short circuit.
CHARGING THE POWER PACK
THE BATTERIES IN YOUR POWER PACK ARE NOT FULLY CHARGED AT THE
FACTORY. BEFORE ATTEMPTING TO CHARGE THEM, THOROUGHLY READ ALL OF
THE SAFETY INSTRUCTIONS.
The charger is designed to use standard household 120 volt 60 Hz power.
1. Plug the charger into any standard 120 Volt 60 Hz electrical outlet.
2. Slide the charger onto the battery pack and let it charge initially for 9 hours. After the
initial charge, under normal usage, your power pack should be fully charged in 3 to 9
hours.
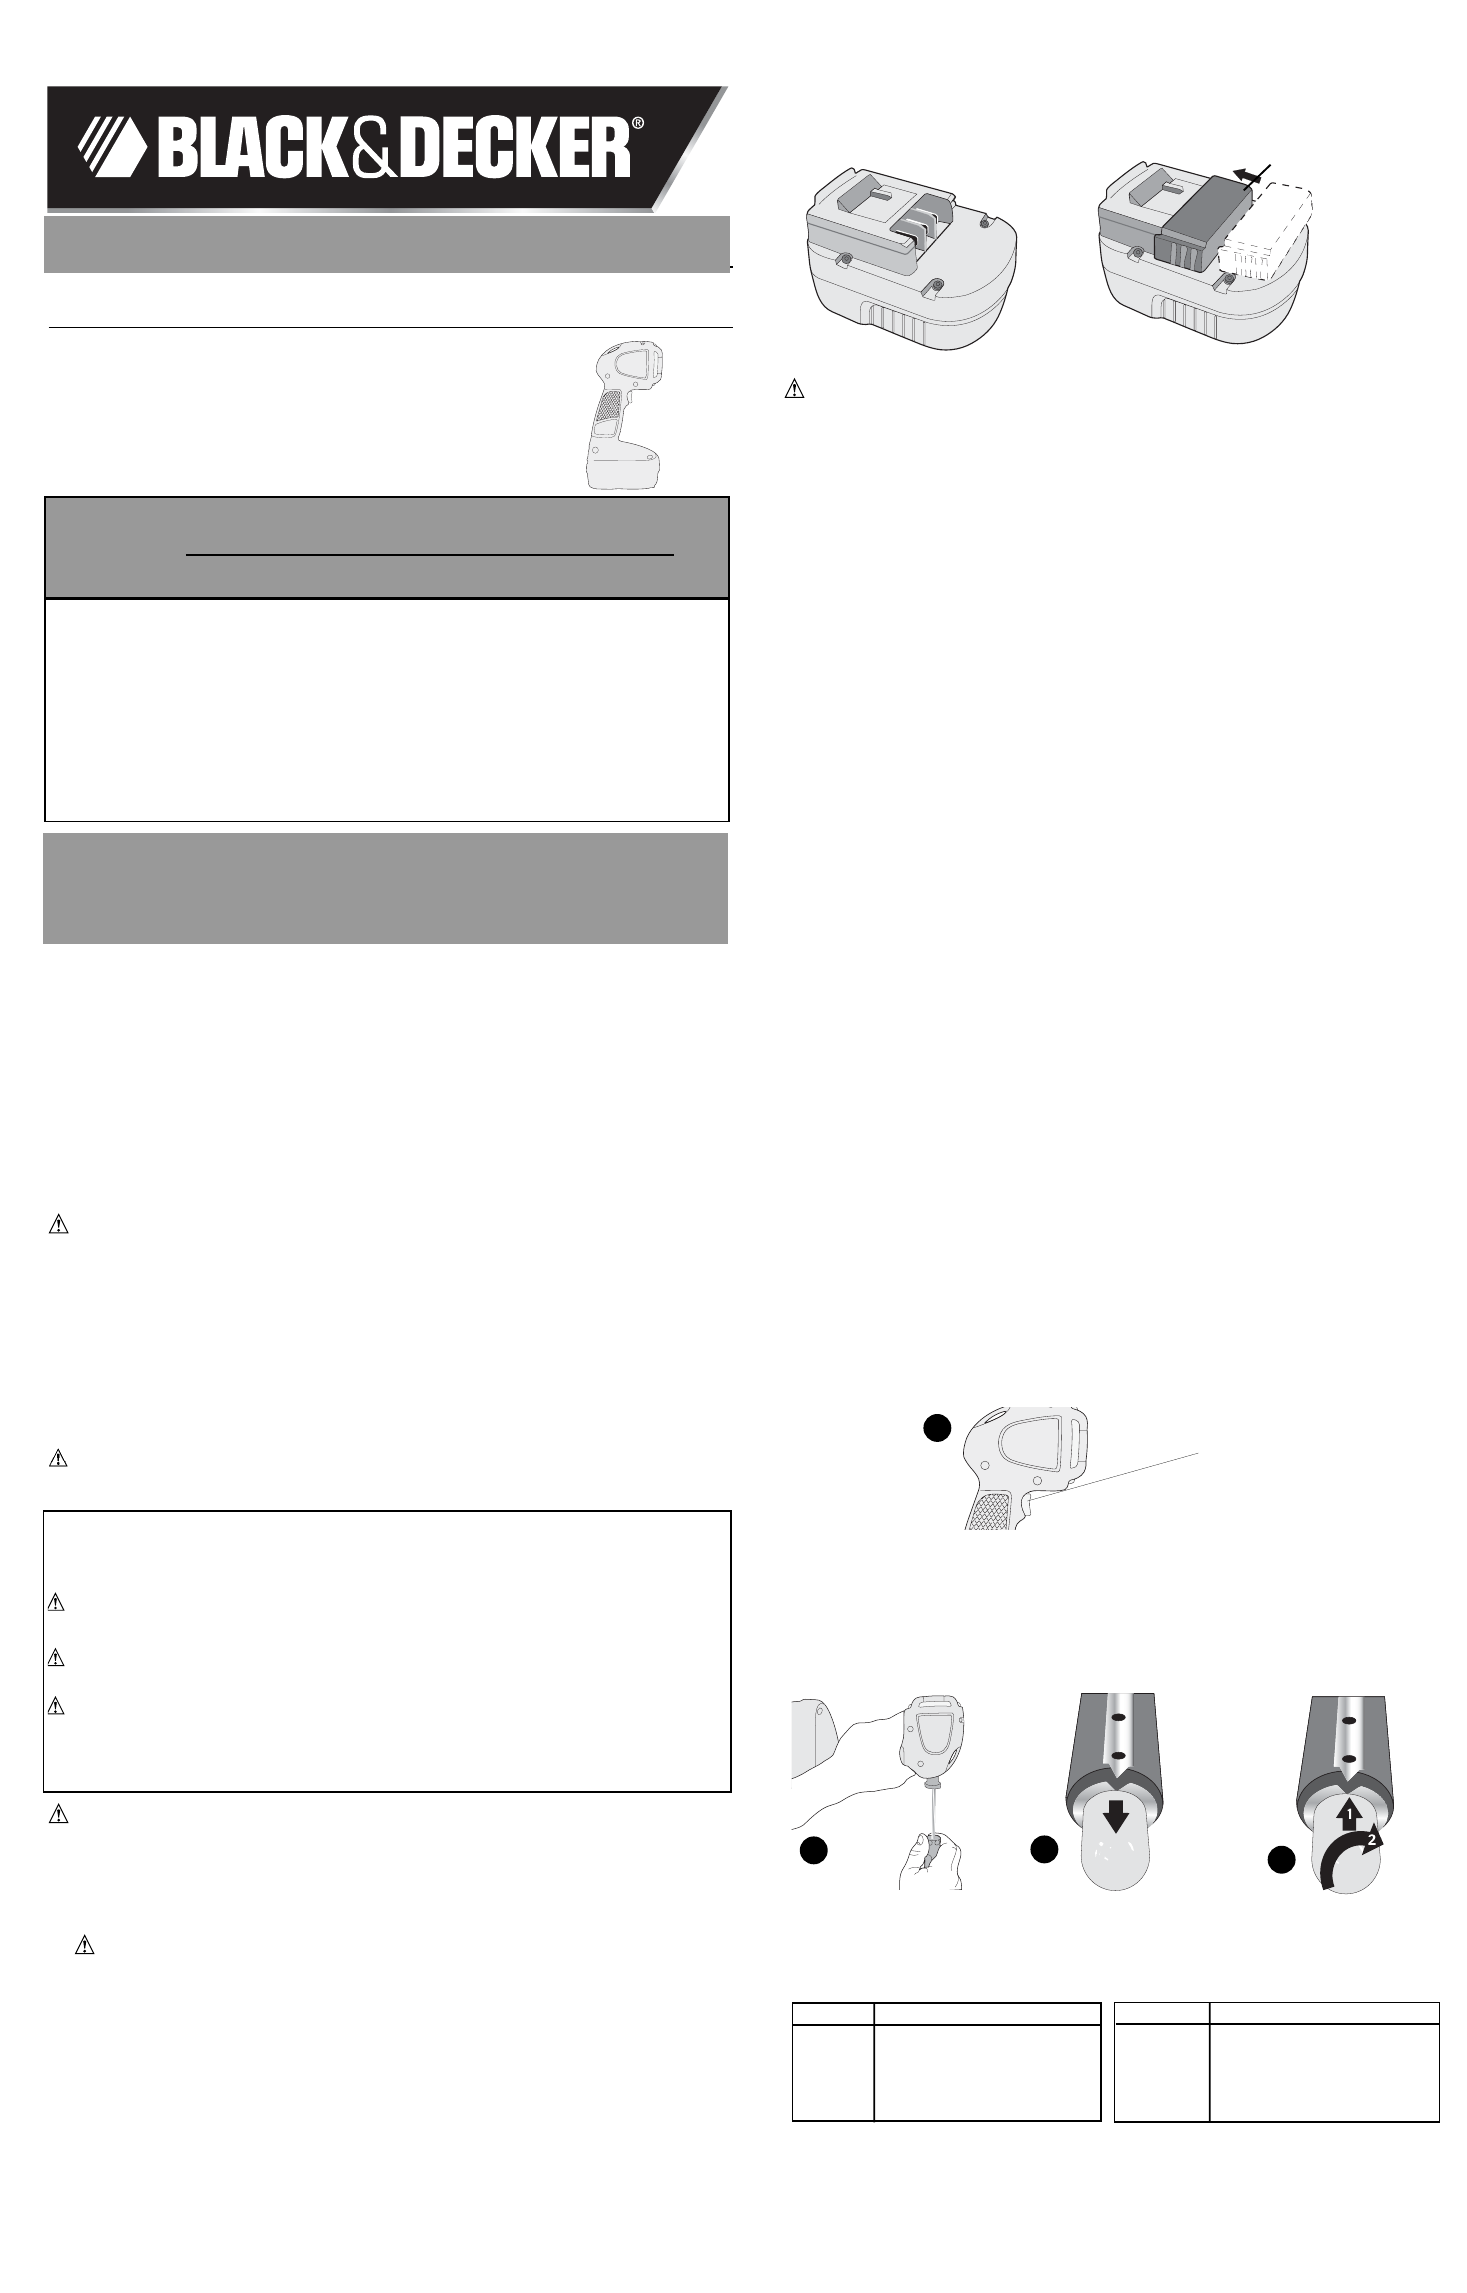
3. Remove pack from the charger and place in product. NOTE: To remove the battery, press
down on the release button on the back of the battery and pull out.
IMPORTANT CHARGING NOTES
1. After normal usage, your power pack should be fully charged in 3 to 9 hours. If the
power pack is run-down completely, it may take up to 9 hours to become fully charged.
Your power pack was sent from the factory in an uncharged condition. Before
attempting to use it, it must be charged for at least 9 hours.
2. DO NOT charge the power pack in an air temperature below 40°F or above 105°F. This
is important and will prevent serious damage to the power pack. Longest life and best
performance can be obtained if power pack is charged when air temperature is about
75°F.
3. While charging, the charger may hum and become warm to touch. This is a normal
condition and does not indicate a problem.
4. If the power pack does not charge properly—(1) Check current at receptacle by
plugging in a lamp or other appliance. (2) Check to see if receptacle is connected to a
light switch which turns power off when you turn out the lights. (3) Move charger and
power pack to a surrounding air temperature of 40°F to 105°F. (4) If the receptacle and
temperature are OK, and you do not get proper charging, take or send the power pack
and charger to your local Black & Decker service center. See Tools Electric in yellow
pages.
5. The power pack should be recharged when it fails to produce sufficient power on jobs
which were easily done previously. DO NOT CONTINUE using product with its power
pack in a depleted condition.
6. To prolong power pack life, avoid leaving the power pack on charge for extended periods
of time (over 30 days without use). Although overcharging is not a safety concern, it can
significantly reduce overall power pack life.
7. When the battery is inserted into the charger, the red “Charging Indicator” light will come
on indicating that there is contact between the battery and charger. The light will stay on
as long as the battery is in the charger and the charger is plugged into a working outlet. It
WILL NOT flash, go out or change to a different color when the charging cycle is
complete.
8. The power pack will reach optimum performance after being cycled 5 times during
normal usage. There is no need to run the batteries down completely before recharging.
Normal usage is the best method of discharging and recharging the batteries.
OPERATING INSTRUCTIONS
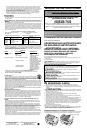
ON/OFF
To turn the light on, depress the button shown in Fig. 1. To turn it off press the button a
second time.
REPLACING THE LIGHT BULB (USE BLACK & DECKER REPLACEMENT BULB)
NOTE: If bulb has been lit, let the light cool for several minutes before changing bulb.
Remove battery before changing bulb.
To replace the bulb, insert a flat bladed screwdriver into the slot of the bulb holder and rotate
it 1/4 turn counterclockwise as shown in Figure 2. Remove the bulb holder and rotate the
bulb until the v-shaped notch in the rim of the bulb aligns with the tip of the terminal on the
bulb holder as shown in Figure 3. The bulb is spring loaded and will pop out. To replace the
bulb align it as in Fig. 3 and press in, then rotate 1/4 turn as shown in Figure 4 so that rim of
bulb is locked under the tip of the terminal.
Black & Decker Service Replacement Bulb
Flashlight Catalog Number Service Part
Number Bulb
BDL18, BDL24 498797-06
MAINTENANCE
Use only mild soap and damp cloth to clean the tool. Never let any liquid get inside the tool;
never immerse any part of the tool into a liquid.
IMPORTANT: To assure product SAFETY and RELIABILITY, repairs, maintenance and
adjustment (other than those listed in this manual) should be performed by authorized service
centers or other qualified service organizations, always using identical replacement parts.
VEA EL ESPAÑOL EN LA CONTRAPORTADA.
INSTRUCTIVO DE OPERACIÓN, CENTROS DE SERVICIO Y PÓLIZADE
GARANTÍA. ADVERTENCIA: LÉASE ESTE INSTRUCTIVO ANTES DE
USAR ELPRODUCTO.
INSTRUCTION MANUAL
Cat. No. BDL18, BDL24 Form No. 90537964 REV. 1 AUG. 2008
Copyright © 2008 Black & Decker Printed in China
11
11
88
88
&&
&&
22
22
44
44
VV
VV
OO
OO
LL
LL
TT
TT
FF
FF
LL
LL
AA
AA
SS
SS
HH
HH
LL
LL
II
II
GG
GG
HH
HH
TT
TT
Catalog Number BDL18, BDL24
1
2
KK
KK
EE
EE
YY
YY
II
II
NN
NN
FF
FF
OO
OO
RR
RR
MM
MM
AA
AA
TT
TT
II
II
OO
OO
NN
NN
YY
YY
OO
OO
UU
UU
SS
SS
HH
HH
OO
OO
UU
UU
LL
LL
DD
DD
KK
KK
NN
NN
O
O
OO
WW
WW
::
::
• Charge battery for 9 hours before first use. For more information see “CHARGING
THE POWER PACK”.
Battery Cap
3
On / Off Button
Interrupteur
Botón de encendido y
apagado
4
SAFETY GUIDELINES - DEFINITIONS
It is important for you to read and understand this manual.
The information it contains relates to protecting YOUR SAFETY and PREVENTING
PROBLEMS. The symbols below are used to help you recognize this information.
DANGER: Indicates an imminently hazardous situation which, if not avoided,
will result in death or serious injury.
WARNING: Indicates a potentially hazardous situation which, if not
avoided, could result in death or serious injury.
CAUTION: Indicates a potentially hazardous situation which, if not avoided,
may result in minor or moderate injury.
CAUTION: Used without the safety alert symbol indicates a potentially
hazardous situation which, if not avoided, may result in property damage.
18V / 24V Slide Pack Batteries
18V Firestorm Battery
18V FSXtreme Battery
18V Battery
24V Firestorm Battery
24V Battery
FSB18
FS18BX
HPB18
FS24BX
HPB24
Cat. # Description
18V / 24V Slide Pack Chargers
18V Cup Charger
18V Cup Charger, FS18C
Fast Charger
24V Cup Charger
418337-32
ETPCA-
180021U2
FSMVC
BDFC240
Cat. # Description
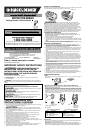
BEFORE RETURNING THIS PRODUCT
FOR ANY REASON PLEASE CALL
1-800-544-6986
BEFORE YOU CALL, HAVE THE CATALOG No. AND DATE CODE AVAILABLE. IN MOST CASES, A
BLACK & DECKER REPRESENTATIVE CAN RESOLVE THE PROBLEM OVER THE PHONE. IF YOU HAVE A
SUGGESTION OR COMMENT, GIVE US ACALL. YOUR FEEDBACK IS VITALTO BLACK & DECKER.
T
T
HANK
HANK
YOU
YOU
FOR
FOR
CHOOSING
CHOOSING
B
B
LACK
LACK
&
&
D
D
ECKER
ECKER
!
!
G
G
O
O
T
T
O
O
WWW
WWW
.B
.B
LACKAND
LACKAND
D
D
ECKER
ECKER
.
.
COM
COM
/N
/N
EW
EW
O
O
WNER
WNER
T
T
O
O
REGISTER
REGISTER
YOUR
YOUR
NEW
NEW
PRODUCT
PRODUCT
.
.