16
w ww.b is se ll .c om
5
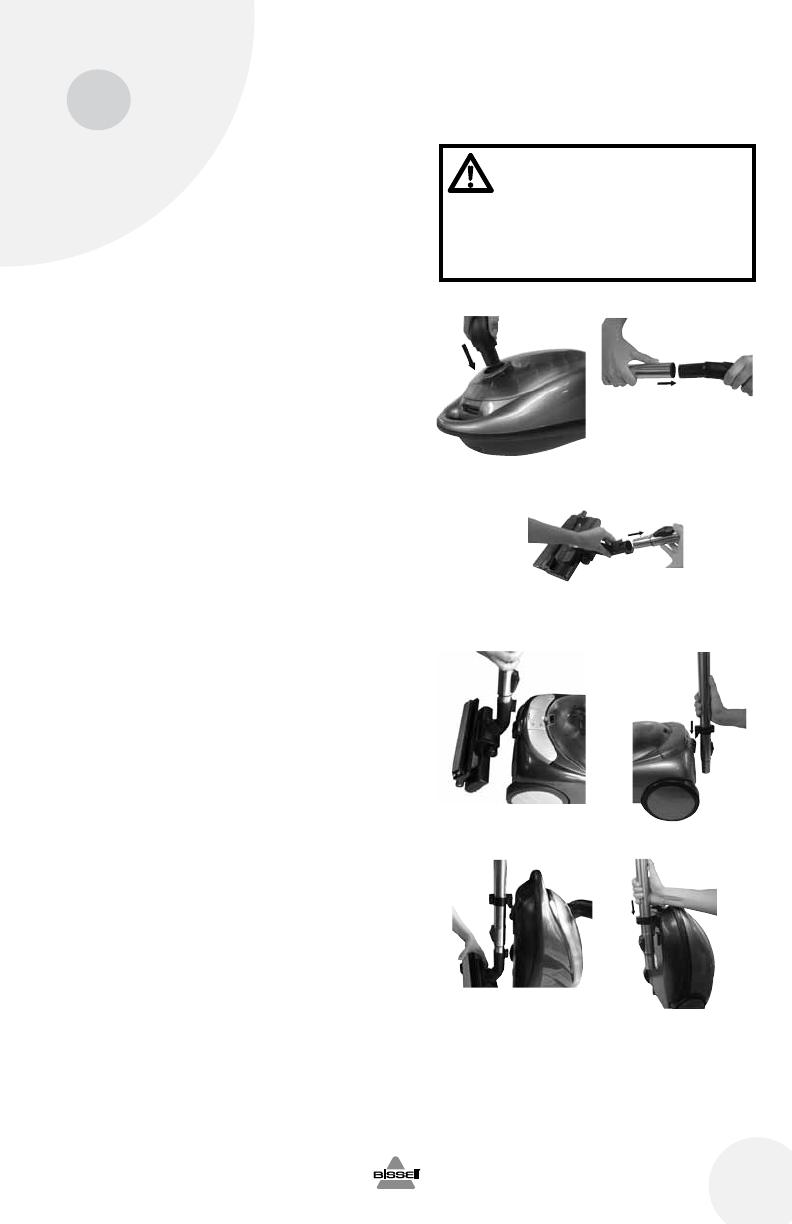
Assembling your vacuum
1. Connect swivel hose by squeezing both locking
buttons and inserting it into the suction opening on
the canister. Once the swivel hose is inserted in the
suction opening, release the locking buttons.
2. Connect telescoping extension wand to the handle
end of the flex hose. Twist slightly to tighten.
3. Connect Pet Hair Eraser floor nozzle to the end of
the telescoping extension wand. Twist slightly to
tighten.
4. Once assembled, you can store your
vacuum in one of two positions:
A. Storing in the in-use position:
1. To store with the Pet Hair Eraser floor
nozzle attached, insert the storage clip
(located on the back of the floor nozzle)
into the storage slot on the rear of the
vacuum.
2. To store without the Pet Hair Eraser floor
nozzle attached, insert the storage clip
(located on the bottom of the
telescoping extension wand) into the
storage slot on the rear of the vacuum.
B. Storing in the upright position:
1. To store with the Pet Hair Eraser floor
nozzle attached, stand the vacuum in the
upright position and insert the storage
clip (located on the back of the floor
nozzle) into the storage slot on the
bottom of the vacuum.
2. To store without the Pet Hair Eraser floor
nozzle attached, stand the vacuum in
the upright position and insert the storage
clip (located on the bottom of the
telescoping extension wand) into the
storage slot on the bottom of the vacuum.
B2.
1.
A1.
Storing in the in-use position
Storing in the upright position
3.
B1.
2.
A2.
WARNING:
Plastic film can be dangerous.
To avoid danger of suffocation,
keep away from babies and
children.


