


11
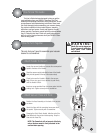
Use only BISSELL Replacement Bulb (#203-1007) in your BISSELL CleanView.
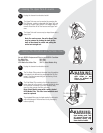
Unplug cleaner from electrical outlet
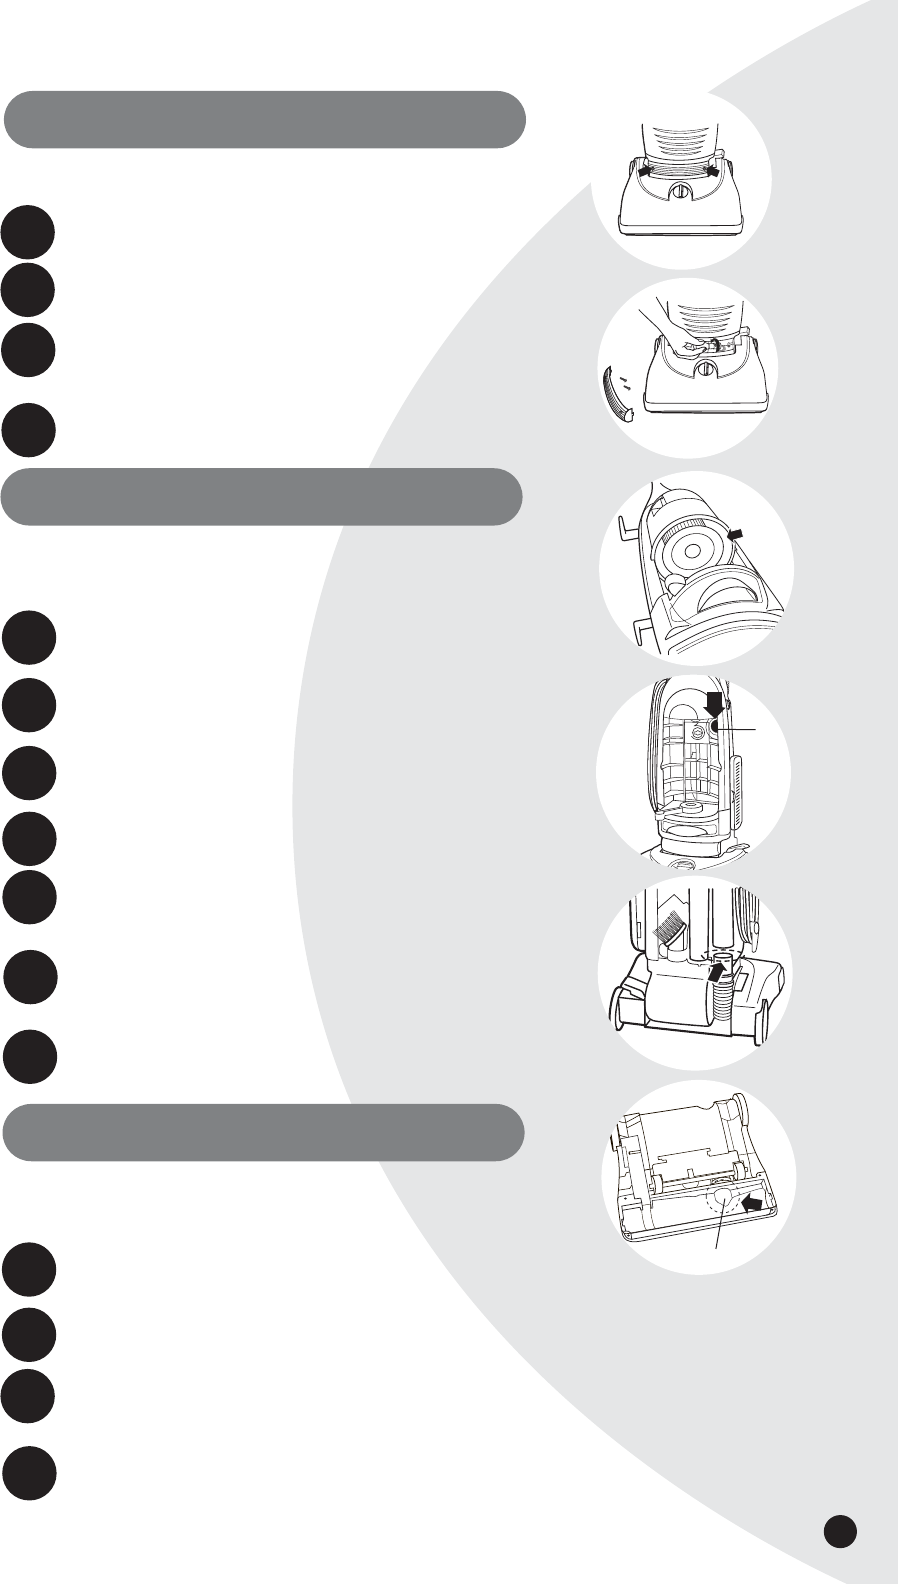
Using a screwdriver, remove the two screws as shown and lift off the lens.
Remove the bulb from the socket by pushing in gently and turning it
counterclockwise. Install the new bulb by pushing it gently into the
socket and turning clockwise.
Reposition lens and secure with the two screws.
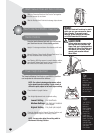
Low suction or poor pickup may be due to a clog in the vacuum cleaner. If
you notice a change in the sound of the motor or a reduction in the spinning
action, check for clogs.
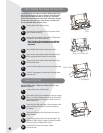
Unplug cleaner from electrical outlet.
Empty Dirt Container.
Check Upper Tank for build up or clogs.
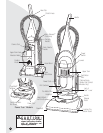
Remove the Upper Tank and check the suction inlet for a clog.
Grasp the Quick Reach Handle and lift Hose Wand to separate from
the suction opening. Check for a clog in the Base, the Wand or
the Hose.
Remove the screw attaching the Hose Wand Base to the
vacuum. Straighten the Hose Wand Base and unclog with long,
narrow object.
If the clog persists, follow the instructions for Checking the
Rotating Floor Brush on page 10 and inspect the Air Passageway
for obstructions.
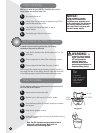
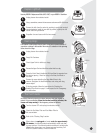
An internal thermal protector has been designed into your cleaner to
protect it from overheating. When the thermal protector activates, the
cleaner will stop running. If this happens, proceed as follows:
Turn the cleaner OFF and unplug from electrical outlet.
Check the Pre-Motor Filter and Post-Motor Filter for
dirt accumulation.
Refer to the "Clearing Clogs" section.
When cleaner is unplugged and motor cools for approximately
30 minutes, the thermal protector automatically resets and clean-
ing may continue. If the thermal protector continues to activate after
following the above steps, your cleaner may need servicing. Call
BISSELL Customer Service, or visit the Web Site.
Replace Lightbulb
1.
2.
3.
4.
Clearing Clogs
1.
2.
3.
4.
5.
6.
Suction
Inlet
Thermal Protector
1.
2.
3.
4.
Air Passageway
7.