


16
www.bissell.ca 800.263.2535
5
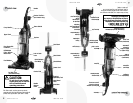
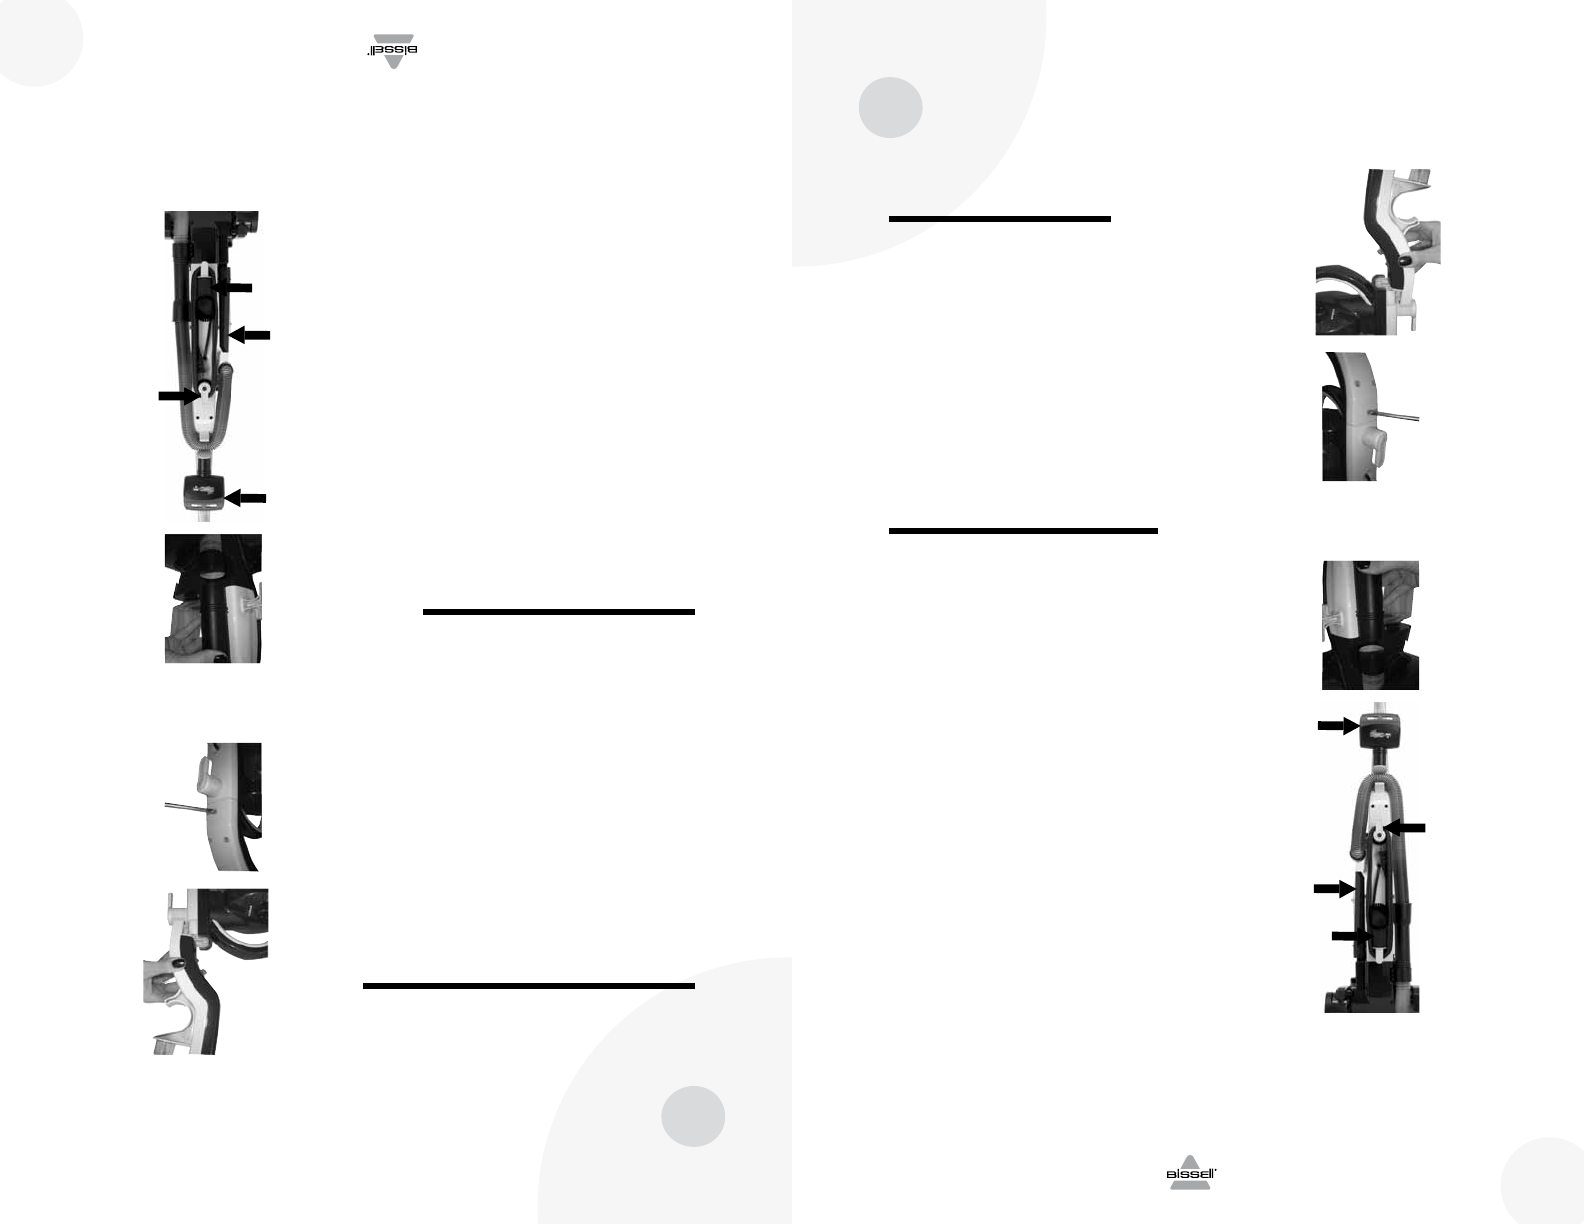
The only tool you’ll need to assemble your
vacuum cleaner is a Phillips screwdriver.
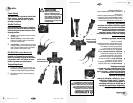
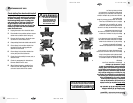
Attach handle to vacuum
1. Locate the vacuum handle and remove the
screw packet taped to the handle.
2. Stand the vacuum upright and from the rear
of the unit, slide the base of the handle firmly
into the grooves at the top of the vacuum
body.
3. Ensure the handle fits firmly to the vacuum
body. If there are any gaps, continue to push
firmly until the handle is secure.
4. Insert the provided screw into the existing
hole, attaching the handle to the body of the
vacuum. Tighten securely with a screwdriver.
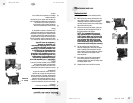
Attach vacuum hose and tools
1. Slide the end of the hose into the hose wand
base. Snap the hose into the hose clip.
Note: The vacuum will not operate
effectively unless the hose wand is firmly
attached.
2. Place the crevice tool on the storage clip on the
left side of the tank (when viewing vacuum from
rear.)
3. Place the contour tool pet on the storage clip
located near the back of the upper handle.
(Select Models Only)
4. Place the dusting brush on the storage clip
located on the lower cord wrap.
5. Wrap power cord around cord wraps.
Assembly
2
1
4
3
4
5
2
16
www.bissell.ca 800-263-2535
5
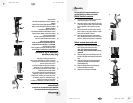
Le seul outil dont vous aurez besoin pour
assembler votre aspirateur est un tournevis à
pointe cruciforme.
Pour fixer le manche sur l’aspirateur
1. Trouvez la poignée de l’aspirateur et retirez le
paquet de vis collé sur la poignée.
2. Tenez l’aspirateur en position verticale et,
sur la face arrière de l’appareil, faites glisser
la base du manche de manière à l’insérer
fermement dans les rainures situées sur le
dessus du corps de l’aspirateur.
3. Vérifiez que le manche est bien fixé sur le
corps de l’aspirateur. S’il y a des écarts,
continuez à pousser fermement jusqu’à ce
que le manche soit bien fixé.
4. Insérez la vis fournie dans le trou et fixez le
manche au corps de l'aspirateur. Serrez la vis
fermement à l’aide d’un tournevis.
Pour fixer le tuyau de
l’aspirateur et les accessoires
1. Faites glisser l'extrémité de la rallonge dans la
base de la rallonge du tuyau. Emboîtez le tuyau
dans le crochet du tuyau.
Remarque : L'aspirateur ne fonctionnera
pas efficacement si la rallonge du tuyau
n’est pas solidement fixée.
2. Insérez le tube-rallonge dans le crochet
porte-accessoires à la gauche du réservoir
(lorsque vu de l'arrière.)
3. Insérez l'outil pour le contour Contour Tool Pet
dans le crochet porte-accessoires situé près de
l'arrière de la poignée supérieure.
(Certains modèles)
4. Insérez la brosse à épousseter dans le crochet
porte-accessoires situé dans le range-cordon
inférieur.
5. Enroulez le cordon d’alimentation autour des
range-cordons.
Assemblage
2
1
4
3
4
5
2