3
4
Step 3: To keep the fan in place, carefully close the window so
that the bottom edge of the window rests on the flat area on
the top of the window fan.
For Casement Windows:
For a safe fit you will need a specifically designed mounting
bracket. This, and the needed hardware, can be provided to
you free of charge. Installation instructions are included with the
bracket. Please call 1-800-253-2764 to order this hardware.
WARNING: BE SURE FAN IS SECURELY INSTALLED IN
YOUR WINDOW AT ALL TIMES. DO NOT LEAN OR PUSH
ON FAN WHILE IT IS IN THE WINDOW.
INSTALLATION GUIDE
For 24” to 27”: Use up to 3” of right side, pull out
extender screen.
For 28” to 34”: Use one 3” extender panel on the left side.
Adjust the pull out extender screen on the right side for a tight
fit (from .5” to 7”).
For 35” TO 37”: Use two 3” extender panels on the left
side. Adjust the pull out extender screen on the right side for
a tight fit (from .5” to 7”).
Larger than 37”: Additional extender panels will be required.
To order additional extender panels visit our website at
www.bionaire.com or call 1-800-253-2764.
MANUAL OPERATING INSTRUCTIONS
NOTE: To operate the fan continuously, make sure that
the mode light located to the left of the control panel is off.
Step 1. Plug your window fan into any 120V AC electrical outlet.
Step 2. To turn the fan on press the power button.
Step 3. Set the speed to high, Medium (med) or low by
pressing the power button.
Step 4. Set the airflow direction to Exhaust (out), Intake (in) or
exchange by pressing the air flow button.
Step 5. To turn the fan off press the power button until the fan
stops.
AUTOMATIC OPERATING INSTRUCTIONS
NOTE: Your window fan is equipped with the digital control
thermostat that automatically turns the fan on and off
depending upon the preset comfort level. This is ideal for
operation at night when the temperature drops. Please follow
the manual operating instructions until you are ready to set
your desired temperature. In order to take advantage of this
feature, make sure your window fan is in automatic mode (this
will be indicated by a red light on the left of the control panel).
Step 1. Press the Temp Set (+,–) buttons on the front of the
control panel or use the remote control to program the
desired temperature.
Step 2. When you are finished setting the temperature, let go
of the button. The display will blink a few times and then will
return to displaying the current room temperature.
IMPORTANT: If the unit will not start in automatic mode, please
make sure that the set temperature is below the current room
temperature. If the fan is stopped and you would like to turn it
back on, lower the set temperature.
REMOTE CONTROL INSTRUCTIONS
Your window fan is equipped with a remote control. This
remote control can be used to adjust the following functions:
power, Manual/Automatic mode, Air Flow Direction,
Temperature adjustments.
Two “AAA” batteries have been included for your convenience.
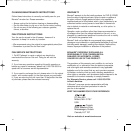
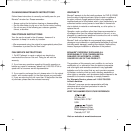
PULLS OUT UP TO 7.0”
LEFT
Extra Extender Panels
RIGHT
Built-In, Pull Out Extender Screen
24” long
FRONT VIEW
Two 3.0” extenders, (Included in your box packed at both ends)
Figure 2
BW2300 visual version.qxd 11/6/01 9:52 AM Page 3


