


Using the turbo fan
(BCV2000F and BCV3000F only)
You can use the turbo fan feature for even more
rapid and uniform heating. To use the turbo fan
feature, set the power knob onto the third setting (III).
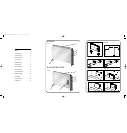
WALL MOUNTING (SEE FIG. 3B-3G)
Important: Before drilling into any wall ensure
no electrical cables are present in the area.
1. Remove feet from main unit
2. Using dimensions provided in Figure 3B, drill
holes for wall mounting brackets.
3. Insert plastic wall nails to holes.
4. Insert screws through holes of wall brackets,
then tighten. Be sure bracket 2 is mounted on
the bottom.
5. Hang on main body with wall brackets.
CLEANING AND MAINTENANCE
•Turn the switch to the 0 (OFF) position.
• Remove the plug from the wall socket.
•Wait for the heater to cool down sufficiently.
•You may clean the outside of the heater with a
damp cloth. Do NOT allow water to come into the
appliance. Do NOT use soap or chemicals, which
may damage the housing. Allow sufficient time
to dry before plugging the unit back in the socket.
• Clean the air inlet and outlet openings
regularly (with normal use at least twice a
year) with a vacuum cleaner.
STORAGE TIPS
If you do not plan to use your heater for an
extended period of time (i.e. during the summer
months), we recommend you to re-pack the unit
in its original packaging or any other dust-free
packaging and store it in a dry and cool place.
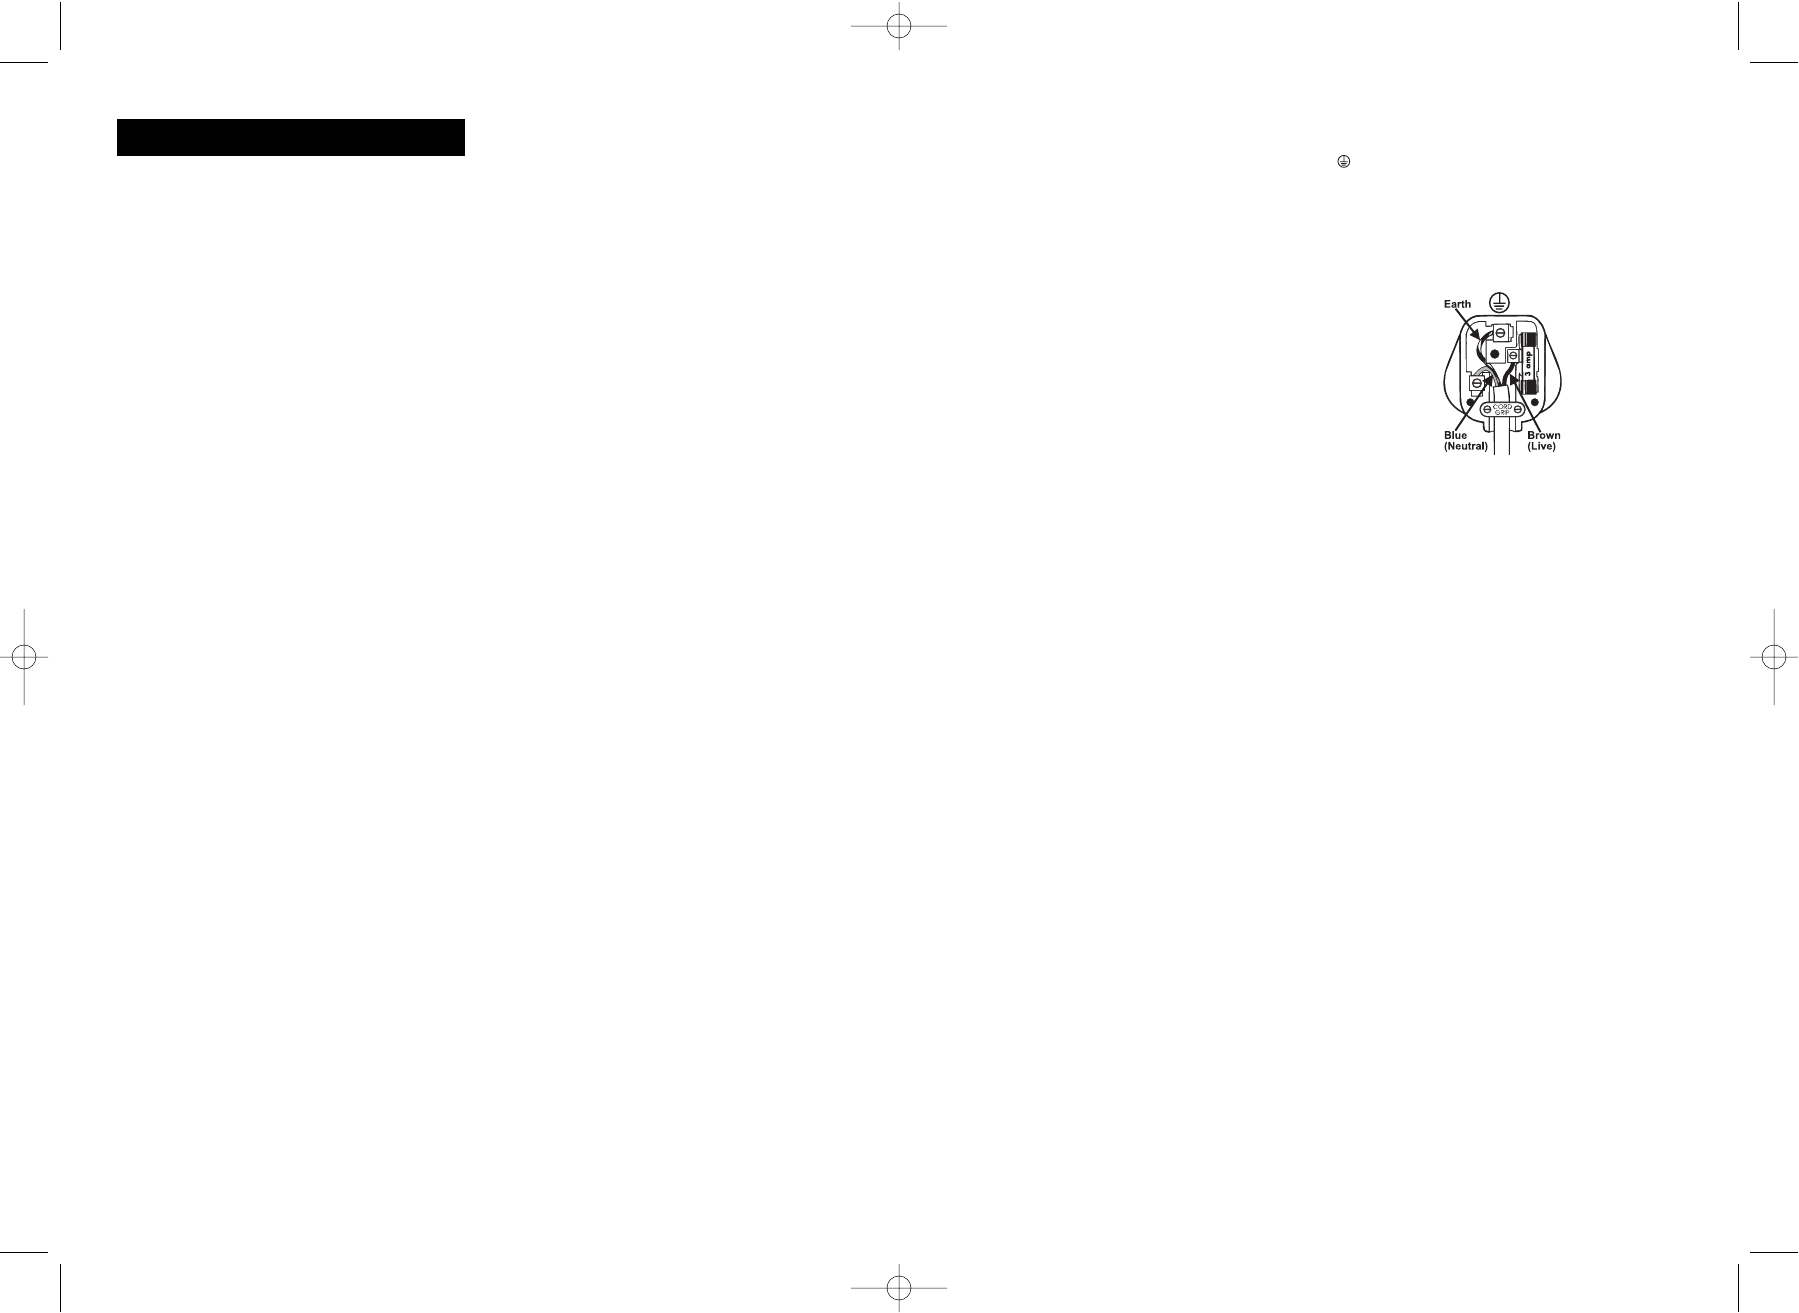
FOR U.K. AND IRELAND ONLY
If the plug is not suitable for the socket outlets in
your home, it can be removed and replaced by
a plug of the correct type. Please refer to
"Installation of a plug" below.
Installation of a plug applicable to U.K.
and Ireland
WARNING - THIS APPLIANCE MUST BE
EARTHED
The wires in the mains lead are coloured as such:
BROWN - LIVE
BLUE - NEUTRAL
Please note that the colour of these mains wires
may not correspond with the colour markings
that identify the terminals in your plug.
Please proceed as follows:
The wire which is coloured GREEN AND YELLOW
must be connected to the terminal which is
marked with the letter “E” or by the earth symbol
or coloured GREEN or GREEN AND YELLOW.
The BROWN coloured wire must be connected
to the terminal, which is marked with the letter
"L" or is coloured RED.
The BLUE coloured wire must be connected to
the terminal, which is marked with the letter "N"
or is coloured BLACK.
NOTE: If the terminals in the plug are not marked
or if you are unsure or in doubt about the installation
of the plug please contact a qualified electrician.
If a 13A 3-pin plug is fitted, it must be an ASTA
approved plug, conforming to BS1363 standard.
Replacement 13A fuses must be BSI or ASTA
BS1362 approved.
GUARANTEE
PLEASE KEEP YOUR RECEIPT AS THIS WILL
BE REQUIRED FOR ANY CLAIMS UNDER
THIS GUARANTEE.
• This product is guaranteed for 3 years.
• In the unlikely event of breakdown, please
take it back to the place of purchase, with
your till receipt and a copy of this guarantee.
• The rights and benefits under this guarantee
are additional to your statutory rights which
are not affected by this guarantee.
• Holmes Products Europe undertakes within
the specific period, to repair or replace free of
charge, any part of the appliance found to be
defective provided that:
• We are promptly informed of the defect.
• The appliance has not been altered in any
way or subjected to misuse or repair by a
person other than a person authorised by
Holmes Products Europe.
• No rights are given under this guarantee to a
person acquiring the appliance second hand
or for commercial or communal uses.
• Any repaired or replaced appliance will be
guaranteed on these terms for the remaining
portion of the guarantee.
THIS PRODUCT IS MANUFACTURED TO
COMPLY WITH THE E.E.C. DIRECTIVES
73/23/EEC, 89/336/EEC AND 98/37/EEC.
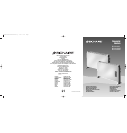
CONGRATULATIONS!
Your Bionaire
™
Heater has been designed using
the latest in technology. With normal care and
maintenance, your Bionaire
™
Heater will provide
years of satisfactory performance.
RETAIN THE FOLLOWING FOR FUTURE
REFERENCE.
DESCRIPTIONS (SEE FIG 1/2)
A.Outlet grill
B.Removable feet
C.Temperature selector control knob
D.Thermostat control knob
E.Power light
F. Turbo Fan (BCV2000F/BCV3000F only)
IMPORTANT SAFEGUARDS
Mains connection
• Read these instructions carefully, in conjunction
with the illustrations, before using the heater.
• Before connecting the heater, check that the
voltage indicated on the rating plate corresponds
to the mains voltage in your home / office.
• Avoid the use of an extension cord because it
may cause the heater to overheat.
• Warning: Risk of Fire. Discontinue use if the
outlet or plug become hot to the touch.
Overheating may indicate a worn or damaged
outlet. Consult a qualified electrician for outlet
replacement.
Safe positioning
• Only touch the heater with dry hands.
• DO NOT position where it can be touched by
children, especially the very young.
• DO NOT position the heater directly under a
power socket.
• DO NOT use this heater outdoors.
• This heater is NOT intended for use in bathrooms,
laundry areas and other similar indoor locations
NEVER locate heater where it may fall into
the bathtub or other water container.
• When using the heater, DO NOT place in the
immediate surroundings of a shower or
swimming pool.
• Position the heater in such a manner that the
air flow toward the heater and away from it,
is not obstructed.
• The heater must NOT be covered.
• Allow a safe area around the heater away
from furniture or other objects; at least 50 cm
from the top and sides and 200 cm at the front.
• Do not use this heater when it is lying on its side.
• If the heater is tipped over, unplug it and allow
it to cool before standing it back up.
• DO NOT use the heater in rooms with
explosive gas (e.g. petrol) or while using
inflammable glue or solvent (e.g. when gluing
or varnishing parquet floors, PVC etc.)
Safety in use
• Extra caution is necessary when the heater is
used near children or when it is left unattended.
• DO NOT insert any objects into the heater.
• Keep the mains cord at a safe distance from
the main body of the heater.
• Prevent overheating of the heater by keeping
the air inlet and outlet unblocked. DO NOT
hang anything in front of or above the heater.
• If overheating should occur, the built-in
overheating safety device will switch off the heater.
• DO NOT use aerosols, inflammable substances
or materials sensitive to heat in the flow of hot air.
Servicing
• Should the heater stop working, first check the
fuse in the plug (UK only) or fuse/circuit breaker
at the distribution board is operating, before
contacting the manufacturer or service agent.
• If the supply cord or plug is damaged, it must
be replaced by the manufacturer or its service
agent or a similarly qualified person in order
to avoid hazard.
• The heater contains no user serviceable parts
and should the product suffer damage or
breakdown it must be returned to the
manufacturer or their service agent.
FOOT ASSEMBLY (SEE FIG 3 A)
1. Insert the foot to side plate.
2. Tighten the screw.
HOW TO USE YOUR CONVENTION HEATER
Setting the power level
I = low power (1000W for BCV2000/2000F and
1500W for BCV3000F)
II = high power (2000W for BCV2000/2000F and
3000W for BCV3000F)
III = high power with turbo fan (BCV2000F and
BCV3000F only)
Setting the temperature level
The thermostat will maintain the desired temperature
level by switching on and off at intervals.
1. To find the ideal thermostat setting, turn the
thermostat knob clockwise to “max”
2. When the desired temperature is reached,
slowly turn the thermostat knob anti-clockwise
until the heater turns off.
3. The heater will now automatically retain the
temperature at the required level.
U.K. and IRELAND
2
3
BCV2000/2000F/3000FI/IUK04M V.q 7/1/04 15:15 Page 7