


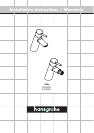

4
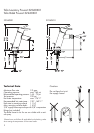
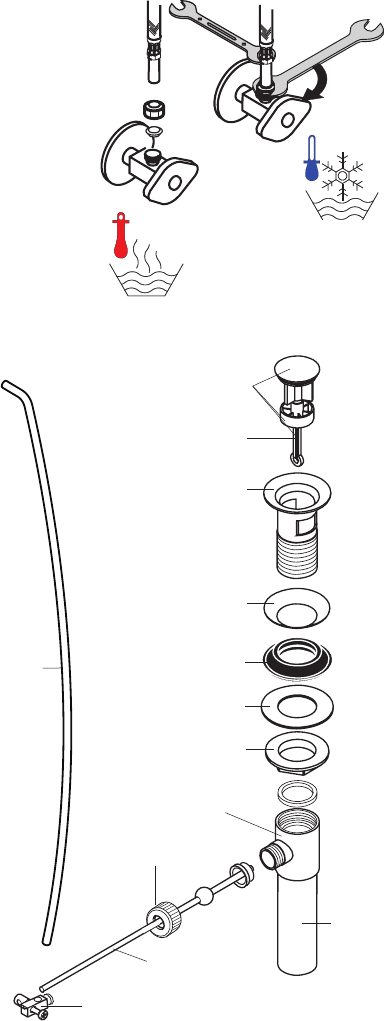
Use 3/8” compression fittings (not included) to con-
nect the supply hoses to the hot and cold stops. Use
two wrenches, as shown in the diagram, to prevent
hose twisting.
For proper operation of the faucet, the hot supply
should be on the left, and the cold supply should be on
the right.
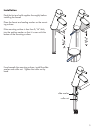
Install the pop-up drain and pull rod.
Turn on the water and check all connections for leaks.
If desired, re-set the high temperature limit stop.
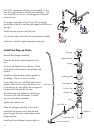
Install the Pop-up Drain
Remove the plunger assembly.
Unscrew the drain outlet flange from the
tee.
Unscrew the tailpiece from the tee. Wrap
the threads with plumbers’ thread tape and
replace.
Install the white, flexible sealing gasket to
the flange. Place it in the sink outlet.
From under the sink, install the black mack
gasket, white friction ring and retainer nut
to the flange. Do not tighten the nut against
the bottom of the sink at this time.
Thread the tee and tailpiece to the flange.
The pivot must face the faucet. If neces-
sary, turn the drain assembly.
Tighten the retainer nut.
Place the plunger assembly in the drain.
Install the horizontal rod so that the end
goes through the loop in the bottom of the
height adjuster.
Install and hand tighten the pivot ball nut.
plunger
flange
sealing gasket
mack gasket
friction ring
retainer nut
horizontal rod
height adjuster
pivot ball nut
swivel connector
pull rod
tee
tailpiece