


7Sp
Guia General de Diagnostico de Averias
Problema Causas Posibles Acción a Tomar
La bomba no se
enciende o no funciona
La bomba se apaga y se
enciende
arbitrariamente (el
control térmico se
activa).
La bomba hace ruido o
vibra excesivamente
La bomba funciona pero
practicamente no
bombea agua.
1. Hay un fusible quemado o el
cortacircuito se desactivó
2. El voltaje es muy bajo
3. El motor está dañado
4. El impulsor (la bomba está llena de
desperdicios)
5. No cebada en forma adecuada
1. El agua está muy caliente
2. La bomba ha estado funcionando sin
bombear agua. El nivel de agua es muy
bajo
1. Los cojinetes están desgastados
2. Hay desperdicios en la cavidad del
impulsor o éste está roto
3. Las conexiones de las tuberías al edificio
son muy rigidas o están muy flojas
1. El voltaje de la línea es muy bajo
2. Hay despertidicos en el impulsor en en el
desagüe
3. Alguna pieza está dañada o desgasta da
4. La bomba está funcionando en sentido
contrario
5. La bomba no es la adecuada para la a
plicación
6. La válvula de chequeo está atascada o la
instaló al reves.
7. La válvula de tranque está cerrada
8. Hay aire en la voluta (parte espiral)
1. Si el fusible está quemado reemplácelo con un similar o active
el cortacircuito
2. Si el voltaje es más bajo que el recomendado, chequee el
alambrado. En caseo de que éste sea adecuado contacte la
compañía de electricidad
3. Reempláce la bomba
4. Si el impulsor no gira, saque la base para botar el desperdicio
acumulado
5. Reponer la bomba en dos pulgadas (5 cm) por lo menos de
agua para cebarla en forma adecuada
1. El agua no debe estar a más de 49˚C (120˚F)
2. Reemplácela o muevala a otro sitio
Precaucion:La bomba se puede encender sin previo aviso.
Desconecte el cordón de la línea de tensión antes de darle
servicio
1. Reempláce la bomba
2. Saque la base y limpie el impulsor o reemplácelo si está roto
3. Reemplace parte de la tubería con un conector flexible
1. Si el voltaje es más bajo que el recomendado, chequee el
alambrado. En caso de que éste sea adecuado contacte la
compañía de electricidad
2. Saque, limpie y apriete bien el impulsor
3. Reemplace las piezas desgastadas o toda la bomba. Limpie las
piezas que lo necesiten
4. Chequee la rotación. (En sentido contrario a las agujas del reloj
en relación a la base). Devuelvala si gira en el mismo sentido a
las agujas del reloj
5. Haga todos los calculos de nuevo para ver si está usando la
bomba adecuada
6. Saque y revise la válvula de chequeo para ver si está bien
instalada y funcionando correctamente
7. Abra la válvula
8. a.Encienda y apague la bomba hasta que el líquido salga sin
aire
b.Ponga la bomba de lado bajo agua para que el aire se fugue
por la entrada
Esta
bomba
tiene aceite que puede estar bajo
presión debido al calor, deje que se
enfrie por lo menos unas dos horas
antes de darle servicio.
1. Esta bomba no necesita lubricación.
2. Si desmantela el motor antes del
vencimiento de la garantía, la
misma se anulará. Igualmente esto
!
ADVERTENCIA
podría crear fugas y daños. Si
necesita reparaciones, enviela a
donde la compró o a un electricista.
En caso de que tenga que
desmantelar el motor deberá
reemplazar los anillos en O.
Cerciórese de que no hayan fugas.
3. Debe mantener la entrada limpia y
sin obstrucciones. Igualmente la
debe revisar periodicamente. Voltee
la bomba y quítele el tornillo que se
encuentra debajo de la salida de
ésta. Gire la base en el mismo
sentido de las agujas del reloj para
abrirla. Saque la base y bote la
basura que se haya acumulado.
Esta bomba tiene aceite para motores
dielectricos para su lubricacion y trans-
ferencia de calor. este aceite puede
contaminar el ambiente. revise las
leyes de protección al ambiente antes
de deshacerse del mismo.
!
ADVERTENCIA
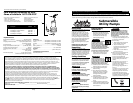
Operating Instructions and Replacement Parts List
2
Where a 2-prong wall receptacle is
encountered, it must be replaced
with a properly grounded 3-prong
receptacle installed in accordance
with the NEC and local codes and
ordinances.
12.All wiring should be performed by a
qualified electrician.
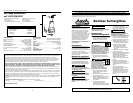
13. It is strongly recommended that this
unit is plugged into a Ground Fault
Circuit Interrupter (GFCI). Consult a
local electrician for installation and
availability (See Figure 1).
The pump motor is equipped with an
automatic resetting thermal protector
and may restart unexpectedly. Protector
tripping is an indication of motor
overloading as a result of operating the
pump at low head (low discharge
restriction), excessively high or low
voltage, inadequate wiring, incorrect
motor conditions, or a defective motor or
pump.
14.Protect electrical cord from sharp
objects, hot surfaces, oil, and
chemicals. Avoid kinking the cord.
Replace or repair damaged or worn
cords immediately. Use wire of ade-
quate size to minimize voltage drop
at the motor.
15.Do not handle a pump or pump
motor with wet hands or when
standing on a wet or damp surface,
or in water.
If your basement or room has water or
moisture on the floor, do not walk on wet
area until all power has been turned off.
If the shut-off box is in basement, call the
electric company to shut-off service to the
house, or call your local fire department
for instruction. Failure to follow this
warning can result in fatal electrical
shock.
Installation
IMPORTANT: This pump is not designed
for use in septic tanks or underground
vaults to handle raw sewage or effluents.
It should never be used in hazardous or
!
DANGER
!
WARNING
explosive locations. Do not use power
cord to lift motor. Always use the handle.
1. Pump should be located and should
rest on a level solid foundation. Two
inches of water is recommended to
properly prime utility pump. Do not
suspend pump by means of the dis-
charge pipe or power cord. Keep
pump inlet screen clear. Do not install
pump directly on clay, earth or sand
surfaces. Protect pump from extreme
heat and cold. Use pipe joint sealant
to ensure airtight pipe connections
2. Thread discharge (outlet) pipe into
pump body carefully to avoid
stripping or cross threading.
3. To install garden hose, install the
elbow adapter provided with the
pump. The elbow adapter uses a o-
ring seal to provide better water
removal. Rotate the elbow adapter
until the o-ring seals against the
pump body and the discharge is in
the desired direction. Thread garden
hose onto the elbow fitting.
NOTE: The garden hose must be 3/4" or
larger to keep friction as low as possible.
A 1-1/4" sump discharge hose adapter
can be connected directly to the pump
body using Teflon® tape.
4. Run discharge pipe/hose away from
the pump.
5. It is strongly recommended that this
pump motor be electrically connected
to a ground fault interrupter. Consult
your local electrician for availability
and installation.
Power Supply: Pump is designed for 120
volt, 60 Hz operation and requires a
circuit of 15 amperes or more capacity.
Pump is supplied with a 3-wire cord set
with grounding-type plug for use in a 3-
wire, grounded outlet.
Do not cut off the round grounding
prong. Cutting cord or plug will void
warranty and may make pump inoperable
6. Do not bend, kink or cut power cord.
Protect cord from sharp objects, hot
surfaces, oil and chemicals. Replace
damaged cord.
7. After all piping and controls have
been installed, unit is ready for
operation.
!
WARNING
Operation
Do not touch pump, pump
motor, water or discharge
piping when the pump is
connected to electrical power. Do not
handle a pump or pump motor with wet
hands or when standing on wet or damp
surface, or in water. Never touch the
pump or discharge piping when unit is
operating or fails to operate. Always
disconnect the pump cord (power) before
handling.
Risk of electrical shock! This
pump is supplied with a
grounding conductor and
grounding type attachment plug. Use a
grounded receptacle to reduce the risk of
fatal electrical shock.
This pump is designed for 120 Volt, 60 Hz
operation and requires a 15 amp circuit
or more and is equipped with a 3-wire
cord set with a grounding-type plug for
use in a 3-wire grounded outlet. For
safety, this pump should always be
electrically grounded to a suitable
electrical ground. NEVER cut off the
round grounding plug.
1. Plug unit into 120 volt outlet.
2. Pump should never be allowed to run
dry. Shaft seal depends on water for
lubrication. Do not operate the pump
unless it is submerged in water. Dry
running (pump not pumping water)
will cause seal damage and eventual
pump failure.
3. The motor is equipped with an
automatic reset thermal protector.
This means if the temperature in the
motor should rise unduly, the switch
will cut off all power before damage
can be done to the motor. When the
motor has cooled sufficiently, the
switch will reset automatically and
restart the motor. If protector trips
repeatedly (cycling of protector)
pump should be removed and
checked. Low voltage, long extension
cords, clogged impeller, very low
head or lift, etc. could cause cycling.
Cycling of protector will cause
eventual motor burnout.
4. The pump will pump water down to
1/8", therefore the pump will not
remove all of the water. Shut off the
pump immediately if the unit has
!
DANGER
!
DANGER
VIP50PRO
General Safety
Information (Continued)
Funcionamiento
(continuación)