


7Sp
TSC130 PRO
Para Piezas de Repuestos, Llame al 1-877-278-2797
Sírvase proporcionar la siguiente información:
- Número de modelo
- Número de serie (si tiene)
- Descripción y número de repuesto como se muestra
en la lista de repuestos
Envíe su solicitud de repuestos a la siguiente direccion:
Aqua Pro Systems
101 Production Drive
Harrison, OH 45030 U.S.A.
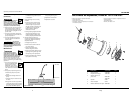
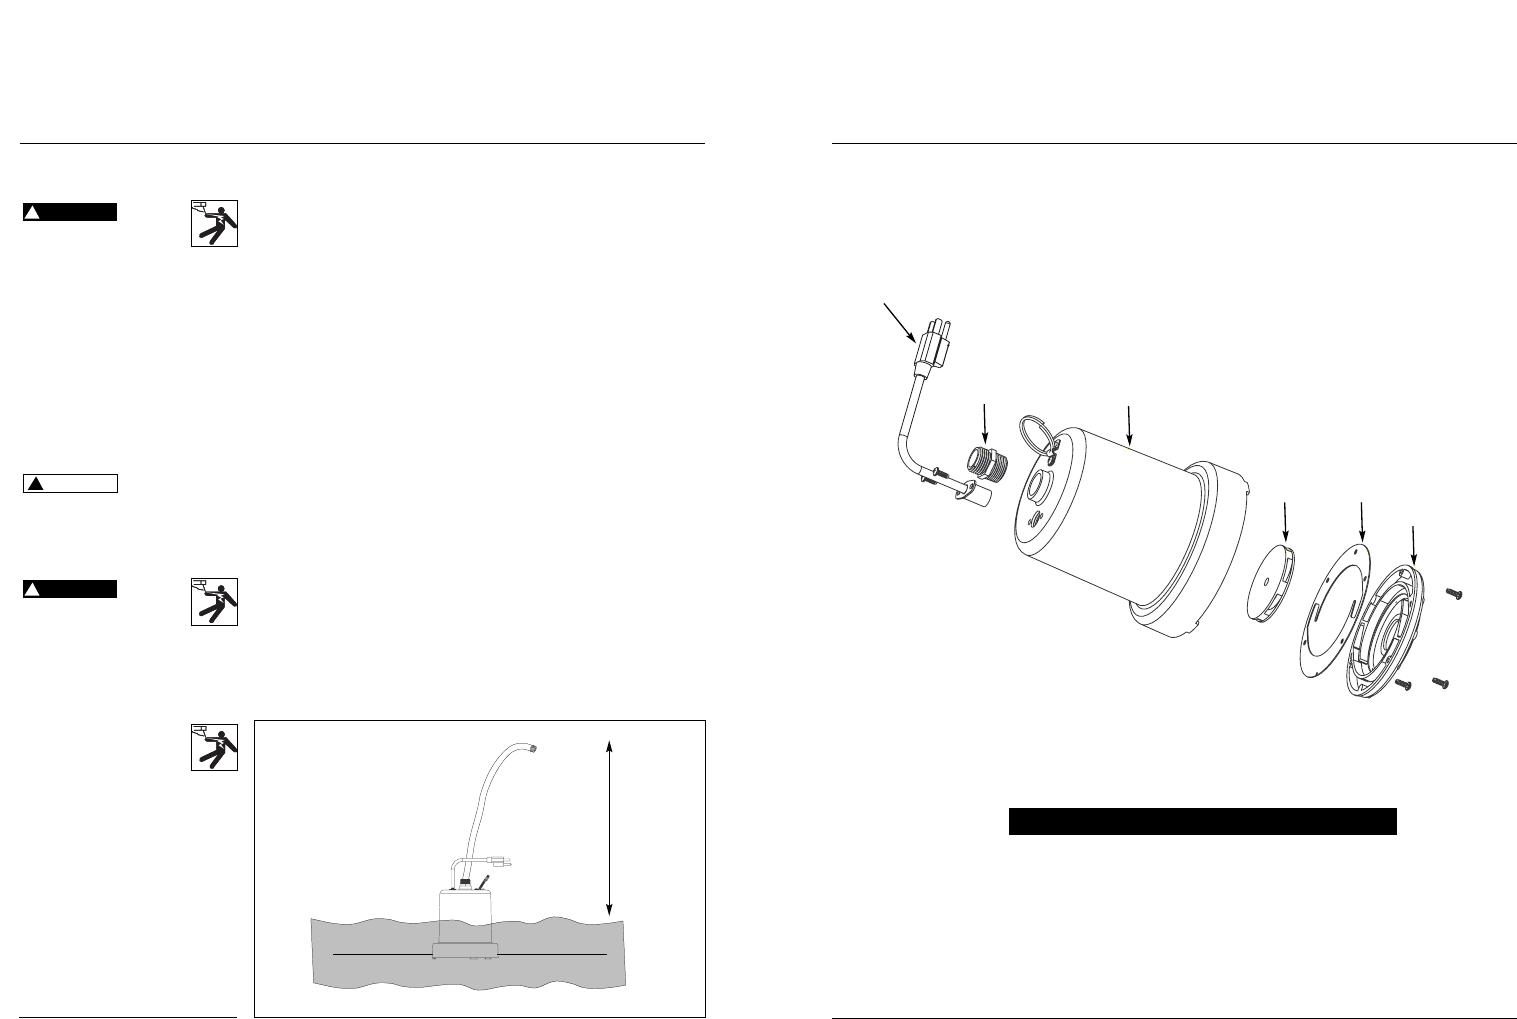
1 Cordón eléctrico 31006-005 1
2 Empalme de descarga 15875-002 1
3 Carcasa exterior con
junta tórica 28053-001 1
19023-001 1
4 Impulsor 23097 1
5 Junta del espiral 23122 1
6 Cubierta del difusor con rejilla 28056-002 1
No. de
Ref. Descripción TSC130 PRO CTD.
1
2
3
4
5
6
2
Operating Instructions and Parts Manual
Installation and Operation
(Continued)
Do not handle pump with wet
hands or when standing in
water or on a damp surface when the
unit is operating or fails to operate.
Always disconnect pump power cord
from power source before handling.
6. Plug the power cord into a ground-
ed 115-volt AC power outlet. The
pump will start operating as soon as
the power cord is plugged into the
power outlet.
7. The pump will remove water down
to 1/8 inches of the hard surface the
pump was placed on.
8. The pump should be turned off
once the water level reaches the
1/8-inch mark.
Do not allow
pump to run dry.
The shaft seal depends on water for
lubrication. Operating pump without
water will damage the shaft seal and
cause pump failure.
Maintenance
Always disconnect electric
supply before attempting to
install, service, relocate or per-
form any maintenance. Failure to do so
could result in fatal electrical shock.
Minimal service is required for this
pump. If pump should fail to operate,
perform the following troubleshooting
guidelines:
1. The motor housing of the
pump is completely sealed
and requires no service.
Disassembly of the motor
housing or alteration of the power
cord could result in fatal electrical
shock.
2. Verify pump is operating correctly.
a. Disconnect pump from power
source.
b.Disconnect discharge hose from
pump.
c. Immerse pump in a bucket or tub
of water.
d.Plug power cord into a grounded
115 volt AC power outlet. If pump
operates correctly proceed to step
#3. If pump does NOT operate,
!
DANGER
!
NOTICE
!
DANGER
unplug power cord and proceed
to maintenance guideline item 4
in this section.
3. Verify discharge hose is correctly
installed.
a. Connect hose to another water
source such as a faucet. If water
flows through hose, proceed to
step 3b. If water is restricted, veri-
fy discharge hose is unwound.
Remove all kinks, bends or
obstructions in hose.
b.Verify pumping height does NOT
exceed 25 feet (See Figure 1). If
pumping height is greater than
25 feet, this pump will NOT work.
4. Periodic cleaning of pump is
required to maintain performance
of the pump. Follow the cleaning
steps listed below:
a. Unplug the power cord.
b.Remove the 3 screws at the bot-
tom of the pump.
c. Remove the volute cover.
Note the alignment marks.
d.Remove the gasket. Note how the
openings in the gasket align with
the openings in the pump base.
e. Remove the debris and make sure
the impeller turns freely.
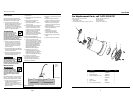
Figure 1 Water Level
25 Ft. Max.
Water Level
f. Replace the gasket making sure
the openings are aligned.
g.Replace the volute cover.
h.Replace the 3 screws.