


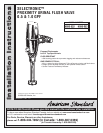
Installation Instructions
M968567 Rev.1.2
6
Fig. 12b
3
9
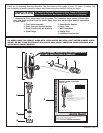
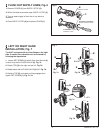
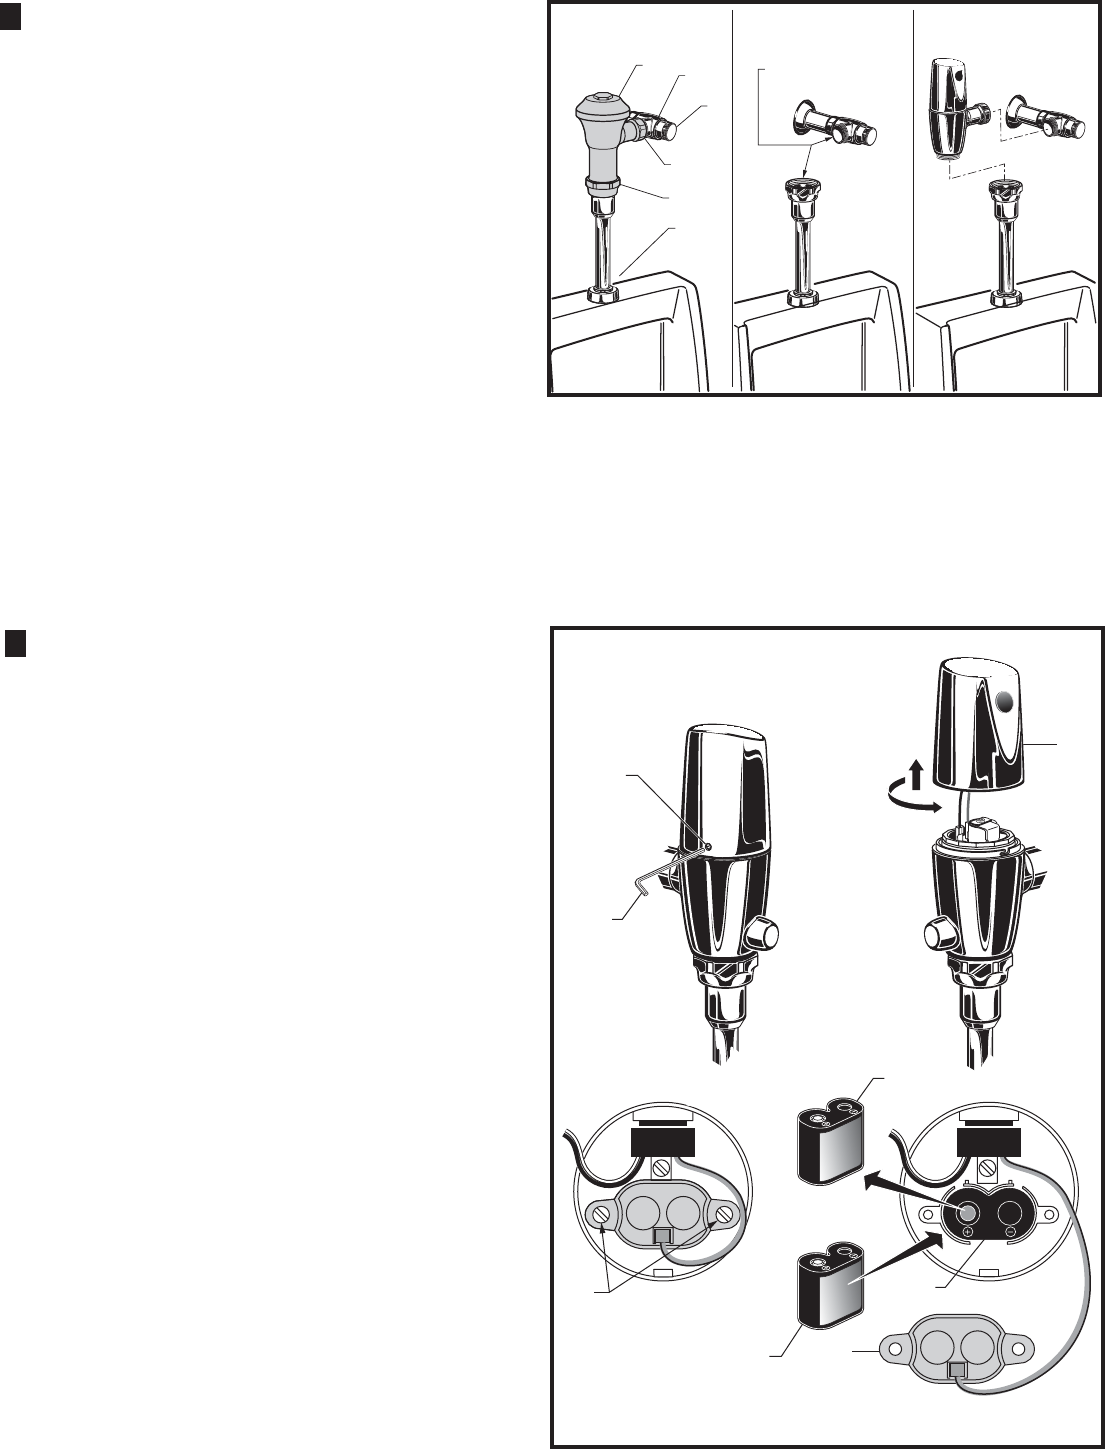
1. Remove COVER (1) from SUPPLY STOP (2) if
installed. Fig. 10.
2. Turn water supply off. Fig. 10.
3. Loosen SPUD COUPLING NUT (3). Unthread
COUPLING NUT (4) and VACUUM BREAKER
COUPLING NUT (5). Remove FLUSH VALVE (6).
Fig. 10.
4. Clean all threaded connections before installing the
new flush valve. Fig. 10a.
5. Refer to Sections 5,6 and 7 to complete the retrofit
installation. Fig. 10b.
Note: In most Retrofits the wall escutcheon, supply stop,
cover tube and vacuum breaker do not have to be replaced.
If these items do need replacement they must be purchased
separately or order the complete flush valve assembly from
American Standard.
HOW TO RETROFIT OUR VALVE;
Fig. 10
8
(Replaces Industry Standard Manual and
Electronic Valves)
CLEAN
CONNECTIONS
2
Fig. 10 Fig. 10a Fig. 10b
1
4
5
3
6
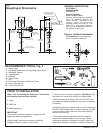
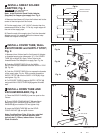
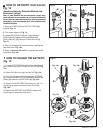
1. Loosen SET SCREW (1) with 2.5mm Hex Wrench
(2) in back of top half of FLUSH VALVE CAP (3). Fig.
12a.
2. Rotate CAP (3) to the right and pull off. Fig. 12b.
3. Turn CAP (3) over and remove the two SCREWS
(4). Remove the BATTERY COVER (5) to expose the
battery (6). Remove old BATTERY (6). Fig. 12c.
4. Install the new BATTERY (7) making sure the + & -
are facing up towards the open end of the cover.
Fig. 12d.
5. Replace the BATTERY COVER (5), reverse the
above steps to assembly flush valve.
HOW TO CHANGE THE BATTERY;
Fig. 12
1
5
7
4
6
6
Fig. 12a
Fig. 12c
Fig. 12d
Fig. 12
OLD
BATTERY
OUT
NEW
BATTERY
IN
2
Installation Instructions