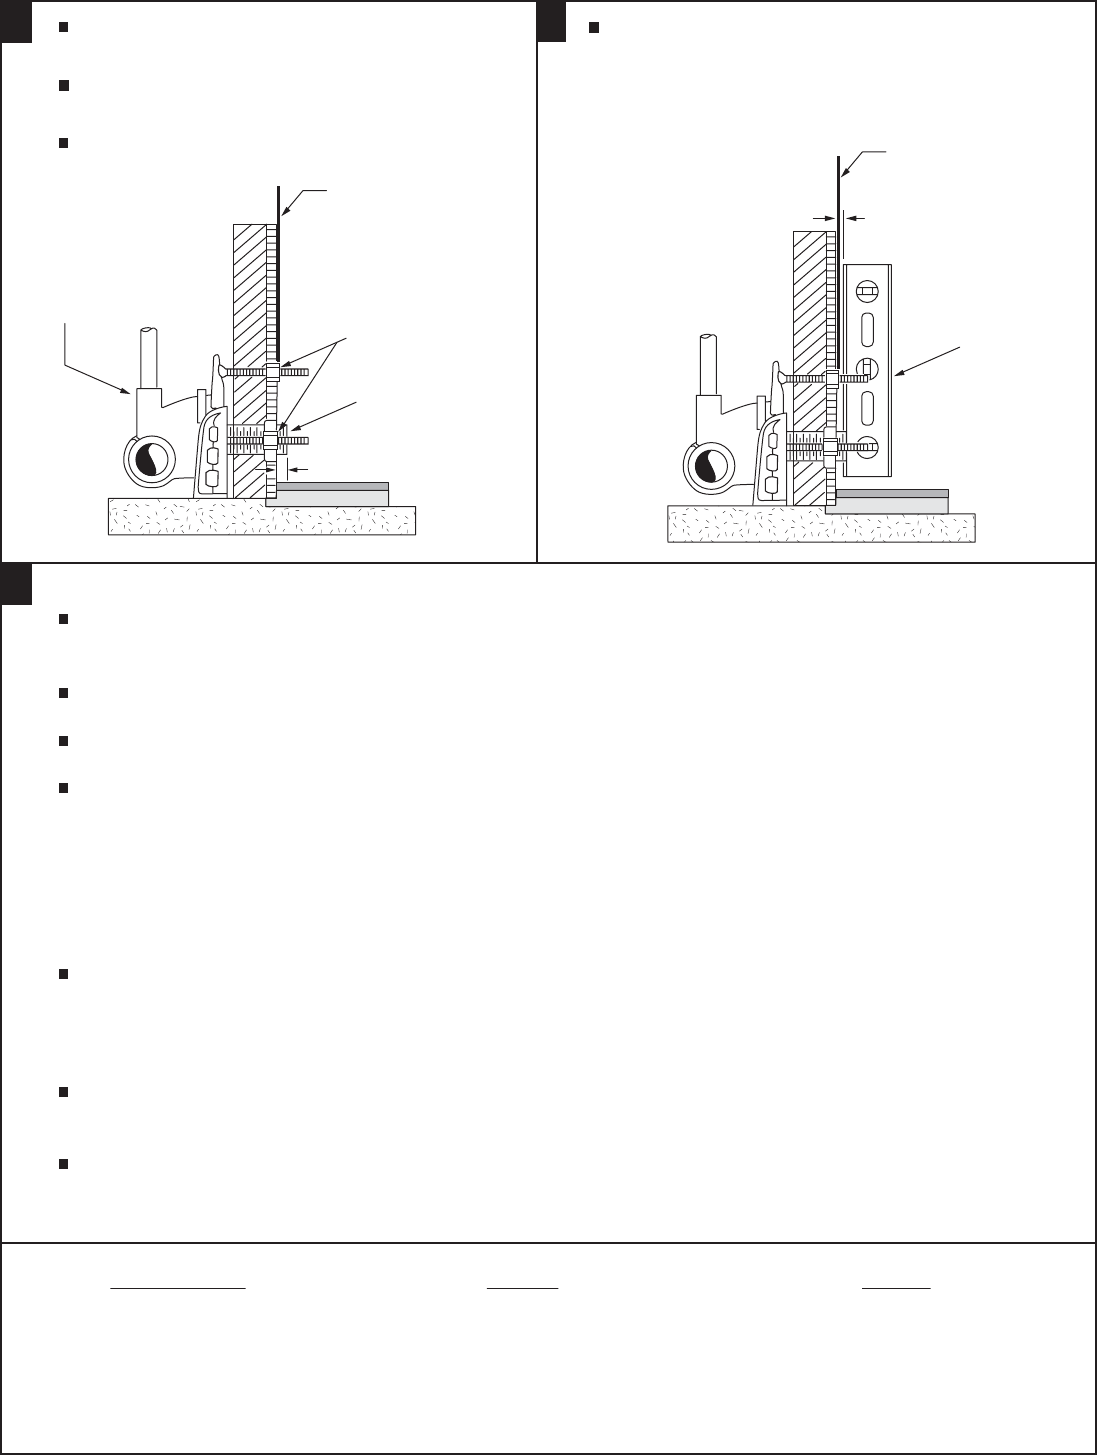
Place back-up nuts on both bottom bolts, and
the top left-hand bolt only.
Adjust the two lower back-up nuts so that front
face of nuts is flush with finished wall.
Adjust waste horn to project 5/16" (7mm) from
finished wall.
Using a level, adjust the top left back-up nut so that
it is in the same vertical plane as the lower left back-up
nut. (If wall surface is irregular, the three back-up
nuts must be positioned to allow a minimum 1/16"
gap between fixture and wall surface.)
NOTE: Bearing nuts and washers must be set to take full loading from the fixture allowing
1/16" (2mm) clearance between fixture and wall.
Follow support manufacturer's recommended setting of closet outlet connection.
Place felt or neoprene gasket (wax ring not recommended) on closet outlet.
When the fixture is installed, closet outlet gasket must be compressed sufficiently to
assure a gas and watertight seal.
Install bowl on support using cap nuts and fiber washers with the back-up nuts and washers.
DO NOT APPLY TOP RIGHT FIBER WASHER AND CAP NUT UNTIL OTHER CAP NUTS
HAVE BEEN FIRMLY TIGHTENED USING A WRENCH.
Install top right cap nut with fiber washer and run up hand tight. Wrench tighten approximately
1/4 turn.
Apply sealant to gap between bowl and finished wall. Remove excess sealant.
7301115-100 Rev. C
3
5
4
- 2 -
In the United States:
American Standard Brands
P.O. Box 6820
Piscataway, New Jersey 08855
Attention: Director of Consumer Affairs
For residents of the United States, warranty
information may also be obtained by calling
the following toll free number: (800) 442-1902
www.americanstandard.com
In Canada:
AS Canada ULC
5900 Avebury Ave.
Mississauga, Ontario
Canada L5R 3M3
Toll Free: (800) 387-0369
www.americanstandard.ca
In Mexico:
Customer Service Manager
AS Maquila, S.A. de C.V.
Via Morelos #330
Col. Santa Clara
Ecatepec 55540 Edo. Mexico
www.americanstandard.com.mx
FINISHED WALL
CLOSET
CARRIER
SYSTEM
(3) NUTS
WASTE
HORN
5/16" (7mm)
LEVEL
FINISHED WALL
1/16" (2mm)
(IRREGULAR
WALL SURFACE)
The following steps require a helper:


