USER MANUAL
ENGLISH
SW 850S B 146 0789 000(4)2007-03 A
21
Front and rear skirt check
Remove the main broom as shown in the relevant
paragraph.
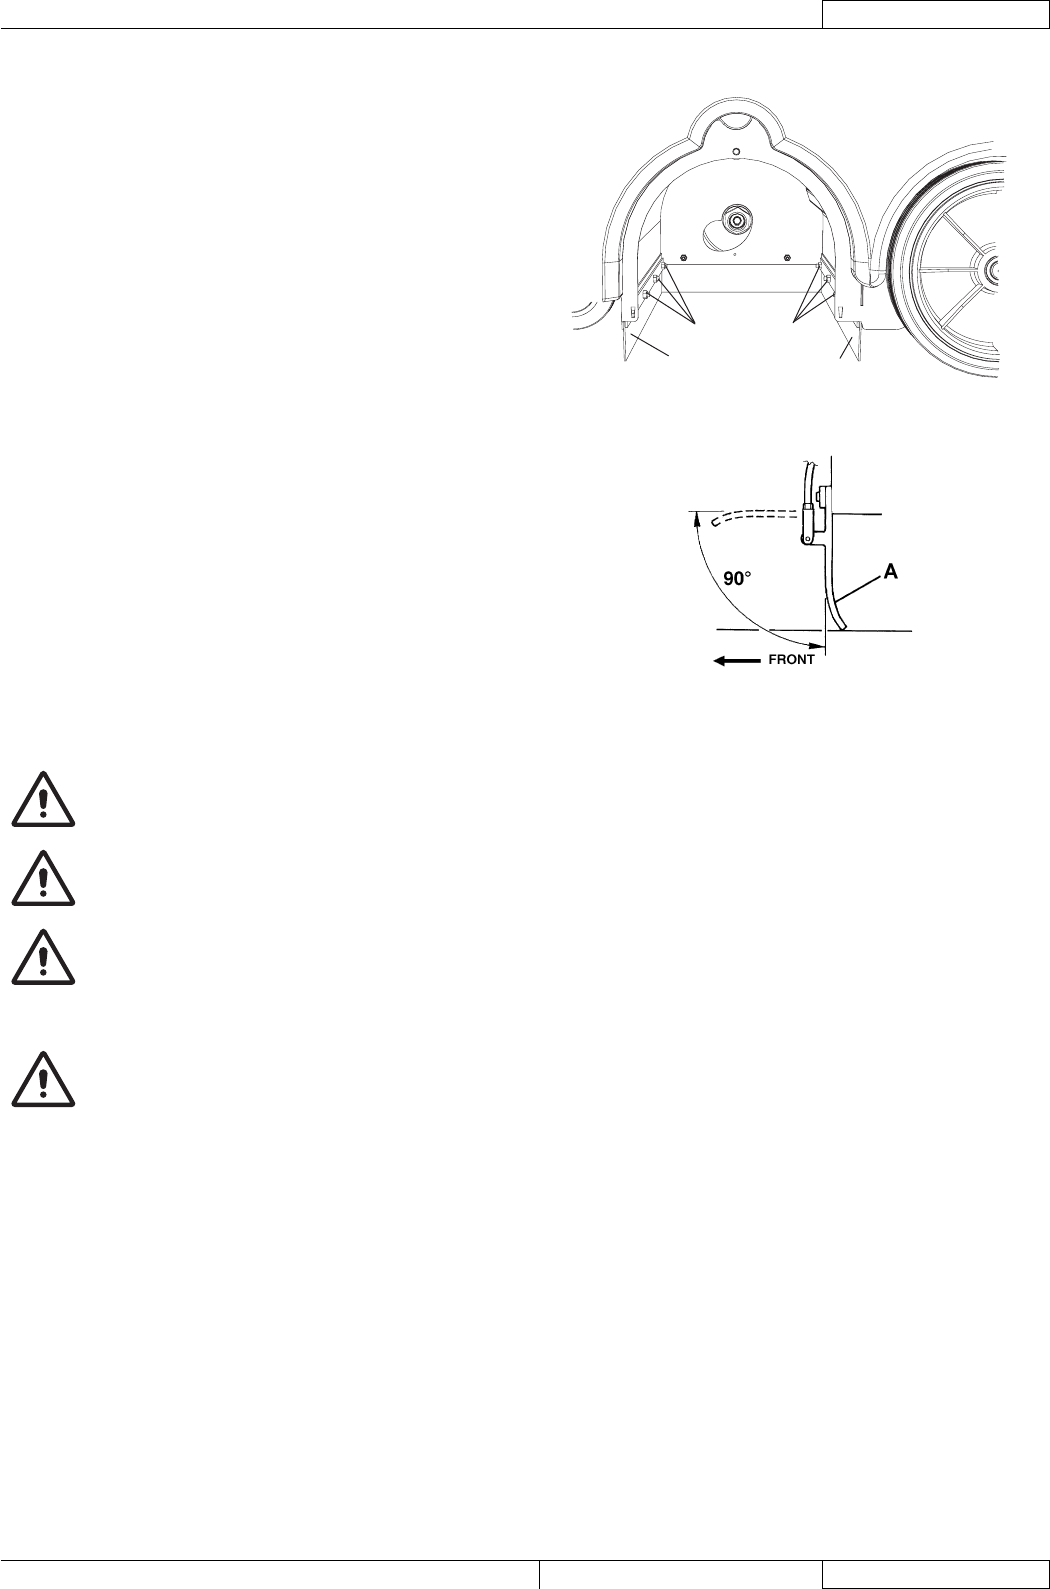
Check the front (A, Fig. 19) and rear skirts (B) for integrity.
Replace the skirts when they have cuts (A, Fig. 13) larger
than 20 mm or cracks/tears (B) larger than 10 mm (for skirt
replacement, refer to the Service Manual).
Check that:
The front skirt (A, Fig. 15) slightly touches the fl oor (as
shown in the fi gure).
The distance from the ground of the rear skirt (A, Fig.
14) is within 0 - 3 mm (as shown in the fi gure).
If necessary, adjust the skirt height by using the slots on
the screws (C and D, Fig. 19).
Press the front skirt lifting lever (27) and check that the
front skirt (A, Fig. 20) turns upwards for about 90° (as
shown in the fi gure); then release the lever (27) and check
that the skirt does not remain in an intermediate position
but returns to its initial position. If necessary, for the front
skirt control cable adjustment or replacement, refer to the
Service Manual.
Assemble the components in the reverse order of
disassembly.
13.
14.
15.
16.
•
•
17.
18.
19.
A
C
D
B
S311474
Figure 19
S311475
Figure 20
BATTERY CHARGING
CAUTION!
Charge the batteries when the yellow (63) or red warning light (64) turns on and at the end of each cleaning
cycle. Keeping the batteries charged make their life last longer.
WARNING!
When the batteries are discharged, charge them as soon as possible, as that condition makes their life shorter.
WARNING!
If the machine is equipped with lead (WET) batteries, battery charging produces highly explosive hydrogen gas.
Charge the batteries in well-ventilated areas and away from naked fl ames.
Do not smoke while charging the batteries.
While charging the batteries always keep the hood open.
WARNING!
Pay careful attention when charging WET batteries as there may be battery fl uid leakages. The battery fl uid is
corrosive. If it comes in contact with skin or eyes, rinse thoroughly with water and consult a physician.
Drive the machine on a level ground. Make sure that the machine cannot move independently; if equipped, press the pedal
brake (26).
Turn the ignition key (61) to "0".
Open the hood (7).
(For WET batteries only) check the level of electrolyte inside the batteries (32). If necessary, top up through the caps (38).
Leave all the caps (8) open for battery charging.
If necessary, clean the upper surface of the batteries.
Charge the batteries according to one of the following methods, depending on the presence of the electronic battery charger
(34).
1.
2.
3.
4.
5.


