


FORM NO. 56041580 - Captor
™
4300, 4800, 5400 / CR 1100, 1200, 1400 - A-23
ENGLISH / A-23
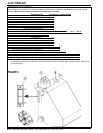
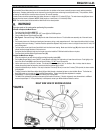
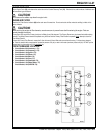
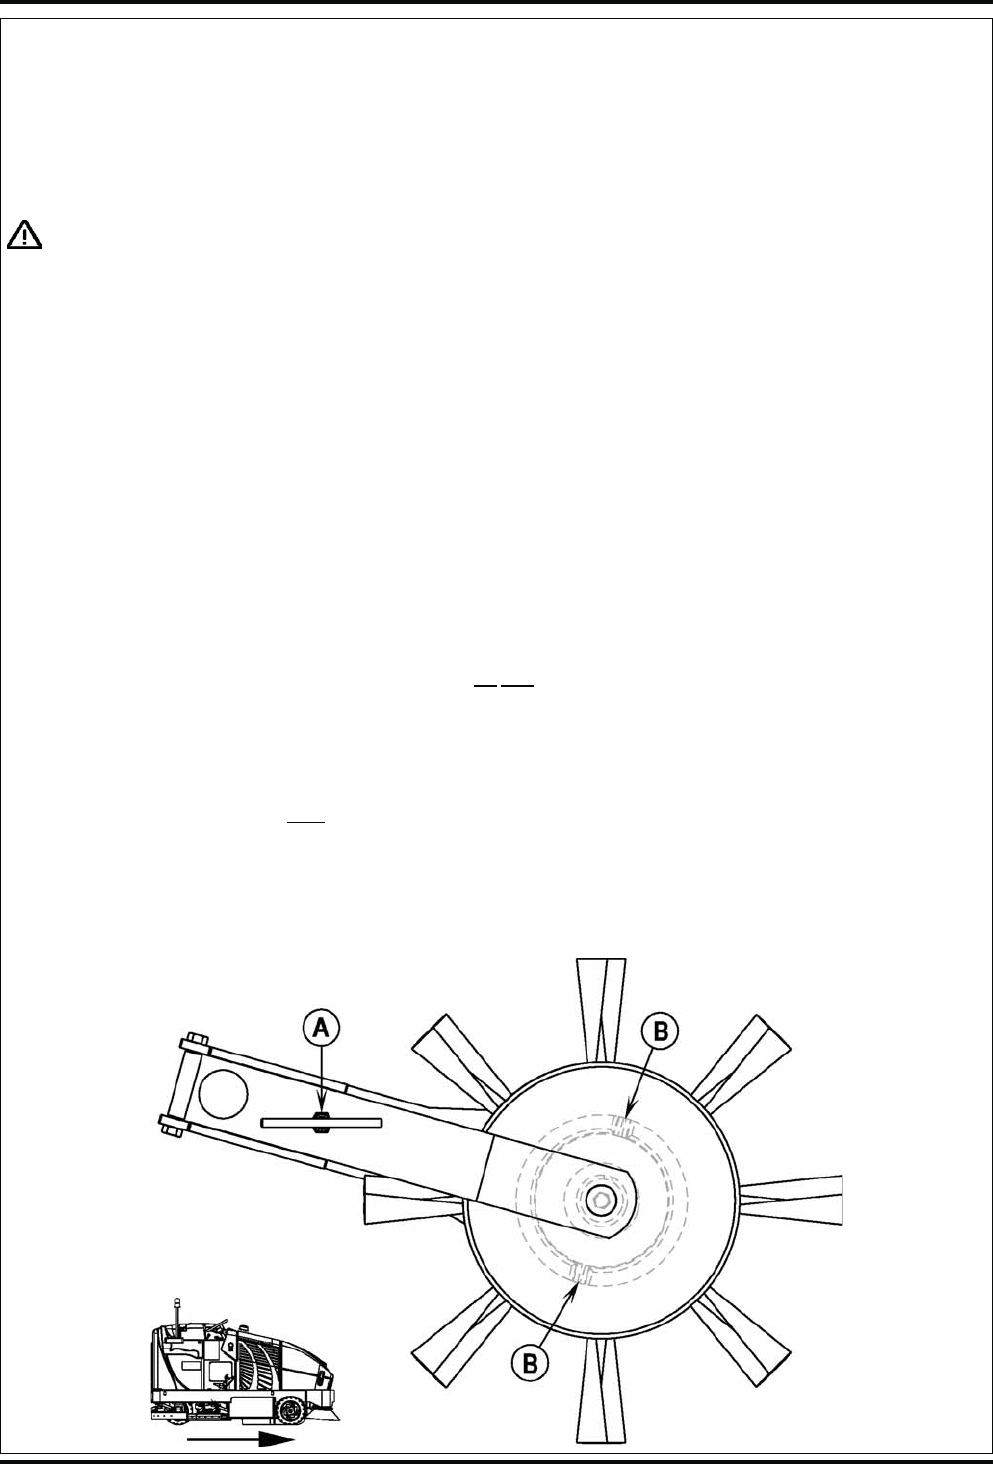
FIGURE 4
MAIN BROOM MAINTENANCE
Since the Main Broom Motor always turns in the same direction, the bristles on the broom eventually become curved, reducing sweeping
performance. Sweeping performance can be improved by removing the broom and turning it around (end-for-end). This procedure, known
as “rotating” the main broom, should be done once every 30 hours of operation.
The main broom should be replaced when the bristles are worn to a length of 2-1/2 inches (6.35 cm). The main broom stop (JJ) must be re-
adjusted when the broom is replaced. NOTE: Bristle length on a new broom is 3-1/4 inches (8.25cm).
NOTE: The machine should be stored with the Main Broom in the raised position.
WARNING!
The engine must not be running when performing this procedure.
To Rotate or Replace the Main Broom...
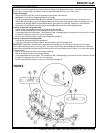
1 Turn the Ignition Key Switch (MM) OFF.
2 Put the Main Broom Raise / Lower (ON / OFF) Lever (II) in the DOWN position.
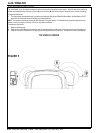
3 Open the Main Broom Right Access Door (38).
4 See Figure 4. Remove the large T-Bolt (A) from the side of the broom idler arm. Pivot the idler arm assembly out of the main broom
core.
5 Pull the main broom out of the broom housing and remove any string or wire wrapped around it. Also inspect the skirts at the front, back
and sides of the broom housing. The skirts should be replaced or adjusted if they are torn or worn to a height of more than 1/4 inch (6.35
mm) off the ground.
6 Turn the broom around (end-for-end) and slide it back into the broom housing. Make sure that the Lugs (B) on the broom drive hub (left
side of machine) engage the slots in the broom core.
7 Swing the idler arm assembly back into the broom core and re-install the T-Bolt that holds the idler arm in place.
8 Close and latch the Main Broom Right Access Door (38).
To Adjust the Main Broom Height...
1 Drive the machine to an area with a level oor and set the parking brake (GG).
2 Pull the Main Broom Raise / Lower (ON/OFF) Lever (II) back and slide to the right and up to lower the main broom. Push lightly on the
front of the Drive Pedal (OO) to start the main broom rotating. DO NOT move the machine.
3 Let the main broom run in place for 1 minute. This allows the broom to polish a “strip” on the oor. After 1 minute, raise the broom,
release the parking brake and move the machine so that the polished strip is visible.
4 Inspect the polished strip on the oor. If the strip is less than 2 inches (5.08 cm) or more than 3 inches (7.62cm) wide, the broom needs
to be adjusted.
5 To adjust, loosen the Main Broom Adjust Knob (JJ) and slide forward or backward to lower or raise the Main Broom. The farther the
Knob (JJ) travels up in the slot, the lower the Main Broom will be. Tighten Knob (JJ) after adjustment is complete.
6 Repeat steps 1-5 until the polished strip is 2-3 inches (5.08-7.62cm) wide.
The width of the polished strip should be the same at both ends of the broom. If the strip is tapered, move the machine to a different
area and repeat steps 1-5. If the polished strip is still tapered, contact your Nil sk-Advance Dealer for service.
RIGHT SIDE VIEW OF BROOM HOUSING