


www.airkinglimited.com
984856M1 Rev. A 9-06
3 of 4
CAUTION: CHECK TO CONFIRM THAT ALL CONNECTIONS
ARE TIGHT, INCLUDING THE GROUND, AND THAT NO BARE
WIRE IS VISIBLE AT THE CONNECTIONS, EXCEPT IN THE CASE
THAT A BARE WIRE WAS USED FOR THE GROUND WIRE.
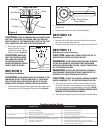
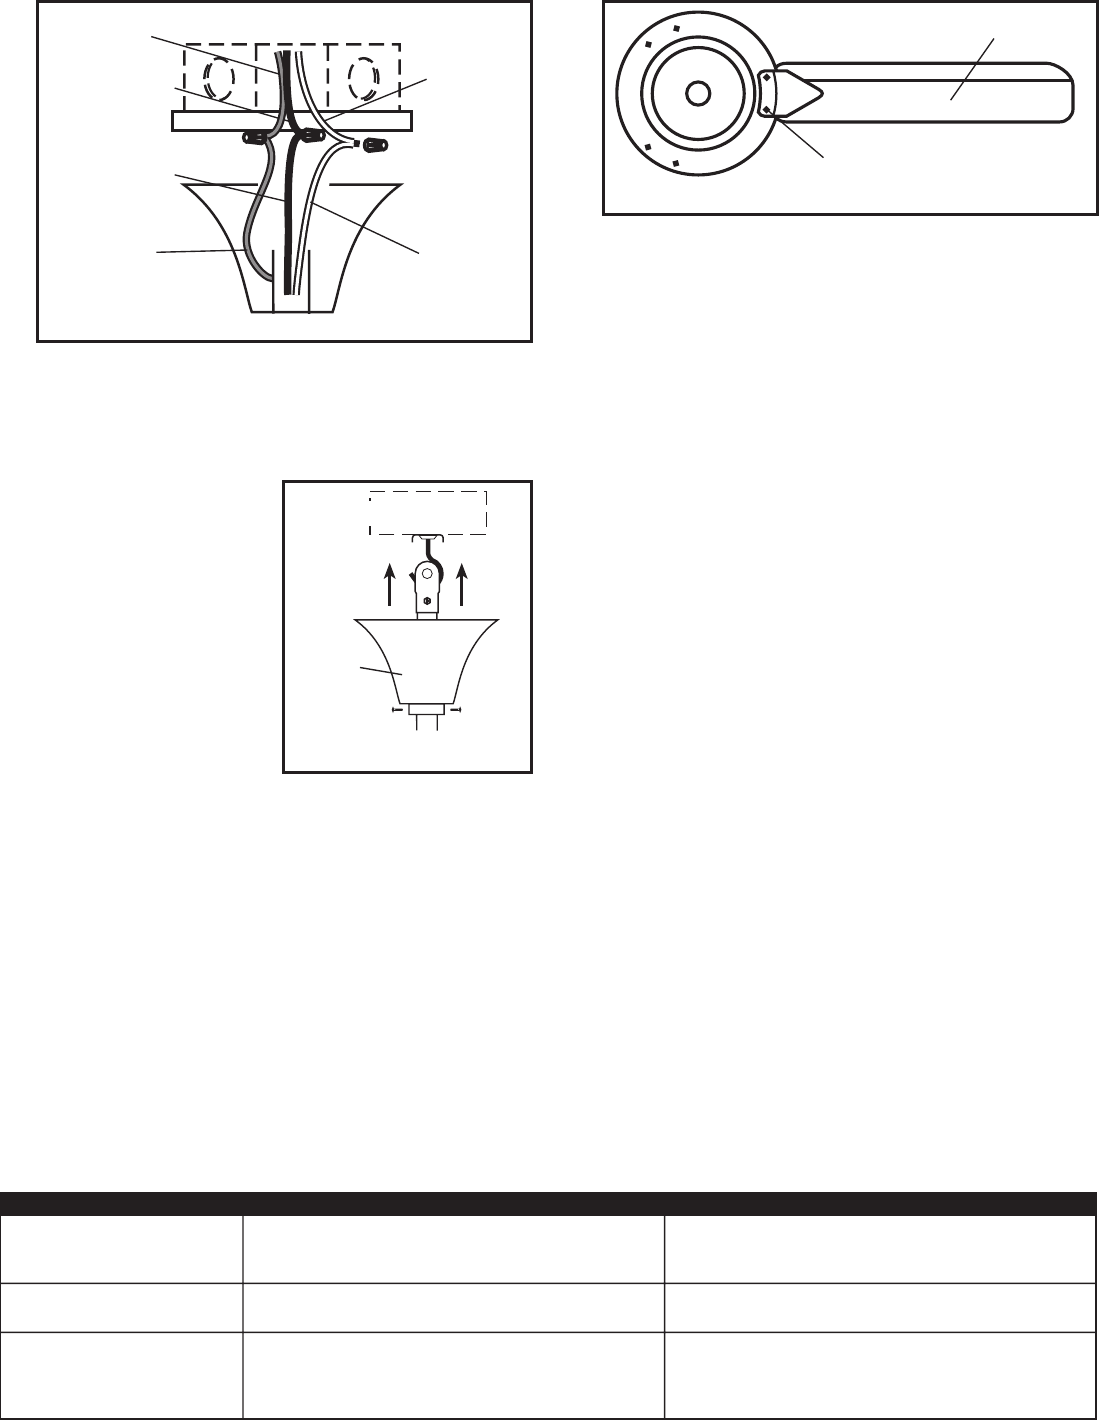
2. Slide upper canopy up the
downrod until it is snug
against the ceiling. Tighten
both set screws. (Figure 5).
CAUTION: MAKE SURE
THAT THE ELECTRICAL WIRES
ARE COMPLETELY INSIDE THE
ELECTRICAL BOX AND NOT
PINCHED BETWEEN THE CEILING
CANOPY AND THE CEILING.
SECTION 5
Installing the Blades
CAUTION: THE BLADES SHOULD BE ATTACHED TO THE
FAN MOTOR AFTER IT IS HUNG AND WIRED. IF THE BLADES
ARE ATTACHED WHILE THE MOTOR IS ON THE FLOOR, THE
BLADES COULD GET BENT, CAUSING THE FAN TO WOBBLE.
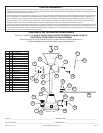
1. Insert one screw through the spring washer, paper washer and
into the motor hub. Do not tighten fully at this time (Figure 6).
Figure 4
Troubleshooting Guide
Trouble Probable Cause Suggested Remedy
1. Fan will not start 1. Fuse or circuit breaker blown or OFF. 1. Check main and branch fuse or circuit breaker.
2. Loose power connections. 2. Check line wire connections to the fan.
3. Wall Control in the off position. 3. Turn wall control to desired setting.
2. Fan sounds noisy 1. Screws securing fan blades to motor housing are loose. 1. Check to be sure screws are tight.
2. Wire nuts inside electrical box are rattling. 2. Check wire nut connections in electrical box.
3. Fan wobbles or shakes excessively 1. Screws securing fan blade brackets to motor housing are loose. 1. Check to be sure screws are tight.
2. Fan blades not seated properly 2. Check that blades are seated firmly to top of motor housing.
3. Fan blades out of balance. 3. Interchanging adjacent (side-by-side) blade pairs can redistribute the
weight and result in smoother operation.
Ground
Ground
Hot (Black)
White
Supply from home
White
Hot (Black)
2. Install second screw in the same manner, then tighten both
screws fully.
3. Repeat steps 1 and 2 for the 2 remaining blades.
SECTION 10
Operation
1. Restore electrical power to the wall switch by turning the
electricity on at the main fuse box.
2. Check the operation of the fan by turning on the wall switch.
SECTION 11
Maintenance and Cleaning
CAUTION: MAKE SURE POWER IS SWITCHED OFF AT
SERVICE PANEL BEFORE SERVICING THE UNIT.
WARNING: DO NOT DEPEND UPON THE FAN’S CONTROLS
AS THE SOLE MEANS OF DISCONNECTING POWER WHEN
INSTALLING OR SERVICING THE FAN. ALWAYS TURN POWER
OFF AT THE MAIN FUSE BOX.
WARNING: DO NOT USE WATER WHEN CLEANING. IT
COULD DAMAGE THE MOTOR OR BLADES AND CREATE THE
POSSIBILITY OF AN ELECTRICAL SHOCK OR FIRE.
CAUTION: DO NOT USE GASOLINE, BENZINE, THINNER,
HARSH CLEANSERS, ETC., AS THEY MAY DAMAGE THE FAN.
1. Use only a soft brush or lint free cloth to avoid scratching
the finish. Abrasive cleaning agents are not required and
should be avoided to prevent damage to the finish. NEVER
USE ANY ABRASIVE PADS OR SCOURING POWDERS. NEVER
IMMERSE ELECTRICAL PARTS IN WATER.
2. The fan is permanently lubricated and does not require oiling.
Figure 6
Blade
Screw, Spring Washer,
Paper Washer
NOTE: Wires omitted
from figure for clarity
Figure 5
Screw
Upper
Canopy
Electrical Box
from fan