


Page 4
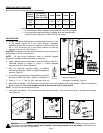
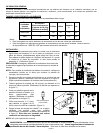
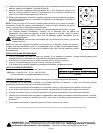
8. Wipe off the bulb glass with the supplied alcohol wipe. Then insert the bulb
through the center hole of the mounting base. (See Figure 5) The power cord
must be 90° to the view port hole on the mounting base.
9. With the ballast pressed against the mounting base, rotate the ballast clockwise
90°.
10. Plug the power supply cord into a standard electric wall outlet. Check bulb
operation by looking through the view port hole. NOTE: The view port hole is
made of glass and will not allow any UVC rays to pass through. A blue glow
should be seen in the duct.
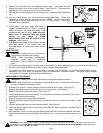
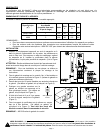
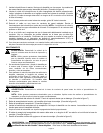
11. If blue glow is not seen, make sure base is
properly installed onto duct. There is a proving
switch located on the base that needs to be
seated properly onto the duct. Make sure that
when base is mounted that the plated
washer on the switch is raised
approximately 3/16” and the switch is fully
engaged. (See Figure 6)
12. With standard duct tape or like material, seal all
joints and seams of the plenum near the
mounting location to reduce any direct viewing
of light.
MAINTENANCE
WARNING: Unplug unit from outlet before
commencing inspection and cleaning.
NOTE: Wear disposable, non-absorbent
protective gloves prior to inspection
procedure in case of accidental breakage of
glass.
1. We recommend inspecting and cleaning bulb at least every 6 months depending upon your home environment and
condition of conventional filters and duration of use and their replacement cycle.
2. To maintain the bulbs maximum output intensity , replace your Air+Health™ Air Purifying System bulb annually,
depending upon your home environment using the replacement procedure below. The bulb should operate
continuously for maximum bulb life and light effectiveness.
REPLACEMENT PROCEDURE
WARNING: Unplug unit from wall outlet before starting replacement procedure.
NOTE: Wear disposable, non-absorbent protective gloves prior to replacement procedure
in case of accidental breakage of glass.
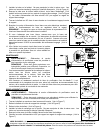
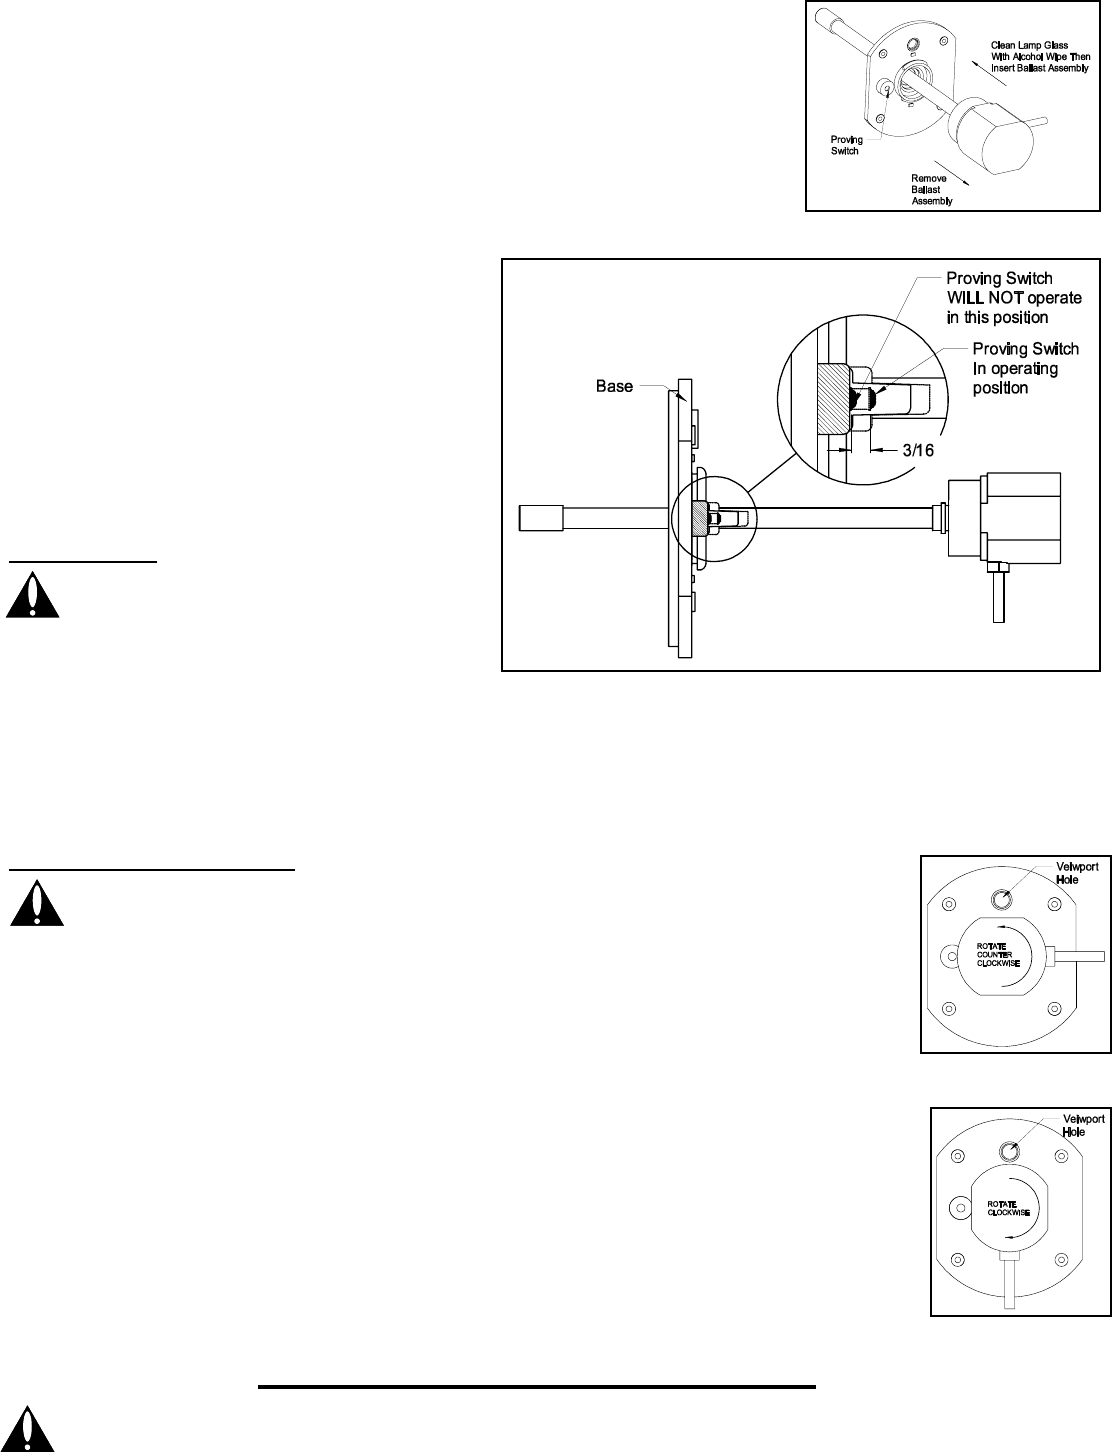
1. Rotate the Air+Health™ ballast assembly counter-clockwise until it stops. (See Figure 7)
2. Remove the ballast assembly and bulb from the mounting base. (See Figure 5)
3. Remove the bulb from the bulb socket. (See Figure 4)
4. Install replacement bulb into bulb socket. Do not handle the bulb with bare hands. Oils on the
hands tend to reduce bulb intensity.
5. Wipe off the glass with the supplied alcohol wipe.
6. Position the ballast assembly power cord 90° to the view port hole on the mounting base. (See
Figure 7)
7. Slide the bulb thought the hole in the mounting base. (See Figure 5)
8. Press the ballast against the mounting base and rotate the ballast assembly clockwise until it
stops. (See Figure 8)
9. After assembly is firmly in place, plug the power supply cord into a standard electrical wall outlet.
Check bulb operation by looking through the view port hole. A blue glow should be seen in the
duct.
Figure 7
Figure 8
Figure 5
WARNING: Never expose eyes or skin to UVC light from any source. Looking directly at the UVC light may cause permanen
t
eye damage or blindness. Never operate the Air+Health™ Air Purifying System out of the plenum. Avoid touching the
glass portion of the bulb with your hands.
Figure 6