


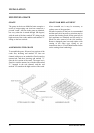

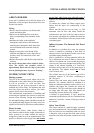

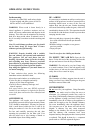
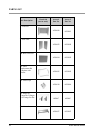

Fig. 7 Fully Closed Fig. 8 Fully Open
Even when all the slots are completely shut a
"bleed" of secondary air will be maintained
ensuring that inflammable gases are burnt off.
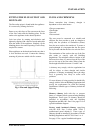
DISASSEMBLE AIRWASH
The Aarrow air wash may be disassembled for
cleaning or adjustment. To achieve this, the
following procedure should be followed:
•The door should be GENTLY lifted off its hinges
so that the below operations can be carried out on a
workbench or similar level surface.
This should be done when the appliance is cold.
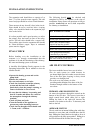
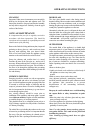
Fig. 9 Rear of the fire door
•Remove the glass by unscrewing the top and
bottom nuts.
•Carefully remove the glass and lift airwash cover
off.
•Unscrew the airwash spring knob from the sliding
plate.
•Remove assembly from the appliance.
•Clean and/or adjust.
•Refit using reverse procedure.
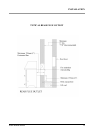
MULTI - PURPOSE OPERATING
TOOL
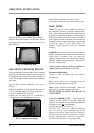
Your Aarrow stove comes with a multi-purpose
tool, which is used for, riddling, setting the
multifuel grate position and for emptying the ash
pan. (Fig. 10)
Fig. 10
RIDDLING
Use the operating tool for setting the grate in the
coal burning position or the wood burning position.
This means that effective de-ashing (see page 19)
takes place, and also allows the grate to be set in the
coal burning or wood burning position, as
indicated on the right hand side of the appliance.
FIRE DOOR GLASS
In the event of the door glass being broken it can
easily be replaced:
•The door should be GENTLY lifted off its hinges
so that the below operations can be carried out on a
workbench or similar level surface. This should be
done when the appliance is cold.
•Unscrew the four nuts, on the inside of the door.
•Remove the upper airwash cover and the two
lower glass clips.
•Carefully remove any pieces of broken glass, and
sealing gasket wearing suitable gloves.
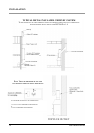
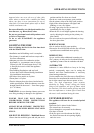
REFIT NEW GASKET
•The fitting of new gasket is shown below (Fig.11a)
Fig. 11a fitting new door gasket
•Re-seat the new glass, ensuring the sealing gasket
is flat and in contact with the glass (Fig.11b)
Acorn Multifuel Stoves 17
OPERATING INSTRUCTIONS