LCKP Installation Notes
08901667 Rev.A 6/30/2005
Xantech Corporation, 13100 Telfair Avenue, Second Floor, Sylmar, CA 91342-3573
Sales: 800.843.5465 • Fax: 818.362.9506
Installation Instructions:
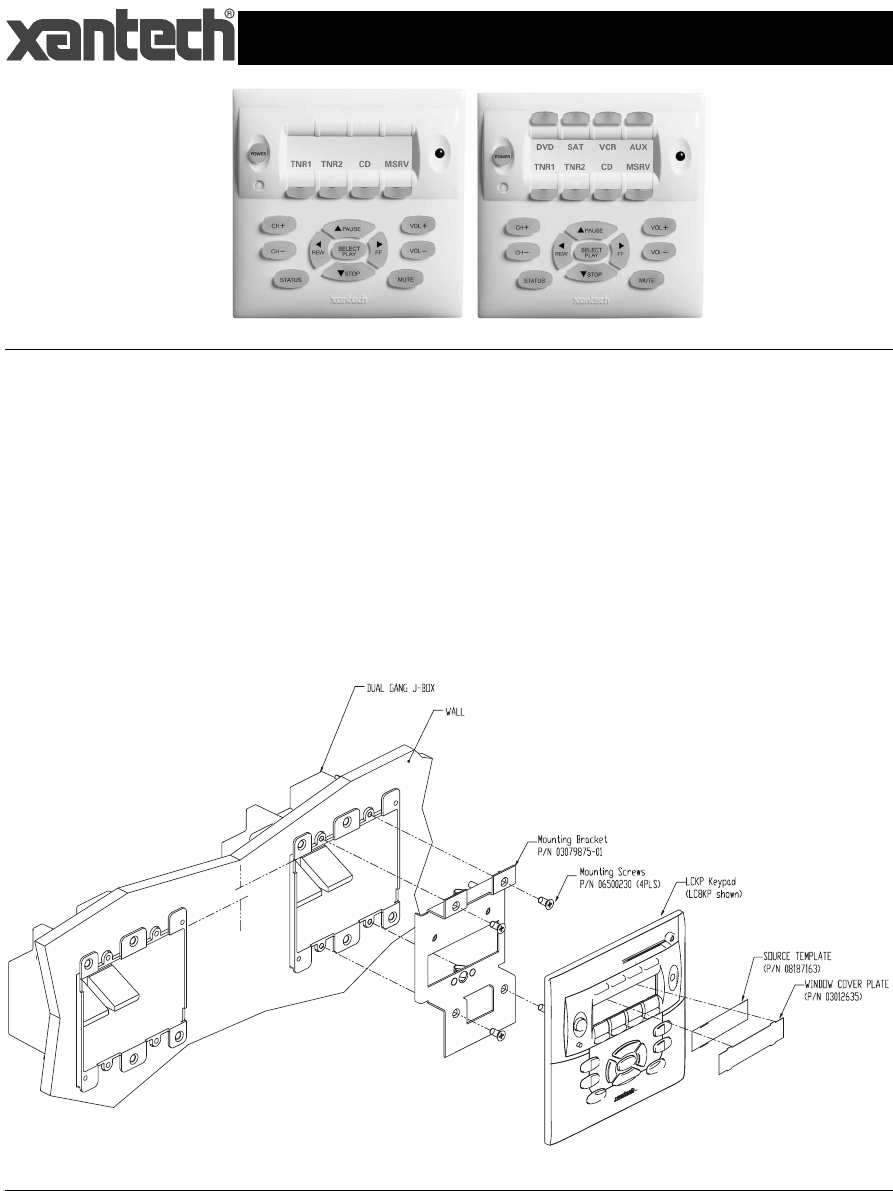
1. Install standard Dual-Gang J-Box or similar into wall. Note: When installing Keypad next to
existing J-Box in wall, LCKP J-Box must be mounted 3/8” higher than any adjacent box.
2. Affix LCKP Mounting bracket (P/N 03079875-01) to the Dual Gang J-Box as shown in
Figure 1 above using four 8-32 screws (included).
3. With the Controller/Amplifier turned off, connect the RJ45 terminated cable from MRC/MRA
Controller to port labeled CONTROLLER on rear of LCKP Keypad. (Note: If using a
Secondary Keypad in the Zone, connect another RJ45 terminated cable to the port labeled
Expansion on the rear of the keypad). See MRC/MRA Controller/Amplifier manual for
proper CAT5/RJ45 Termination.
4. Add or remove jumpers according to the MRC Controller/Amplifier Instruction Manual
5. Firmly snap the LCKP Keypad into the bracket.
3/8" Offset
Figure 1: LCKP Keypad Mounting Diagram
Source Label Installation:
1. Print out the desired Source Labels using the perforated Source Template sheet.
2. Place Source Template over the Source Window area of the LCKP Keypad.
3. Insert the top ‘tabs’ of the Window Cover Plate into the top section of the LCKP window.
4. Push the bottom of the Window Cover Plate locking the Source Label and Cover Plate into
place.
LC4KP Keypad LC8KP Keypad