1
Modules & Connecting Blocks
INSTALLATION INSTRUCTIONS
794 & 797
INTERFACE MODULES
The Model 794 or 797 allows any of the Xantech 3-wire IR receivers, keypads and control systems to
connect directly to the serial remote control input jack found on many audio/video components. This
eliminates the need for attaching an emitter to the front panel of the unit. The installer, by choosing the
correct model number, suffix number and DIP switch settings, may use these modules to control many
components.
INSTALLATION
• Review all tables 1, 2, & 3 to make sure you select the correct interface. The model number suffix generally
specifies which INTERFACE CABLE is supplied with the unit (see Tables 1, 2 & 3).
•
Do Not
extend the cable supplied with the 794 or 797. The unit may not operate reliably when a longer
cable is used.
•
Do Not
plug the 794 or 797 into anything until all switches are set.
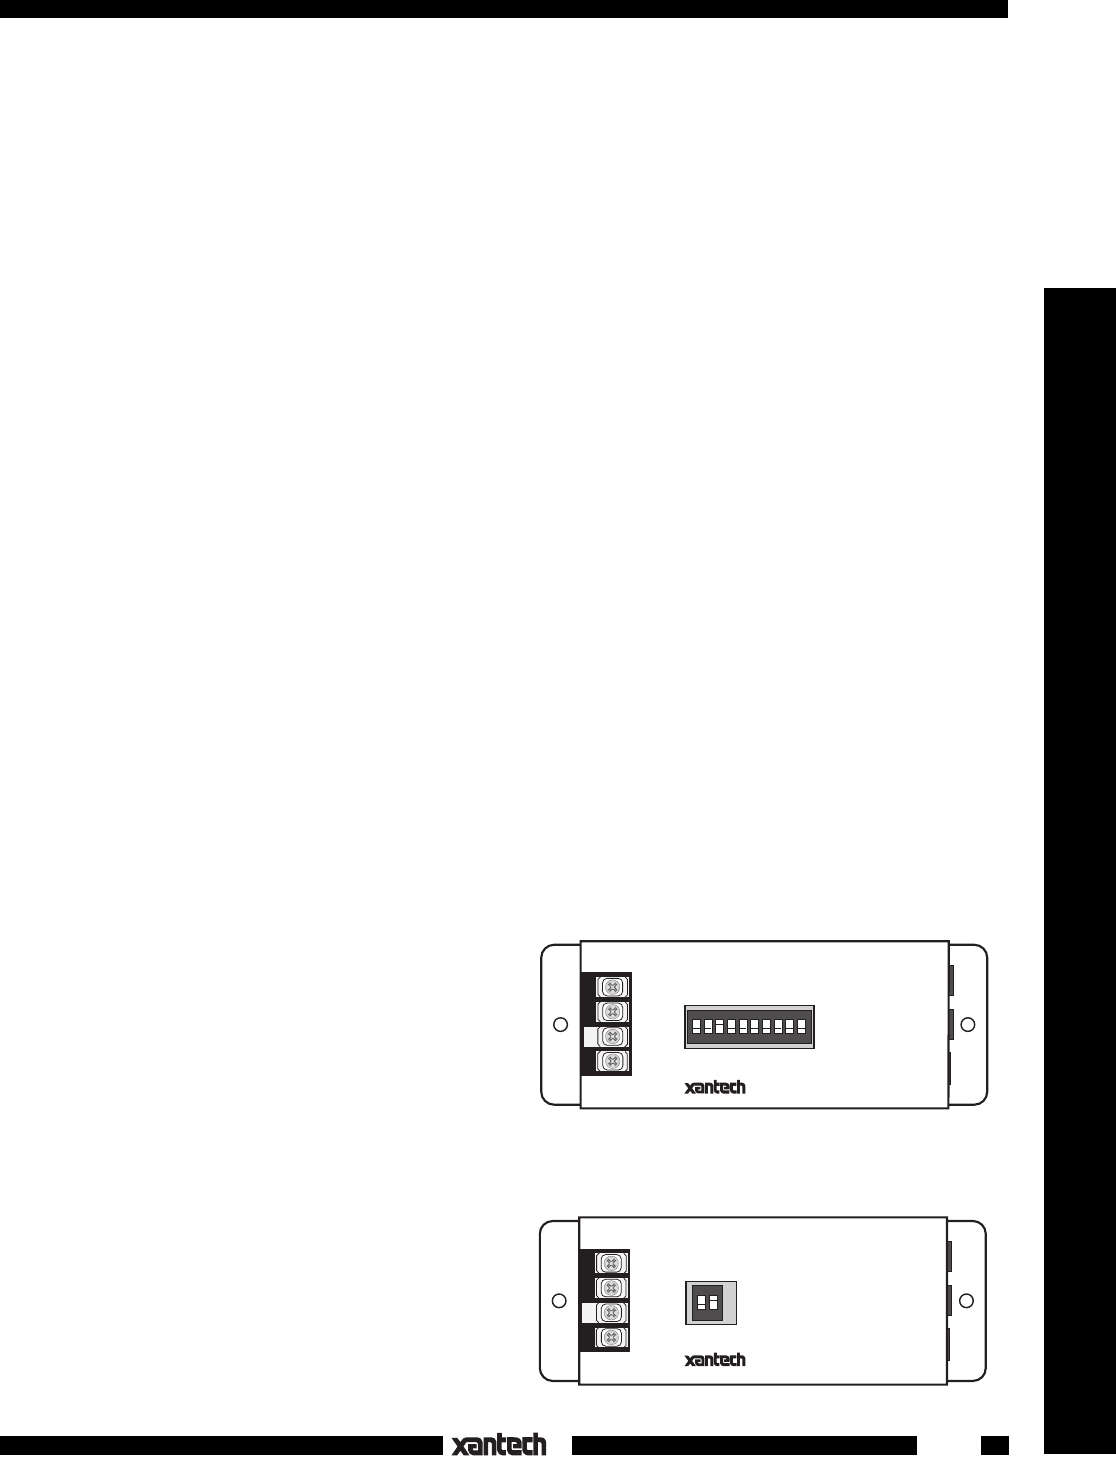
• There are ten DIP switches on the 794 and two on the 797. When the 794 or 797 is driven by a Model
390 Blast-IR or Model 792 Power Module, switch S1 must be in the 0 (off) position.
• The 794 and 797 are designed to supply power to Xantech 3-wire IR Receivers and keypads. Connect
them directly to the IN, GND1 and +12V terminals. The IN and GND1 terminals may also be connected
to any Xantech emitter output port.
• Use a 781RG or 782-00 power supply to power the 794 and 797 by plugging them into the +12V jack.
You may also power them from other Xantech devices in a system by running +12 V and Gnd jumper leads
from the other device to the +12V and GND2 terminals on the 794 and 797.
• If the plug on the 781RG or 782 power supply does not fit the +12V jack on the 794 or 797, simply remove
the plug and connect the white striped wire to +12V and the black wire to GND2 on the 794 or 797
terminals.
MODEL 794
• Switch S3 should be in the 1 (on) position in most
installations.
• When multiple 794’s are connected, or when ground
loops are encountered, set S3 to the 0 (off) position.
• Switch S2, and S4 through S10, should be set ac-
cording to Table 1, page 2. For products not listed,
contact Xantech Technical Support. New versions
are added from time to time.
MODEL 797
• Switch S2 should be in the 1 (on) position in most
installations. When multiple 797’s are connected or
when ground loops are encountered, set S2 to the 0
(off) position.
• In general, set S1 and S2 according to Table 2, next
page. For products not listed, contact Xantech Tech-
nical Support. New versions are added from time to
time.
OUTPUT
+12V
IR IN
GND1
GND2
+12V
1 (ON)
0 (OFF)
1 2 3 4 5 6 7 8 910
ON
SENDER/
EMITTER
12345678910
794
UNIVERSAL INTERFACE
Fig. 1 794-00
IR IN
GND1
GND2
+12V
OUTPUT
+12V
1 (ON)
0 (OFF)
SENDER/
EMITTER
12
1 2
ON
797 SERIES
UNIVERSAL INTERFACE
Fig. 2 797-00
