


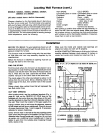
Locating Wall Furnace (cont.)
MODELS 1403622, 1403621, 2203622, 2203621,
3003622 and 3003621
(All other models have a built-in thermostat)
Choose a location for the thermostat about 5 feet above
the floor on an inside wall. The thermostat wire supplied
with your furnace is 20 feet long, which should be enough
to run up through the attic so the thermostat can be a max-
imum of 16 feet from furnace measured in a straight line,
or approximately 12 feet from the furnace if the wire is run
under the floor. The thermostat should be sensing average
room temperature, avoid the following:
HOT SPOTS: COLD SPOTS:
Concealed pipes or ducts Concealed pipes or ducts
Fireplaces
Registers
TV sets
Radios
Lamps
Direct sunlight
Kitchen
Stairwells - drafts
Doors - drafts
Unheated rooms on
other side of wall
DEAD SPOTS:
Behind doors
Corners and alcoves
After picking a location that meets the requirements, in-
spect the wall, floor and outside areas. Make sure there
are no pipes, wiring, or anything else that would interfere
with furnace or vent or thermostat installation. If required,
move them or pick a new location.
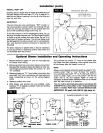
Installation
BEFORE YOU BEGIN: To avoid electrical shock turn off
electrical circuitsthat pass through the wall where you are
going to install the furnace.
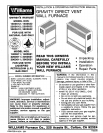
This furnace must be installed using only the vent tube,
air inlet tube and vent cap assembly supplied by the
manufacturer.
Before the furnace is installed an opening must be cut
through the wall for the vent cap.
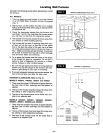
FIND THE STUDS
Find the studs where the furnace is to be placed. Use a
stud Iocator or small finishing nails. Repeatedly drive and
remove a nail into the wall in the area of the stud until you
find it. Then find one side. Leave the nail there. Drive
another nail just on the other side of the same stud.
The inside edge of the other stud should be about 14-1/2
inches from the one found. Drive a finishing nail on the
inside edge of this stud, then another nail on the outside
edge.
Using a level, draw vertical lines that will represent the
two stud center lines.
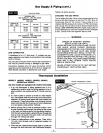
CUT VENT OPENING
After locating studs, use the cardboard template (Fig. 4,
page 8). Line up the CENTER OF STUD lines on the
template with the center lines you have drawn on the wall.
Use the template to draw the 9-1/4 inch diameter circle on
the wall. Then mark the location of the gas supply line.
Using a window, dooror wall corner for reference, measure
tofind where ventwill be on outside wall. Check to be sure
of proper clearances (Figs. 1 and 2, page 6). If necessary,
relocate for proper clearances.
Drill a 1/4 inch hole in the wall at the vent opening center
mark all the way through to the outside. Cut the 9-1/4 inch
diameter hole through inside wall. Using the 1/4 inch hole
as center, cut a matching hole in outside wall. It may be
petter to work from the outside when breaking through
brick, stone or tile.
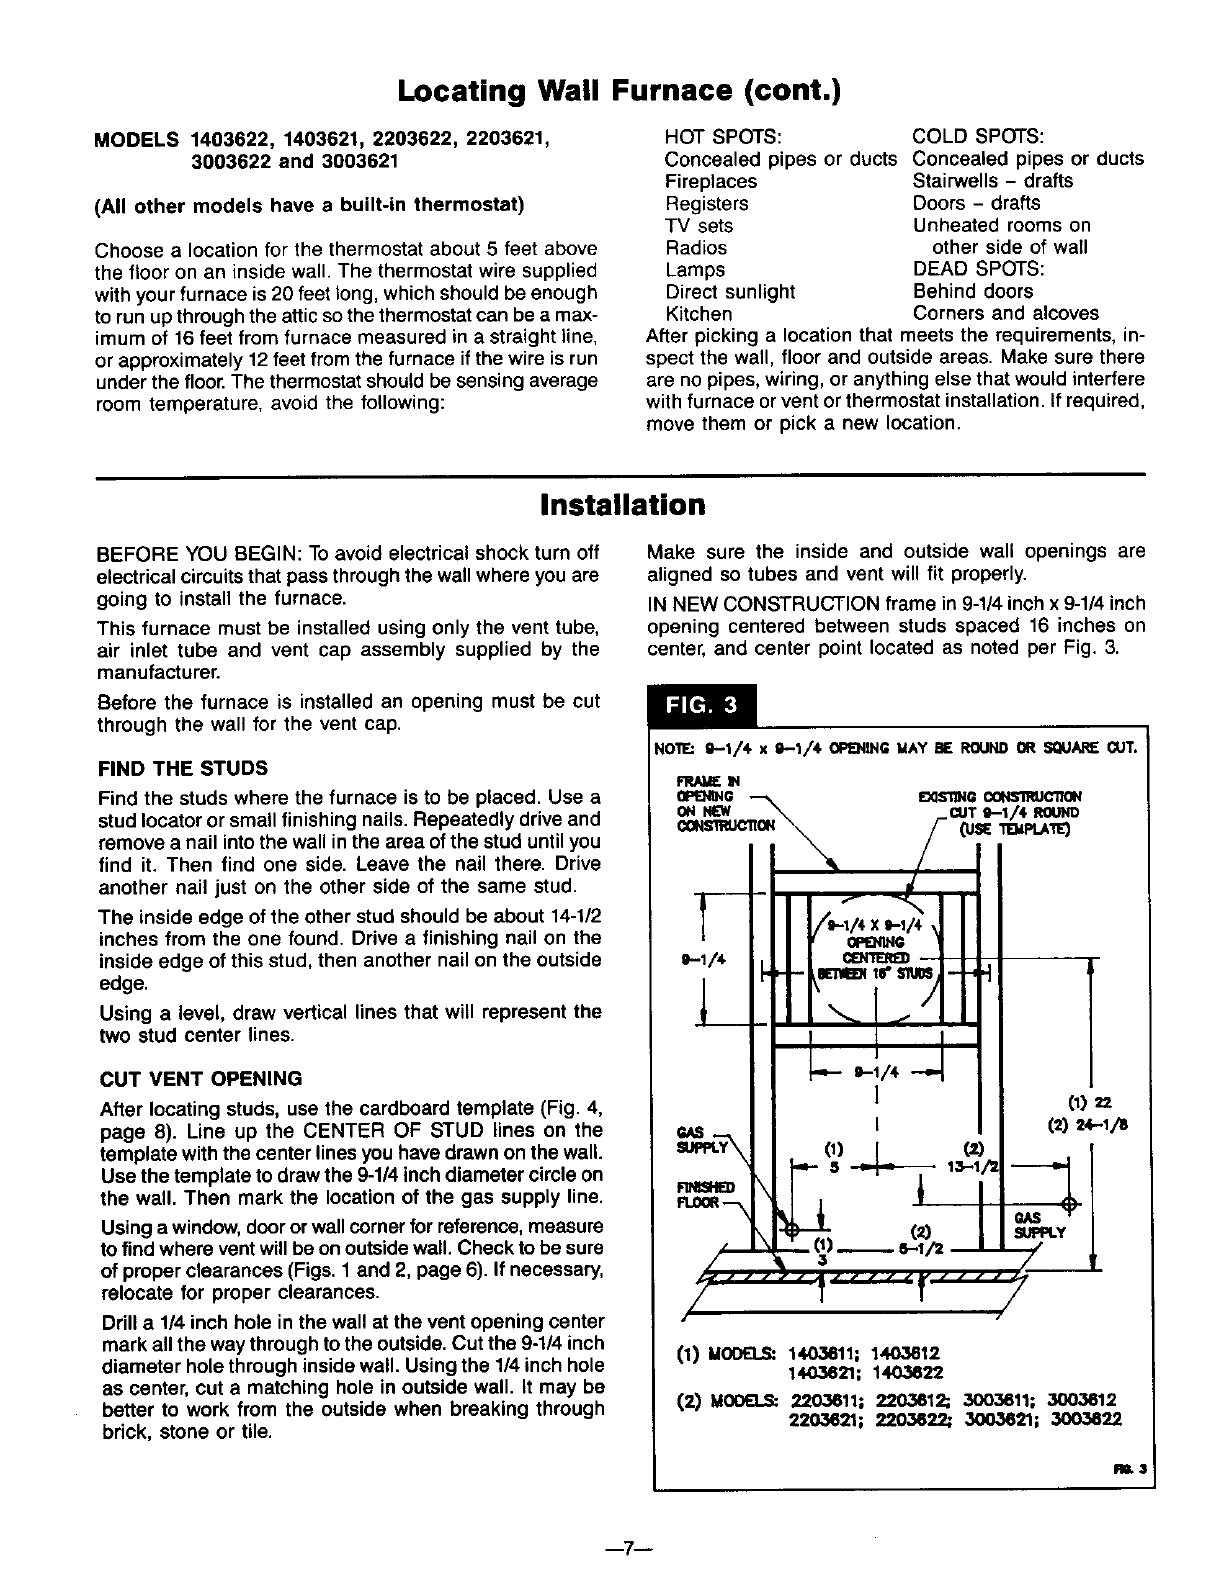
Make sure the inside and outside wall openings are
aligned so tubes and vent will fit properly.
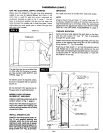
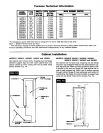
IN NEW CONSTRUCTION frame in 9-1/4 inch x 9-1/4 inch
opening centered between studs spaced 16 inches on
center, and center point located as noted per Fig. 3.
i
NOllE:S-I./,, x 9-1/40I:'£NblG MAYBE ROUNDOR SQUARECUT.
(I) MOD_ 1403611; 1403612
144)3621; 1403622
(2) MOOELS: 2203611; 2203612; 3003611; 3003612
2203621; 2203622; 3003621; 3003622
RL3
--7--