


4
and is accompanied with a continual snapping or arcing
noise, the air cleaner requires attention and may need
to be cleaned.
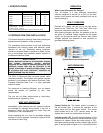
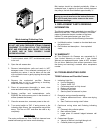
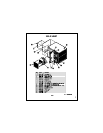
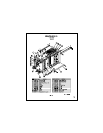
Cell Access Door Knobs (C): The cell access
doorknobs are located on the door near the intake end
of the unit. To open the cell access door, turn the knobs
counter clockwise until it releases from the cabinet.
Arcing (snapping or cracking noise): An occasional
arcing noise may be emitted from the air cleaner. This is
a normal occurrence caused by exceptionally large
pieces of dirt, etc., entering the collecting elements. In
addition, an arcing noise accompanied by a flickering of
the indicating light may be noticed after washing the
cells. Should this occur, allow more drying time. Also,
see “Troubleshooting Chart”, for additional causes of
arcing.
The louvers on the grill are adjustable so the direction of
airflow can be controlled as desired.
NOTE: The unit is equipped with an interlock switch for
your safety. The unit will not operate if the cell access
door is not closed securely.
NOTE: The blower access door is not protected by an
interlock switch. Do not attempt to operate the unit
unless the door is fastened securely.
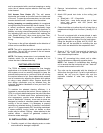
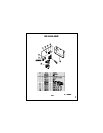
DUCTING APPLICATION
The T5200 air cleaner is designed for free hanging
applications or for limited duct system applications. The
duct systems must be carefully designed to keep the
external static pressure to a minimum while still moving
the required amount of air. Some added static pressure
can be overcome by adjusting the blower drive pulleys
or using a more powerful motor. Capture hoods and
duct design information may be obtained from the
Industrial Ventilation Handbook or from your local Trion
representative.
To maintain the selected cleaning efficiency, it is
important to assure that the total air volume (capacity in
CFM) is uniformly distributed across the entire face area
of the unit. The metal mesh filters, perforated plate or
mist suppressors; provide some resistance to effect
even air distribution. However, since most air ducts are
designed to handle air velocities greater than the rated
velocity of the air cleaner, it is necessary to properly
transition any attached ducting. If possible, a contraction
ratio of 1 in 3 (approximately 20°) should be maintained.
If space prohibits, turning vanes, air baffles or other
means may be utilized. Ducting – where attached to the
cabinet collars – should be gasketed, caulked or
otherwise made watertight.
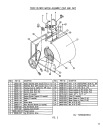
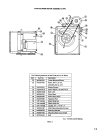
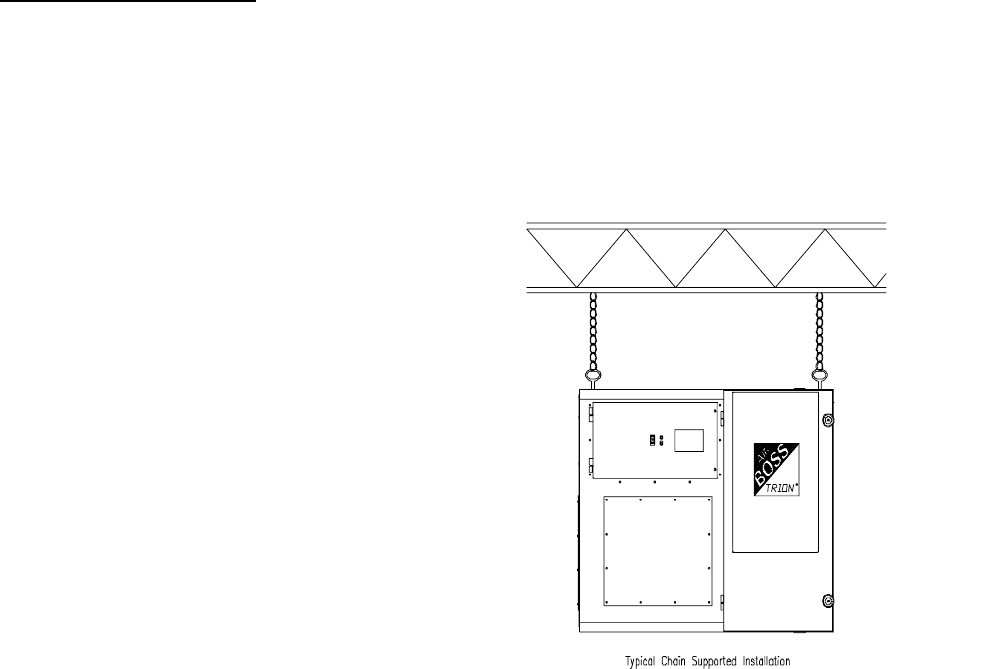
III. INSTALLATION – READ THOROUGHLY
1. Carefully unpack unit from shipping crate or carton
and examine for damage in shipment.
2. Remove ionizer/collector cell(s), pre-filters and
after-filters.
3. Attach 600 pound test chain to the ceiling joist
using:
a. Wood joist – 1/2” –13 eye bolts
b. Metal joist – wrap chain around joist at least
twice and secure with 600 pound test
connecting link
4. Chain should be cut to allow the unit to hang from a
predetermined height from the floor. (Usually 10-12
feet).
5. The unit is equipped with a locator dimple in each
corner on the top and bottom and (1) each on the
approximate mid point edge of the top and bottom..
Using the dimples as a guide, drill (6) 19/32” dia.
Holes that will be required for mounting the eye
bolts, which are attached to the suspension chain.
6. Screw a ½”-13 x 1-1/4” long eye bolt (or larger) in
each hole. The T5200 unit is supplied with weld
nuts at each dimple location.
7. Using 1/2” connecting links, attach unit to chain.
Use turnbuckles on diagonally opposite chains.
NOTE: Foul threads on turnbuckles after leveling
unit to ensure that the turnbuckle will not "“back off"
or loosen and cause the unit to fall.
8. The units can be suspended with the direction of
airflow from the right to left. If a left to right airflow is
desired, the unit may be flipped over and the
eyehooks installed in what was originally the
bottom.