1. INTRODUCTION
Model GS-102
2. LEARN SENSOR TO AAA+
TM
CONTROL PANEL
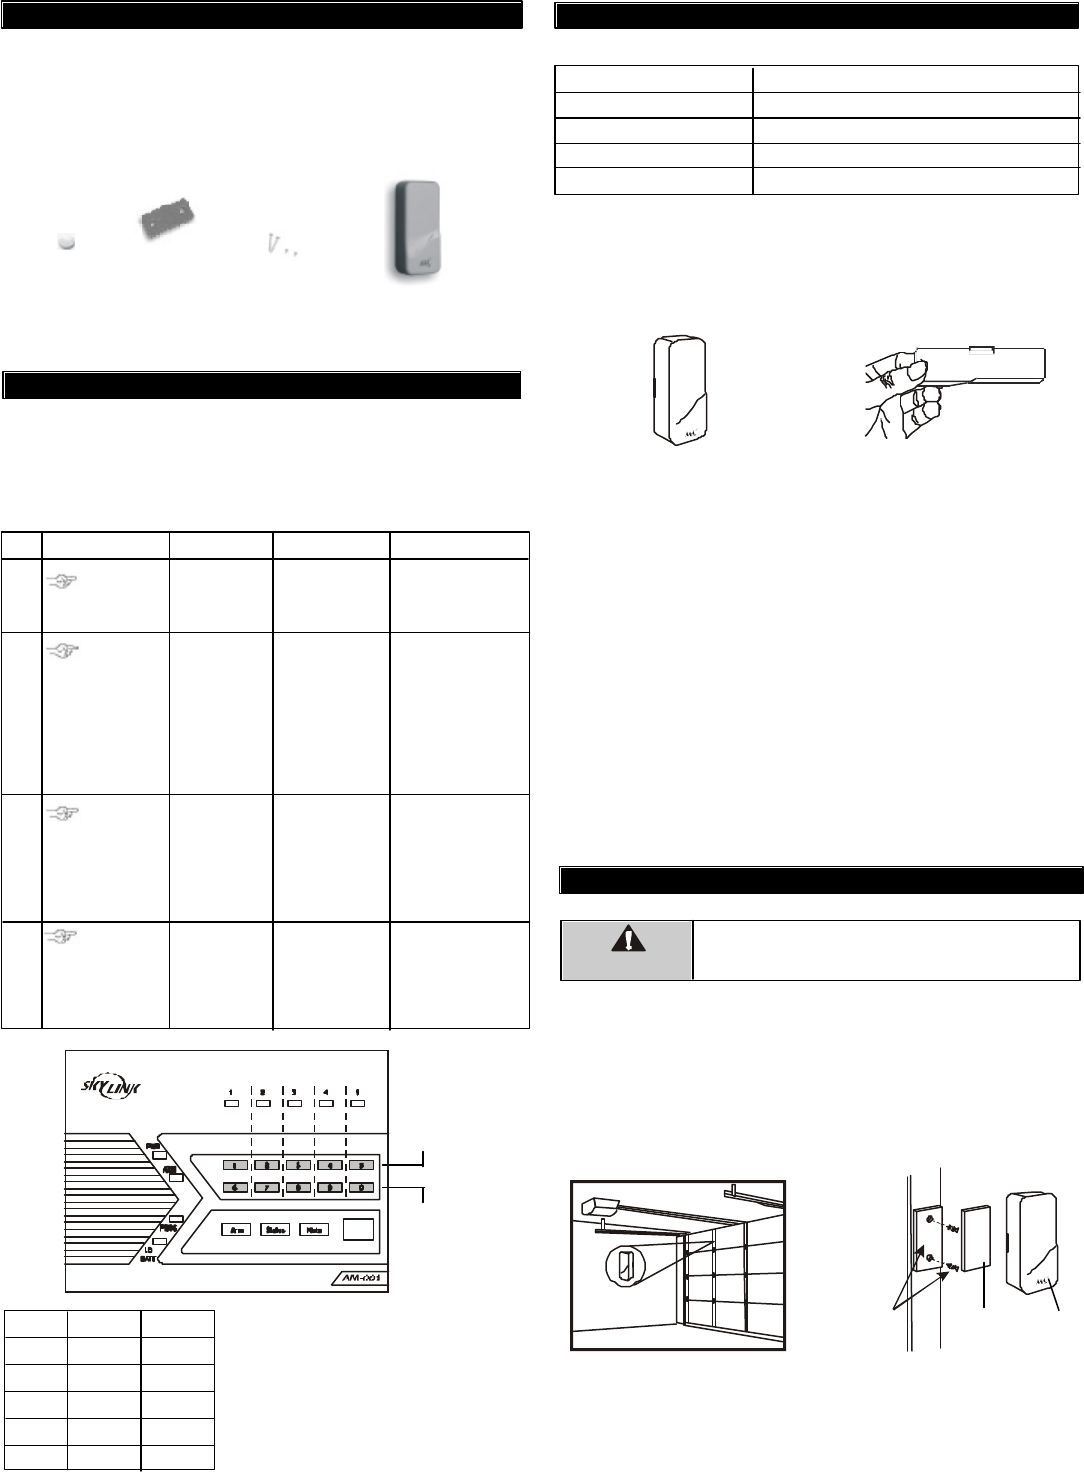
The garage door monitor
TM
sensor is designed to monitor the status of
your garage door and advise you if the door is open. It works in
conjunction with AAA+
TM
Control Panel. When the monitored door is
opened, the control panel will either alert you or alarm will be triggered.
In this package, you should find a garage door monitor
TM
sensor, 3V
lithium battery and other mounting accessories.
Please follow the instructions below to set up the garage door monitor
TM
sensor.
3V Lithium
battery
Mounting plate
2 pcs 3.5 x 18 screws
2 pcs 3.5 x 12 screws
In order for the sensor to communicate with the control panel properly,
the sensor must be programmed to the control panel. Follow the brief
instructions below or refer to the detail instructions from the AAA+
TM
User’s Instructions to program the sensor to the control panel. Before
proceeding, please remove the battery isolator from the sensor.
3. INSTALLATION
4
[PROG]
[MPIN]
Enter Program-
ming mode
Enter master
password to
programming
mode
3 beeps for valid
password. 1 long
beep for invalid
password.
[3]
Select learn
sensor
programming
[0] to [9]
After you have
selected the zone,
that zone LED will
be on.
Activate sensor
After [3] is entered,
some zone LEDs will
flash once, or twice,
some will be off. The
zone LEDs represent
whether that zone is
already occupied by
another sensor.
**See Table A below.
Select sensor
location
Refer to the dia-
gram below to
select the sensor
location, which
includes the zone
and sensor
number.
Once the sensor
is activated, the
signal will be trans-
mitted to the Con-
trol Panel which
will be stored.
You will hear [Zone X
Sensor Y Accepted ],
where X and Y are
the zone and sensor
numbers you have
selected.
Activate the
sensor by tilt-
ing the sensor
from horizontal
to vertical
position
Step Keys Function Description Note
1
2
3
Zone 1
SENSOR 1
Button [1]
SENSOR 2
Zone 2
Zone 3
Zone 4
Zone 5
Button [2]
Button [3]
Button [4]
Button [5]
Button [6]
Button [7]
Button [8]
Button [9]
Button [0]
This row :
Buttons for
Sensor 1
Zone LED :
Flash once
This row :
Buttons for
Sensor 2
Zone LED :
Flash twice
®
After learning the sensor to the control panel, you may test the communi-
cation by placing the sensor in vertical position & horizontal position.
2. LEARN SENSOR TO AAA+
TM
CONTROL PANEL (CONT)
The control panel will announce the sensor's status, such as "Zone 1
Sensor 1 Triggered", and corresponding zone LED will flash and buzzer
will beep. If the magnetic contact is closed, the beeping will stop.
Note:
Each location is allowed to learn one
sensor only. Learning a sensor to a
location will clear the memory of the
sensor previously learnt.
Sensor
ZONE LED DESCRIPTION
Off Zone is not occupied by any sensor
Flashes once This zone is occupied by sensor 1.
Flashes twice This zone is occupied by sensor 2.
Flashes once, then twice This zone is occupied by sensors 1 and 2.
** Table A: Zone LED status for learning sensors.
Garage Door
Monitor
TM
Sensor
If the sensor is face up in the vertical position, the control panel will not
beep, indicating the sensor is in a closed position.
If the sensor is face down in the horizontal position, the control panel will
beep and a zone LED will flash to indicate a door is open.
You can change the orientation of the sensor and you should see the
change in response of the receiver. If the sensor and receiver are
working properly in close proximity, you can now begin to install the
sensor onto your garage door.
NOTE: It is normal to hear a rattle from the sensor when tilted or
rotated to another position.
Vertical
Horizontal
Attached the sensor to the garage door with double-sided foam tape if the
surface of your garage door is smooth and clean enough to provide a
good adhesive surface, such surface can usually be found on a metal
garage door. Please ensure the surface is smooth and clean.
For wooden garage doors, it is recommended to use the mounting plate
and screws as well.
Unplug the power cord of your garage door opener
before installation to ensure power is not connected.
WARNING
Note: Mount the sensor near the top of the garage door for best results.
Note: Ensure you straighten up the antenna on the receiver to receive the best
possible reception.
Double-sided
foam tape
Mounting plate
and screws
(optional)
Sensor
When the sensor is in vertical position,
the receiver will not beep.
When the sensor is in horizontal position, the
receiver will beep and a zone LED will flash.


