


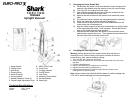
Using the Vacuum with the Attachments
Maintenance & Care
1. Place vacuum in its upright position.
2. Make sure that the vacuum cleaner is NOT plugged into the electrical
outlet.
3. Turn the carpet adjustment knob to the high pile position.
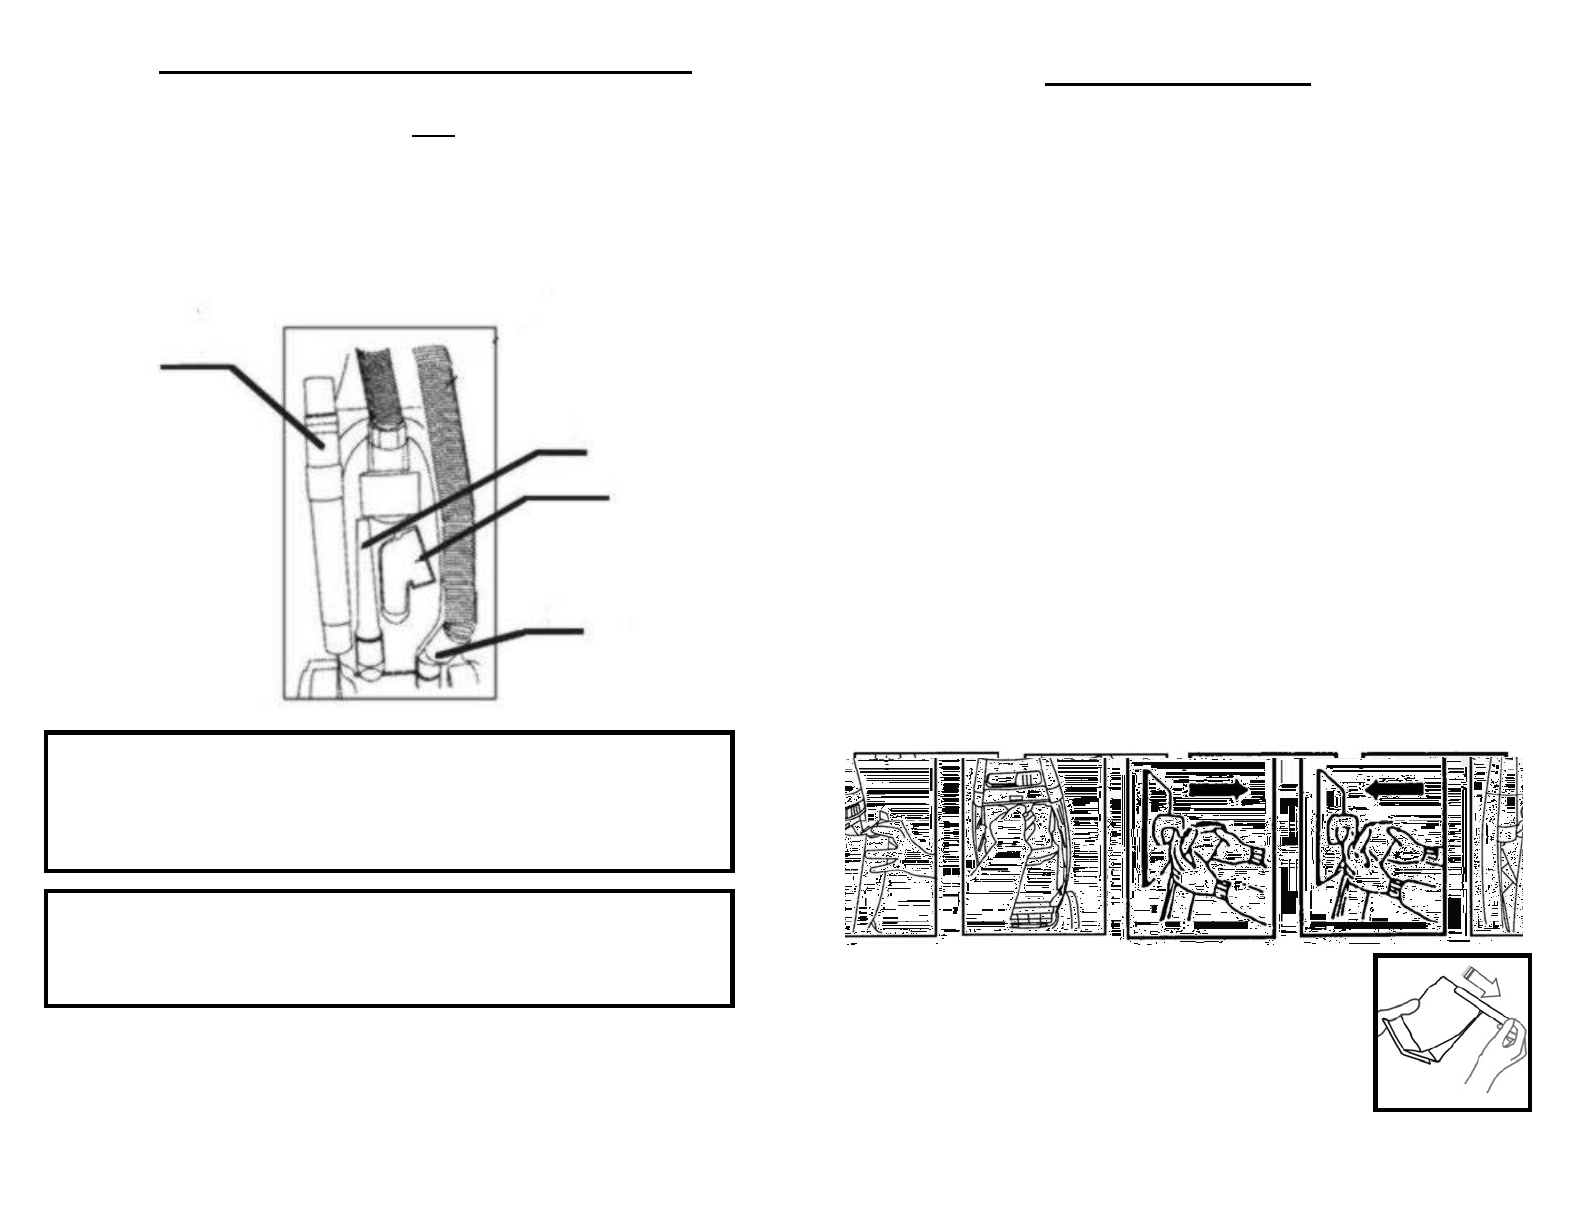
4. Pull the hose connector from the rear of the vacuum and push the
desired attachment firmly onto the end of the hose.
5. If additional length is required, attach one or both of the extension tube
to the end of the hose and then attach the crevice nozzle or dusting
brush to the end of the extension tube.
WARNING: When the vacuum is turned on, the beater brush will
continue to rotate. Avoid tipping the vacuum or setting it on
furniture, fringed area rugs or carpeted stairs while you are using
the hose with the attachments. Avoid leaving the vacuum is one
place for an extended period of time, particularly on thick carpet.
Extension Tube (2)
Crevice Nozzle
Dusting Brush
Hose Connector
For best cleaning results, the dust bag should be changed often. The use
of powder carpet fresheners can decrease the effectiveness of the dust
bag filtering system by clogging the bag and not allowing air to flow though
properly. We recommend that hard objects, pins, broken glass, paper
clips, etc. be picked up from the floor before vacuuming. Although, your
vacuum will pick them up, they could do severe damage to the vacuum.
Use genuine SHARK dust bags, belts and filters only, to insure top
performance from your vacuum.
1. Changing the Dust Bag:
Your vacuum comes with both paper bags and a reusable cloth bag. To
change bags:
A) Unplug power cord from wall outlet.
B) Remove the front panel of the unit.
C) Remove the old dust bag by holding the cardboard tab and pull
towards you. Remove carefully to avoid dust/dirt spilling from dust
bag.
D) Take a new dust bag and while holding the cardboard tab push the
bag over the opening of the dirt discharge tube until it is seated
against the rear of the enclosure.
E) Make sure that the entire bag is correctly inserted inside the
housing, before replacing the front panel. Always check the pre-
motor and post motor filters every time you change the dust bag.
F) Once the new dust bag is in place, replace the front panel by
aligning the bottom locking tabs with the slots in the body, close
cover slowly allowing the front panel to snap in place. The latch will
self lock.
IMPORTANT: If the bag is not inserted correctly into the housing,
the cover will not close. Please make sure that the bag is inserted
all the way in until the latch catches otherwise front cover will not
close.
2. Emptying the Cloth Dust Bag:
A) Hold the dust bag over a dustbin. Remove the
clip by sliding it off the dust bag sideways.
B) Shake the contents of the dust bag into the
dustbin.
C) Close the dust bag by sliding the clip back onto
the bottom edge of the dust bag.
3 4