Humidifier Operations (continued)
CAUTION: Keep your humidifier clean. While
humidifiers do not cause colds, some studies sug-
gest that dirty humidifiers can cause cold like
symptoms in some people. To avoid this, we rec-
ommend you clean your humidifier weekly with
Humidifier Cleaner 32-7283 and use Bacteriostat
32-14900. These are available at your local Sears
store.
DRY ROOM AIR
N
HUMIDIFIEOAIR DRYROOMAIR
\to t
WATER
Assembly Instruction
(14 Gallon-Model 758.144240)
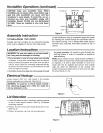
Included with this humidifier are two decorative handles
which must be _.t-taelibd to the top of the side panels.
Location Instructions
I WARNING: For your own safety, do not use humidi- Itier if any parts are damaged or missing.
I
1. Place humidifier in area of house where most humidity
is needed, or one which would likely result in moist air
being circulated throughout the house such as near a
cold air return. Moist air (humidity) produced will dis-
perse into the whole house, but area closest to unit will
have the highest humidity.
2. Humidifier should sit at least two inches away from wall
Figure 2
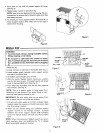
Locate handle and using a screwdriver attach the handle
by inserting the screws through the pre-drilled holes in
the cabinet housing. This is easiest with motor support
removed (see unpacking instructiod_-printed o'n top of
carton).
for proper operation. Air needs to enter through rear
and top louvers in order for humidifier to operate at
peak efficiency.
NOTE: Due to release of cool, moist air from humidifier, it
is best to direct air away from home's thermostat and hot
air registers. It is best to keep humidifier in front of an
inside wall. Hot air registers and cold air from outside
walls can affect the efficiencies of the controls. Unit
should not be placed where warm air from a hot air regis-
ter blows directly on unit.
Electrical Hookup
Locate nearest 120V A.C. wall socket in the location
desired, preferably on inside wall. (See Fig. 3)
WARNING: To avoid fire or shock hazard, humidi- I
tier, should be plugged into a 120V, A.C. outlet. Do
Inot use extension cords.
Lid Retention
Figure 3
1. Locate lid retention clips in styrofoam packing material
on top of motor support section. (See Fig. 4) Dispose
of packing material.
2. Position lid over housing with hinges facing rear of unit.
(See Fig. 5)
3. Position lid retention clip over clip mounting area.
\
Figure 4
4


