


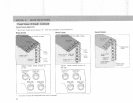
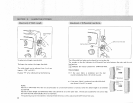
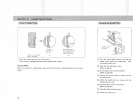


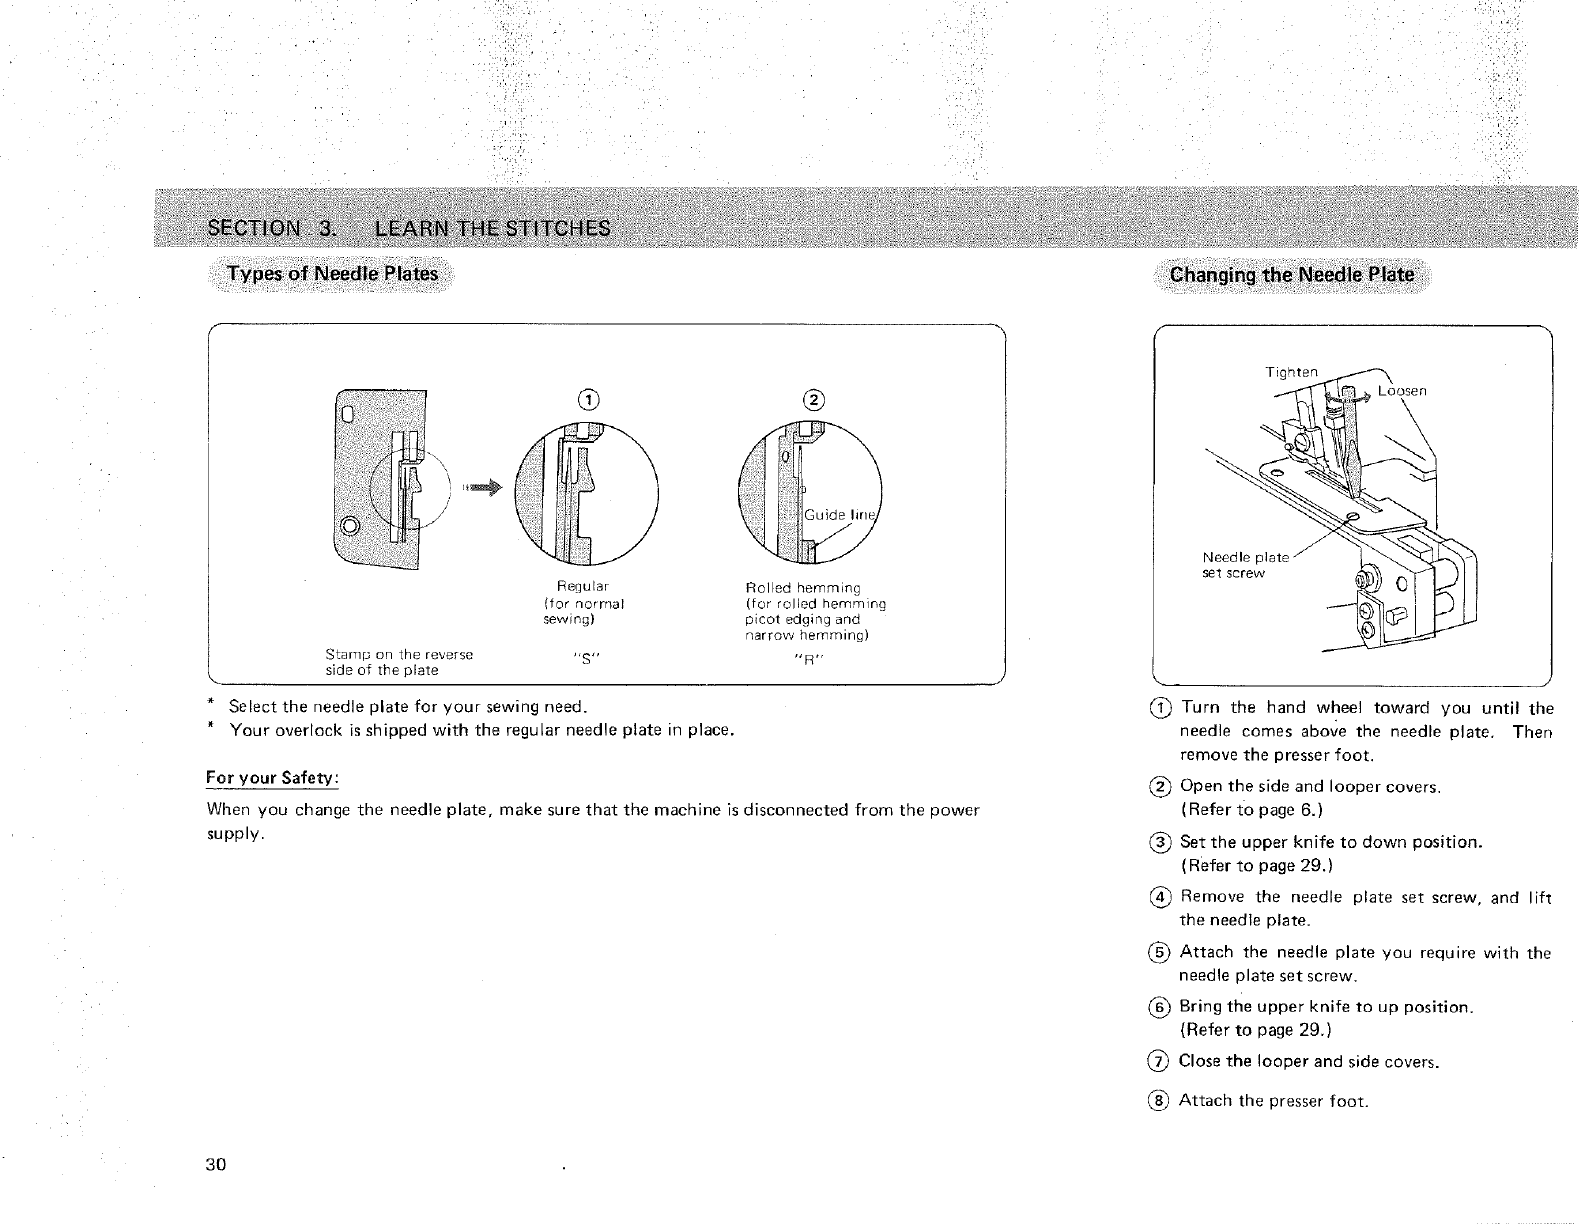
Stamp on the reverse "S"
side of the plate
* Select the needle plate for your sewing need.
* Your overlock is shipped with the regular needle plate in place.
Regular Rolled hemming
(for normal (for rolled herrlqfing
sewing) picot edging and
narrow hemming)
"R"
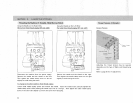
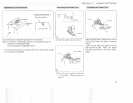
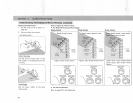
For your Safety:
When you change the needle plate, make sure that the machine is disconnected from the power
supply.
3O
Changing the Needle Plate
Tighten
Loosen
Needle pl_
set screw
(_ Turn the hand wheel toward you until the
needle comes above the needle plate, Then
remove the presser foot,
(_ Open the side and looper covers.
(Refer to page 6.)
(_ Set the upper knife to down position.
(Refer to page 29.)
Remove the needle plate set screw, and lift
the needle plate.
(_) Attach the needle plate you require with the
needle plate set screw,
(_) Bring the upper knife to up position.
(Refer to page 29.)
(_ Close the looper and side covers.
Attach the presser foot.