


4 iColor Cove QLX Installation Guide
Philips Solid-State Lighting Solutions
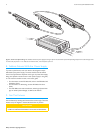
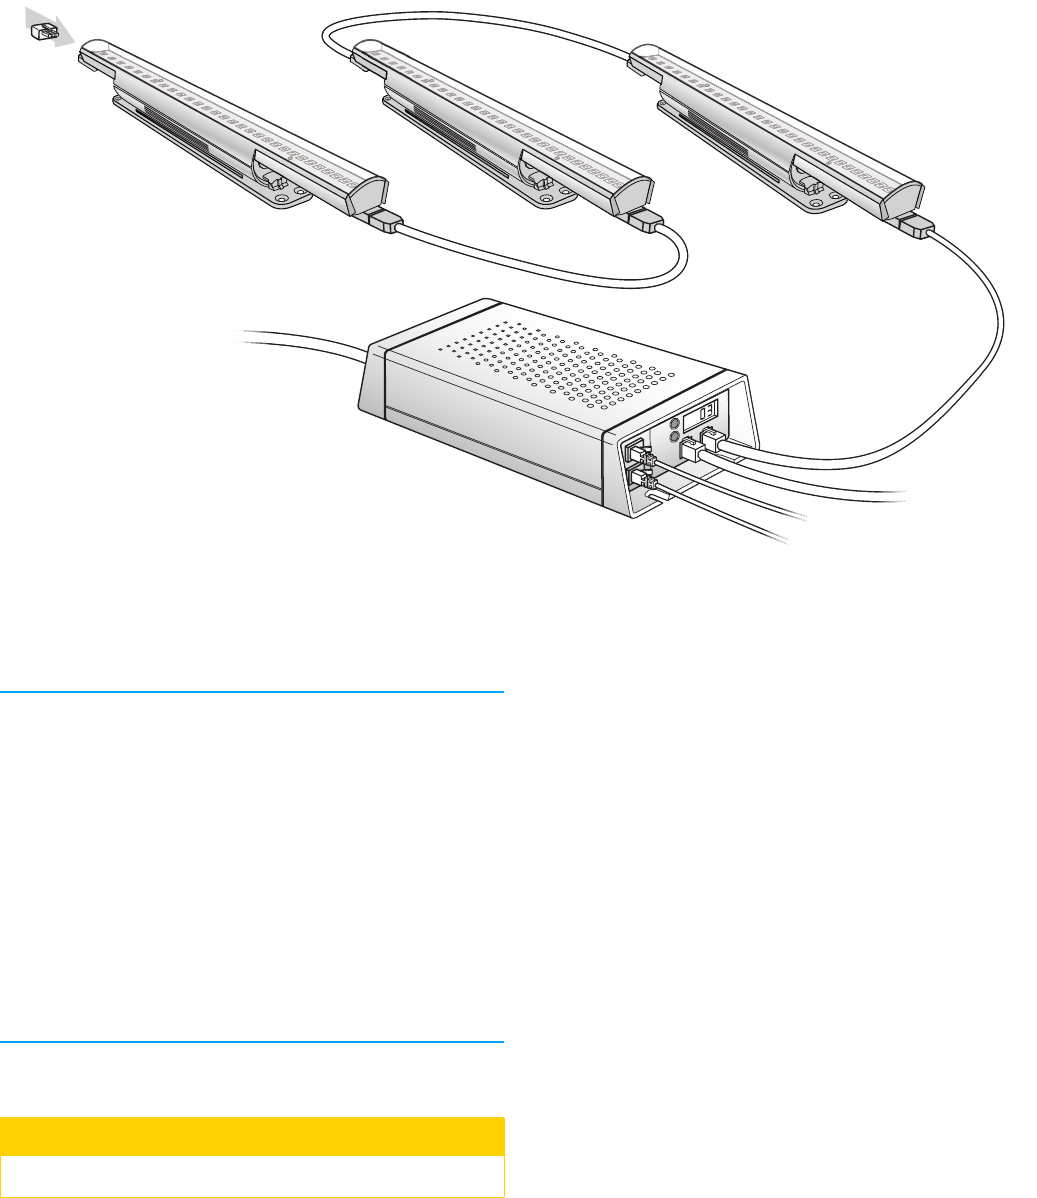
Figure 2: iColor Cove QLX Wiring This illustration shows the power supply receiving line power and control data inputs and dispatching both power and data through a lead-
er cable to the first fixture in a run. Note the terminator location, in the last fixture of the run.
8. Address Fixtures With the Power Supply
To power up the fixtures, each one needs to be assigned a unique
addressed by the power supply. The exact method used to address
iColor Cove QLX fixtures depends on the type of power/data supply
being used. Specific instructions are in each power supply’s user guide,
or if an external controller is used, in that tools’ guide.
• For information on the PDS-60ca 24V, refer to the PDS-60ca 24V
Installation Guide.
• For information on addressing, see the sPDS-60ca 24V User
Guide.
• The PDS-480ca uses external software, either Light System Man-
ager or Video System Manager, to address the fixtures.
9. Aim The Fixtures
Aim the fixtures by rotating each fixture to the correct angle. There are
detents every 10 degrees in the bracket that hold it in position.
ƽCAUTION
ICOLOR COVE QLX FIXTURES ARE A CLASS 2 LED PRODUCT. DO NOT
STARE INTO A BEAM OR VIEW DIRECTLY WITH OPTICAL INSTRUMENTS.