Page-7
K. Install the lock keeper/strike. Position the keeper/
strike at the pre-drilled pilot holes. Insert a shim between
the frame jamb and rough opening at the keeper/strike
location. Fasten using (3) #10 x 3" screws (provided).
INTERIOR
2-PANEL (XO)
EXTERIOR
Vent
Panel
Vent
Panel
Vent
Panel
A
S
T
R
A
G
A
L
INTERIOR
4-PANEL (OXXO)
EXTERIOR
LOCK KEEPER
3-PANEL (OXO)
EXTERIOR
Fixed
Panel
A
S
T
R
A
G
A
L
INTERIOR
Vent
Panel
LOCK KEEPER
LOCK KEEPER
POCKET
COVER
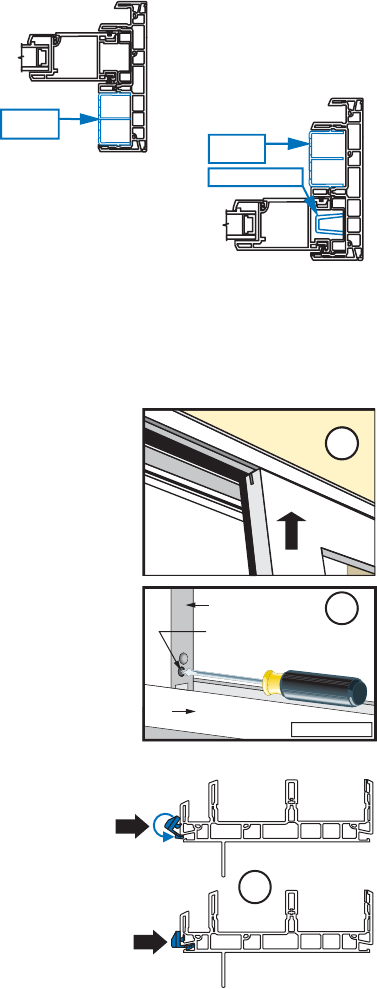
J. Install jamb pocket cover in pocket
above bumper.
Fixed
Panel
POCKET
COVER
INTERIOR
2-PANEL (OX)
EXTERIOR
A. Insert door panel. From the interior of the building, tilt
the top of the panel toward the door frame and insert the
top of the door panel into the top track. Move the bottom
of the panel toward the door frame until it is vertical.
Gently set the panel down into the bottom track.
Note: Make sure the top of the panel clears the anti-
lift clip before attempting to place the panel on the
bottom track.
TWO OR MORE PEOPLE WILL BE REQUIRED TO HANDLE THE PANEL SAFELY.
5A
Sill
Roller adjustment screw
Interior View
Slide panel
5B
Note: A wide putty knife may be needed to raise the
rollers above the sill when installing the panel.
B. Adjust the rollers so that the slide panel runs freely
and is parallel to the fixed interlocker. Rotate the middle
roller screw clockwise to raise the panel or counter-
clockwise to lower the panel. They are located at the
bottom of the slide panel at both ends. Once plumb,
adjust the slide panel to the proper height to attain
even coverage of the weather strip at both the top and
bottom as viewed from the exterior.
C. Install the weep hoods in the weep slots on the
sill. Place the top of the weep hood against the sill
then swing the bottom into the latched position.
Note: The screen track ends do not need weep
hoods. This is where the screen track weeps.
2
1
6C
4A
4B
4C
4
REINSTALL THE SLIDING PANEL
3
SETTING AND FASTENING THE DOOR (CONTINUED)


