


1
IMPORTANT SAFETY INSTRUCTIONS
WARNING – TO REDUCE THE RISK OF FIRE, ELECTRIC
SHOCK, OR INJURY TO PERSONS, OBSERVE THE FOLLOW-
ING:
1. All electrical work must be done in accordance with local or
national electrical code as applicable. For safety, this product
must be grounded. If you are unfamiliar with methods of in-
stalling electrical wiring, secure the services of a qualified elec-
trician.
2. When wiring, servicing or cleaning this unit, turn off power and
lock out service panel. Failure to do so could allow others or
thermostat to turn on power unexpectedly which may cause
fatal electrical shock.
3. To avoid electrical shock:
• Do not install unit in a tub or shower enclosure or any loca-
tion where it may come in contact with water.
• Never place a switch where it can be reached from a tub or
shower.
4. Do not install this unit in an area where chemicals and other
flammables are stored or used. Explosion and fire may result.
CAUTION
1. This product may ONLY be installed in a wall. Do not mount in
any other position.
2. Install heater at least 12" from floor or any adjacent vertical
surface.
3. Do not locate heater behind a door, furniture, drapes, etc.,
where the air flow to the unit would be restricted.
4. Provide heater with an appropriately-rated electrical circuit to
prevent tripped breakers or blown fuses.
5. Do not connect heater to dimmer switch or speed control.
6. To avoid motor bearing damage and noisy and/or unbalanced
impellers, keep drywall spray, construction dust, etc., off power
unit.
7. Please read specification label on product for further informa-
tion and requirement.
INSTALLATION INSTRUCTIONS
READ & SAVE THESE INSTRUCTIONS!
Wall Heater
MODELS: 9192NT, 9194NT, 9198NT
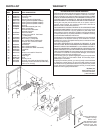
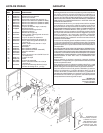
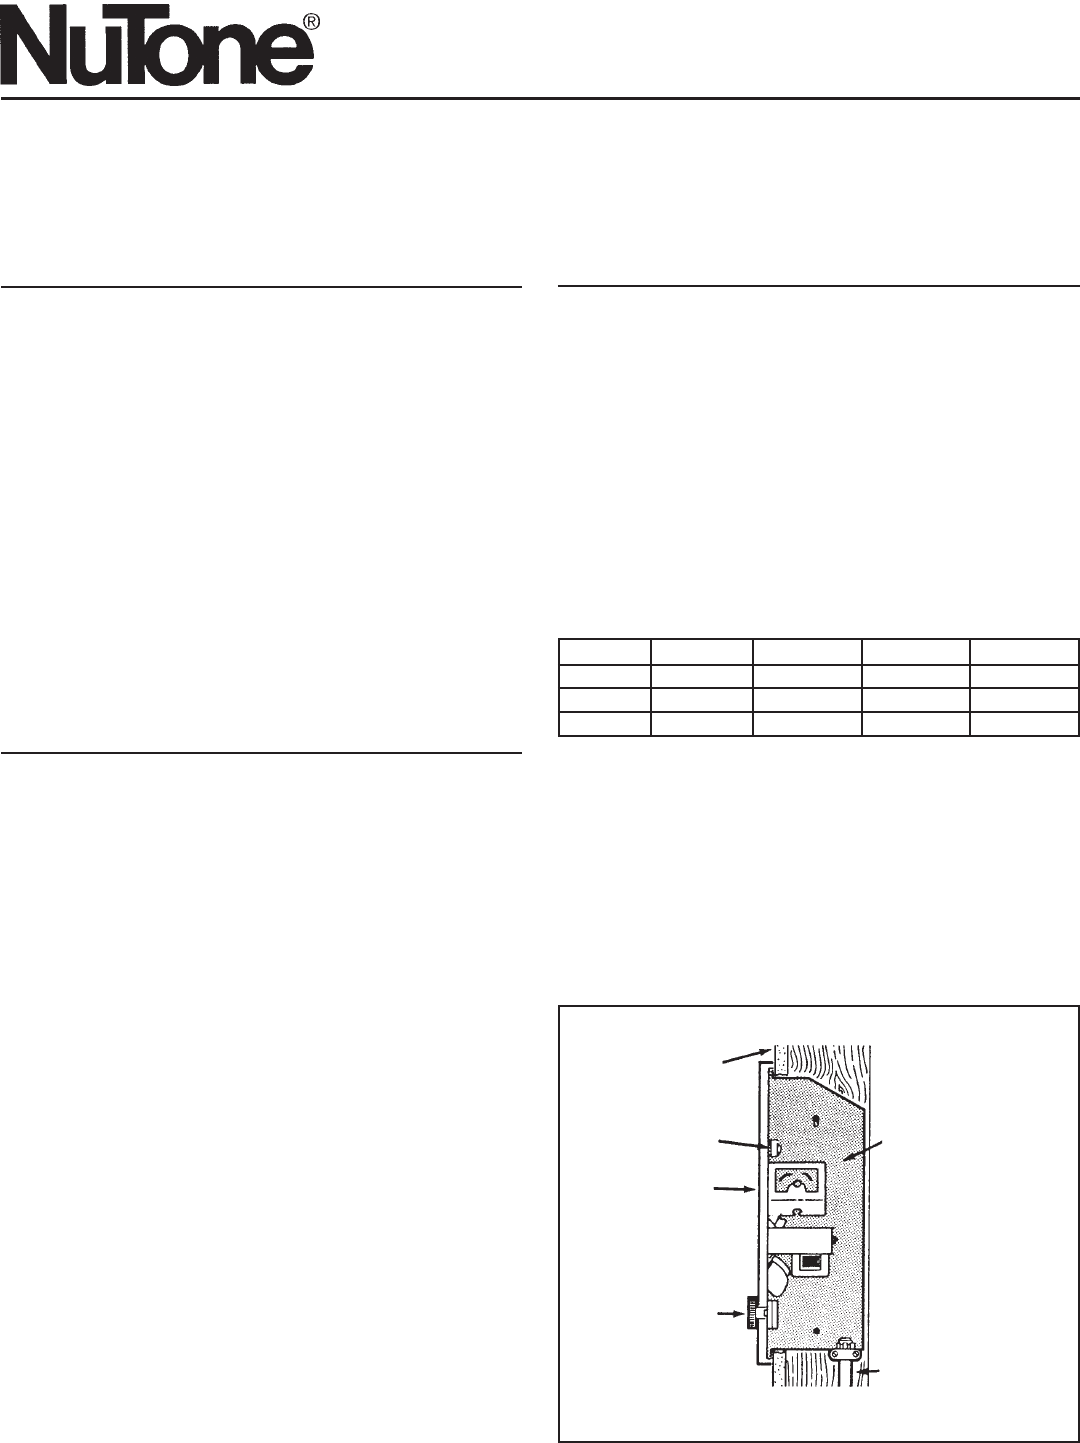
FIGURE 1
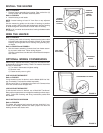
PLAN THE INSTALLATION
This heater is intended to be used to supply supplemental heat
from a wall location in new or existing construction.
Choose a location where edge of heater will be at least 12" from
the floor or any adjacent vertical surface.
The heater can be operated using its built-in thermostat or a re-
mote thermostat (Choose either the Model 86W Line-Voltage ther-
mostat or use the Model 82 Transfomer/Relay with an appropriate
low-voltage thermostat.). The Model 85NT Kit is available for sur-
face-mount applications. Purchase these accessories separately.
Plan to supply the heater with proper line voltage and appropriate
power cable.
NOTE: Power can be tapped from a nearby circuit depending on
the heater wattage required and the amperage rating of the circuit.
Heater can be converted to half-wattage to avoid overloading such
circuits.
MODEL VOLTS AMPS WATTS BTU/HR
9192NT 240 8.33/4.17 2000/1000 6827/3413
9194NT 240 12.50/6.25 3000/1500 10240/5120
9198NT 240 16.67/8.33 4000/2000 13653/6827
DRYWALL
THERMAL
OVERLOAD
GRILLE
BUILT-IN
THERMOSTAT
HEATER HOUSING
POWER CABLE
Bold ratings are factory wired.
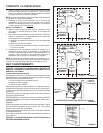
See “OPTIONAL WIRING CONVERSIONS” section for wattage
conversion instructions.
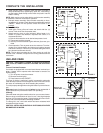
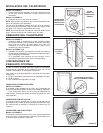
Refer to FIGURE 1
Follow these basic steps when installing this heater:
1) Nail housing to studs.
2) Connect power cable.
3) Fasten heater assembly and grille to housing.