


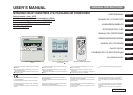


8
• If you select a day of the week for which setting
have already been made, all the timer numbers
that have been set are displayed. And the details
of the timer setting for the number which has “◄”
mark is displayed. You can modify the selected
setting by overwriting it.
•
If you set ON timer and OFF timer operating at
the same time, OFF timer will precede.
• If the same two times are set for ON timer on the
same day, the lower number precedes.
Next setting and exiting Weekly timer mode
After “ ” is displayed, “ ” is displayed.
1 Press ▲ or ▼ button.
By pressing ▲ or ▼ button, it is possible to choose the item to set.
“
” (select the next timer operation number
within the same day)
↕
“ ” (select the next day)
↕
“ ” (Timer mode ends)
2 Press SET button.
If “ ” is selected, “ ” is displayed.
Repeat step 3 and the subsequent steps of Weekly timer setting
on page 7.
If “
” is selected, “ ” is displayed.
Repeat step 1 and the subsequent steps of Weekly timer setting
on page 7.
If “
” is selected, timer mode ends.
2 1
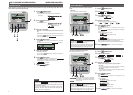
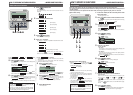
Display after Weekly timer modes setting
• The day of the week set is underlined.
• The ▼ mark is displayed above the current day of the week.
• The display of all the timer operation numbers set for the
current day is turned on. The ◄ mark indicates the next
setting number to be activated, and the set time is displayed.
• The timer operations are executed in order, and the number
and time display are turned off when all the timer operations
for the current day are completed.
• If you press
button while timer
mode is under setting, timer mode is canceled
and the display will return to the original one.
• If you do not press any button for several
minutes after entering the timer mode, the
timer mode ends and the display returns to
the original one.
NOTICE
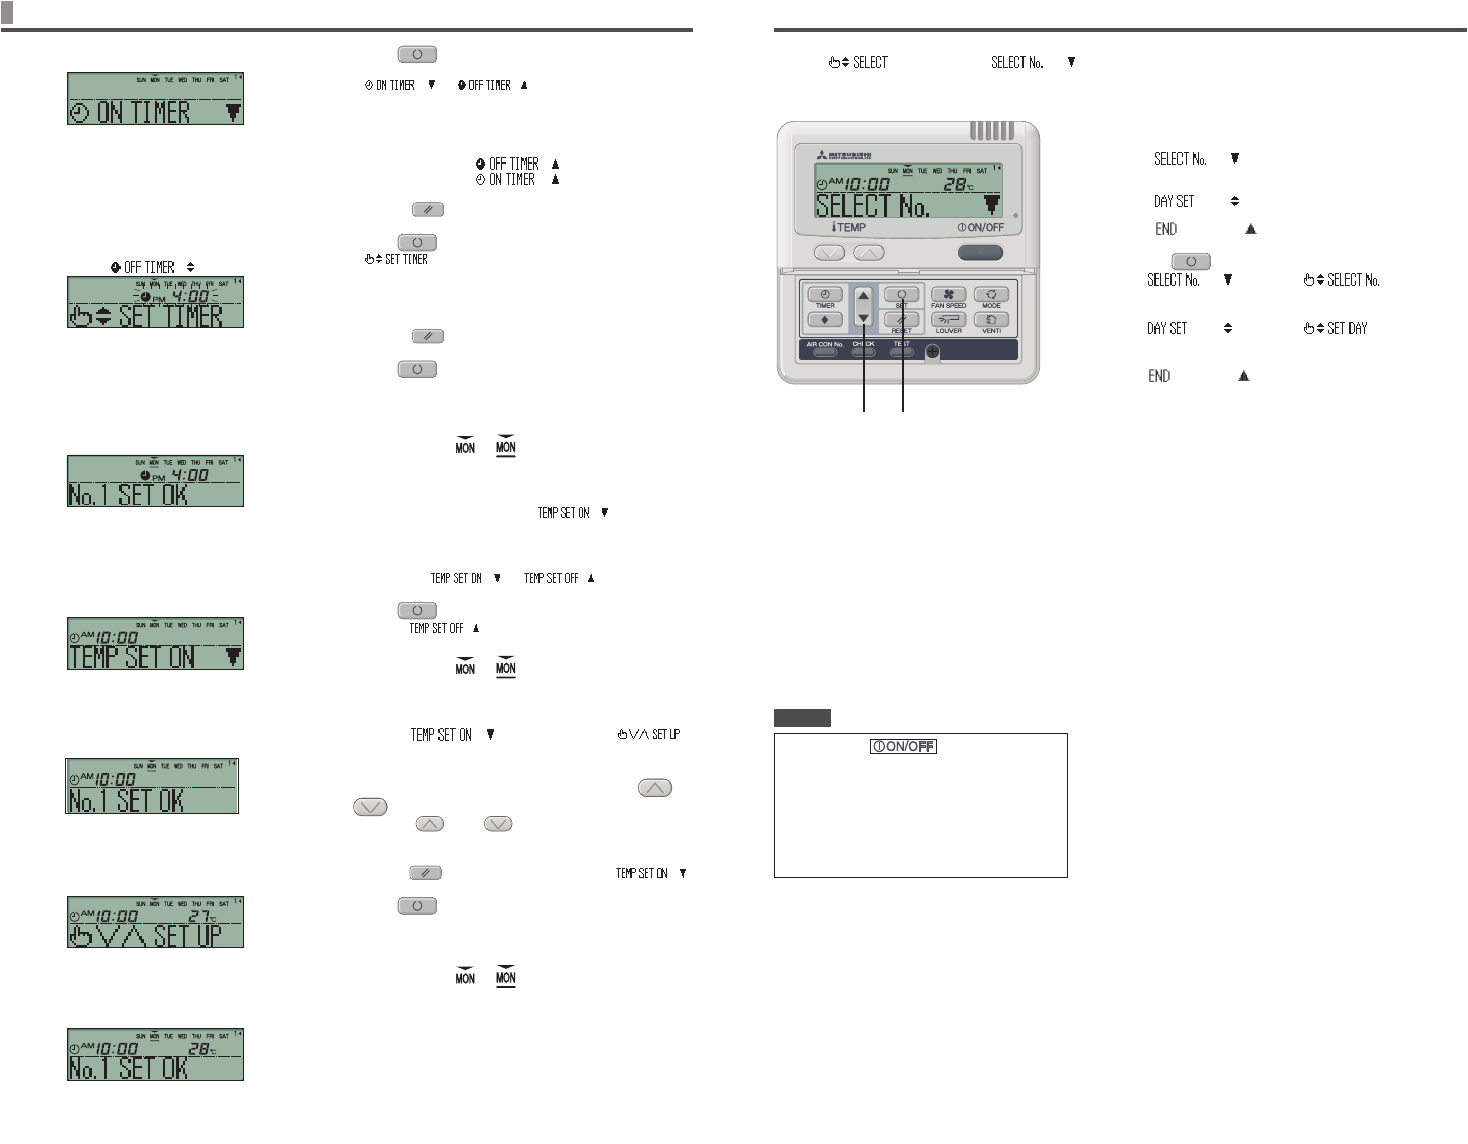
HOW TO PERFORM THE TIMER OPERATION < WIRED REMOTE CONTROL >
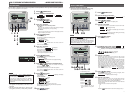
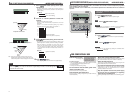
5 Press SET button.
◄ mark next to a number lights.
“ ” or “ ” is displayed.
The settings so far are effective and the display changes as shown
on the left.
6 Press ▲ or ▼ button.
Press ▼ button and “ ” is displayed.
Press ▲ button and “ ” is displayed.
Select either of the above two.
Press the
RESET button to return to the display in step 3.
7 Press SET button.
“ ” is displayed
8 Press ▲ or ▼ button.
Set the time.
Press the
RESET button to return to the display in step 5.
9 Press SET button.
When time display lights, the time is fixed.
In case of OFF timer setting, setting process is completed on
this step.
A “_” mark lights (
) under the day of the week which
you set and the display appears as the left image.
Proceed to “Next setting and Exiting Weekly timer Mode” on the
right page.
In case of ON timer setting, “
” is displayed,
proceed to step
10.
10
Press ▲ or ▼ button.
Select either “ ” or “ ”.
11
Press SET button.
In case “ ” has been selected, ON timer setting
process is completed.
A “_” mark lights (
) under the day of the week which
you set and the display appears as the left image.
Proceed to “Next setting and Exiting Weekly timer Mode” on the
right page.
In case “
” has been selected, “ ”
is displayed; Proceed to step 12.
12
Press the temperature setting buttons or
.
Press the or the button to increase or decrease by
1°C.
Set the temperature at the start of operation.
Press the reset button to return to the display “ ”.
13
Press SET button.
ON timer setting with start-up temperature has been
completed.
The value of the temperature stops flashing and lights.
A “_” mark lights (
) under the day of the week which
you set and the display appears as the left image.
Proceed to “Next setting and exiting Weekly timer mode” on the
right page.
<When “ ” is selected>