


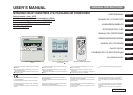


5
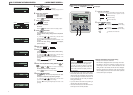
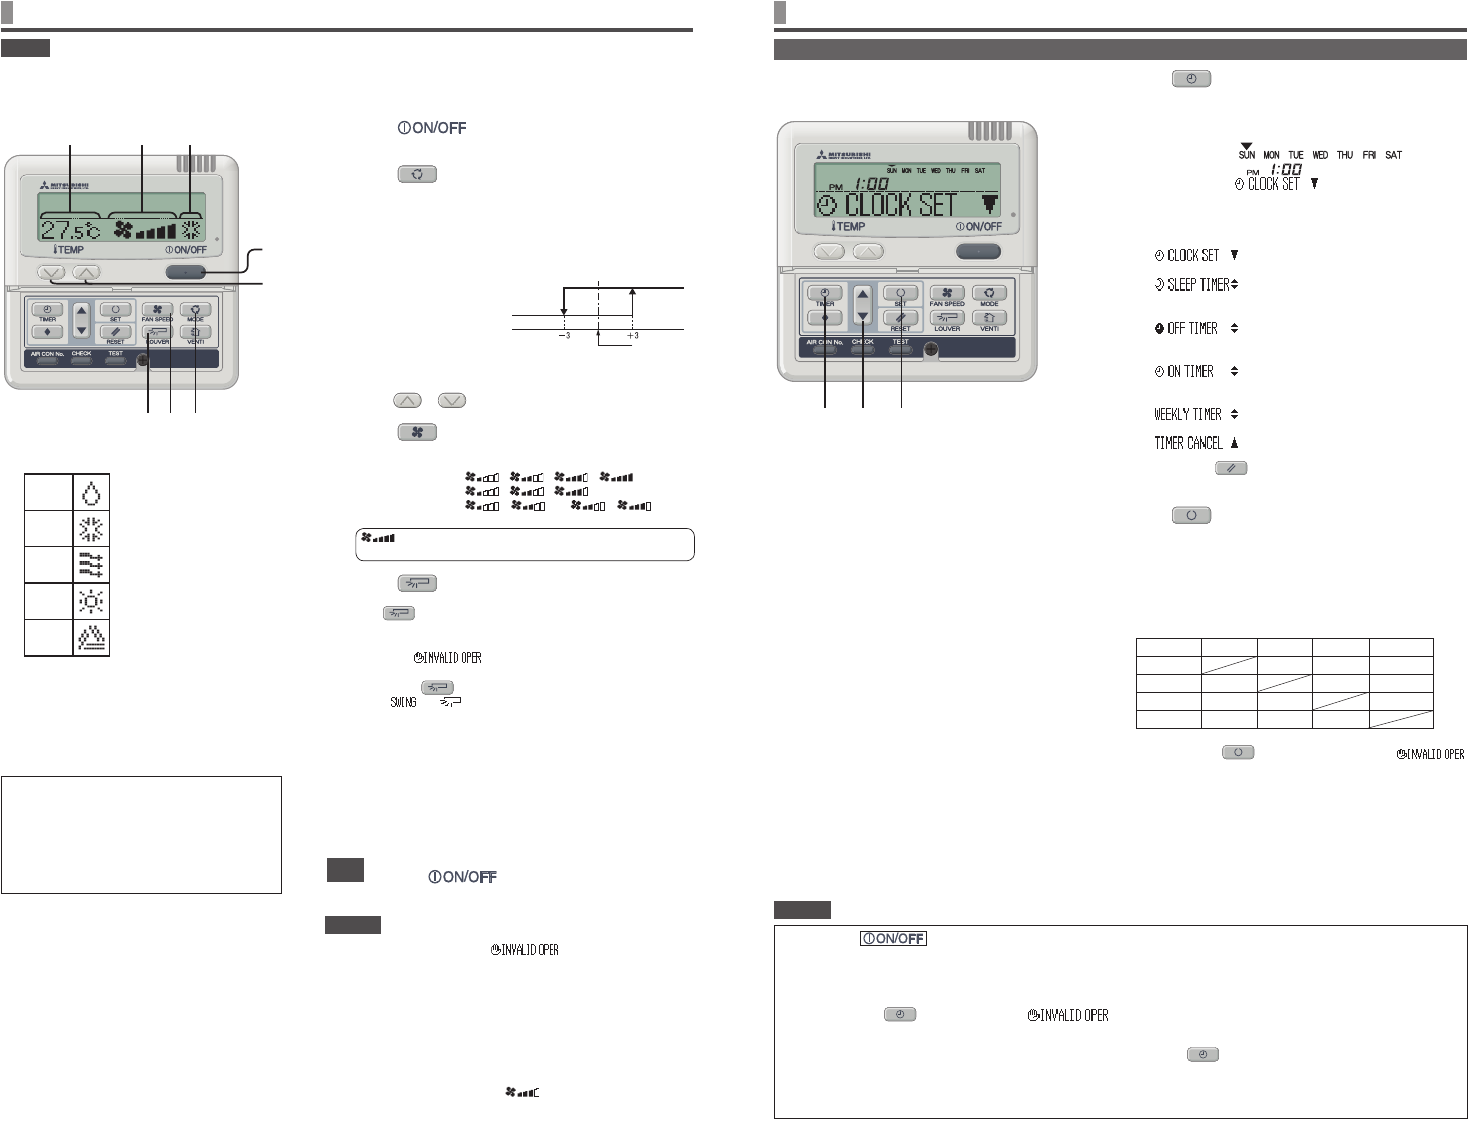
HOW TO PERFORM THE TIMER OPERATION < WIRED REMOTE CONTROL >
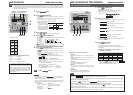
1 Press TIMER button.
The mode changes to timer mode.
“Current day of the week” and “Current time ” are displayed.
[EXAMPLE] Sunday : 1 o’clock in the afternoon
Display area : [
]
[ ]
[ ] (lights)
2 Press ▲ or ▼ button.
By pressing ▼ or ▲ button, it is possible to choose the item to set.
[
] (set to current time)
[
] (Every operation stops after a certain period
of time has elapsed.)
[
] (The unit stops operating at the setting
time.)
[
] (The unit starts operating at the setting
time.)
[
] (Timer set for each day of the week)
[
] (Cancel the timer setting)
If you press the
RESET button, timer mode ends and return
to original status.
3 Press SET button.
The selected timer mode is set.
For setting of each timer mode, see the following pages.
The possible combination of the timer function is mentioned in the
following table.
Combination of modes that can be set together
(: possible ×: impossible)
• If you select a combination of modes that cannot be set together
and press the
SET button, the message “
(invalid operation)” is displayed for 3 seconds and then the
display returns to the one selected in step 2.
3
2 1
• If you press button while timer mode is under setting, timer mode is canceled and the display will return
to the original one. Note that the setting which has not completed is canceled.
• If you have set the ON timer mode and either the OFF timer or Sleep timer mode at the same time, the OFF timer
(or Sleep timer) precedes the ON timer.
• If you press the
Timer button and “ ” is displayed, the button can not be operated because the
button operation is disabled. If you want to make the button effective , consult your dealer.
• If you do not press any button for several minutes after pressing the
Timer button, Timer mode ends and the
display returns to the original one.
• When the weekly timer setting recovers from power failures, the setting data (four settings per day) remain stored,
but holiday settings will automatically override the settings for each day.
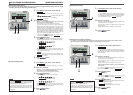
THE SELECTION OF TIMER MODE
Functions of each timer operation
Sleep timer•
When the specified period of time elapses, operation
stops.
10 settings are available, from “an hour later OFF” to “10
hours later OFF”.
The unit will stop when the setting time is reached.
OFF timer•
The unit stops operating at the setting time.
It will operate one time per setting.
ON timer•
The unit starts to operate at the setting time. The
temperature can be set together. It will operate one time
per setting.
Weekly timer•
You can set up to four ON/OFF timers per day.
Once Weekly timer is set, it repeats every week.
HOW TO OPERATE < WIRED REMOTE CONTROL >
NOTICE
There may be a case that “• ” is displayed when any
button mentioned in the above is pressed, but it is not a malfunction.
In that case, the operation of the button is prohibited.
When you start to operate the unit for the first time after turning the •
power supply on, the default settings are listed below. You can change
them as you like.
Central control ......................Turned off
Operation changeover .......... With auto mode : auto cooling
Without auto mode : cooling
Set temperature ...................23°C
Fan speed ............................
Louver position .....................Horizontal
ATTENTION
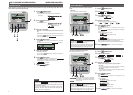
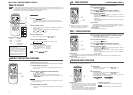
1 Press button.
The unit starts operating.
2 Press MODE button.
The range of operation mode is displayed according to the model
of indoor unit.
Every time the button is pressed, the display changes in the
following order: dry
cool
fan
heat
auto.
(EXAMPLE display for auto-operation enabled)
•
With auto operation,
heating and cooling is
automatically changed
depending on difference
between the setting
temperature and sucking
room air temperature.
3 Press TEMP button.
Press or button to set the room temperature.
4 Press FAN SPEED button.
The range of fan speed modes is displayed according to the model
of indoor unit.
At 4-speed .............“ ↔ ↔ ↔ ”
At 3-speed .............“ ↔ ↔ ”
At 2-speed .............“
↔ ” or “ ↔ ”
At 1-speed .............The operation is invalid
at 4-speed
The unit operates with the maximum fan speed.
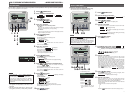
5 Press LOUVER button.
If the indoor unit is equipped with the auto swing function, press
the LOUVER button once and current louver status is
displayed.
If the indoor unit is not equipped with the auto swing function, the
message “ ” is displayed.
For the louver operation •
☞
See page 11 to 12
1 Press LOUVER button, and change the display to
For the louver stopping •
☞
See page 11 to 12
1 Press once while the louver is operating to display stop
positions in order.
2 Press the button once more at the preferred stop position to
stop the louver at that position.
Effective stop position
☞
See page 11 to 12
For automatic operation: ...............................middle
For cooling/dehumidifying operation: ............Horizontal
For heating operation: ...................................downwards
Stop
Press button
1
3
2 4 5
Setting
temperature
Fan speed
mode
Operation
mode
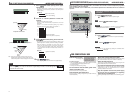
Guideline for room temperature setting
COOL ...............26 to 28°C
DRY ..................21 to 24°C
HEAT ................22 to 24°C
FAN ...................Setting unnecessary
• The settings of operation change, temperature
and air flow volume adjustment can be changed
even when the air conditioner is stopped. When a
button is pressed while the operation is stopped,
the corresponding display is turned on and you
can change the setting. The display lights for three
seconds after changing the setting, and then turns
off automatically.
• In order to protect both indoor/outdoor air conditioners, keep the power supply on for six hours before initial operation. (The
crank case heater is energized in order to heat up the compressor.) Do not turn off the power supply. (Power is distributed to
the crankcase heater, even if the compressor is stopped. This keeps the compressor warm, and prevents failures caused by
accumulation of liquid refrigerant.)
cooling operation
heating
operation
room setting
temperature
Operation mode
DRY
COOL
FAN
HEAT
AUTO
NOTICE
OFF timer
×
×
Sleep timer
×
×
Weekly timer
×
×
×
ON timer
×
Sleep timer
OFF timer
ON timer
Weekly timer