Model No.
Quick Installation
Model No.
Voice
Before You Begin
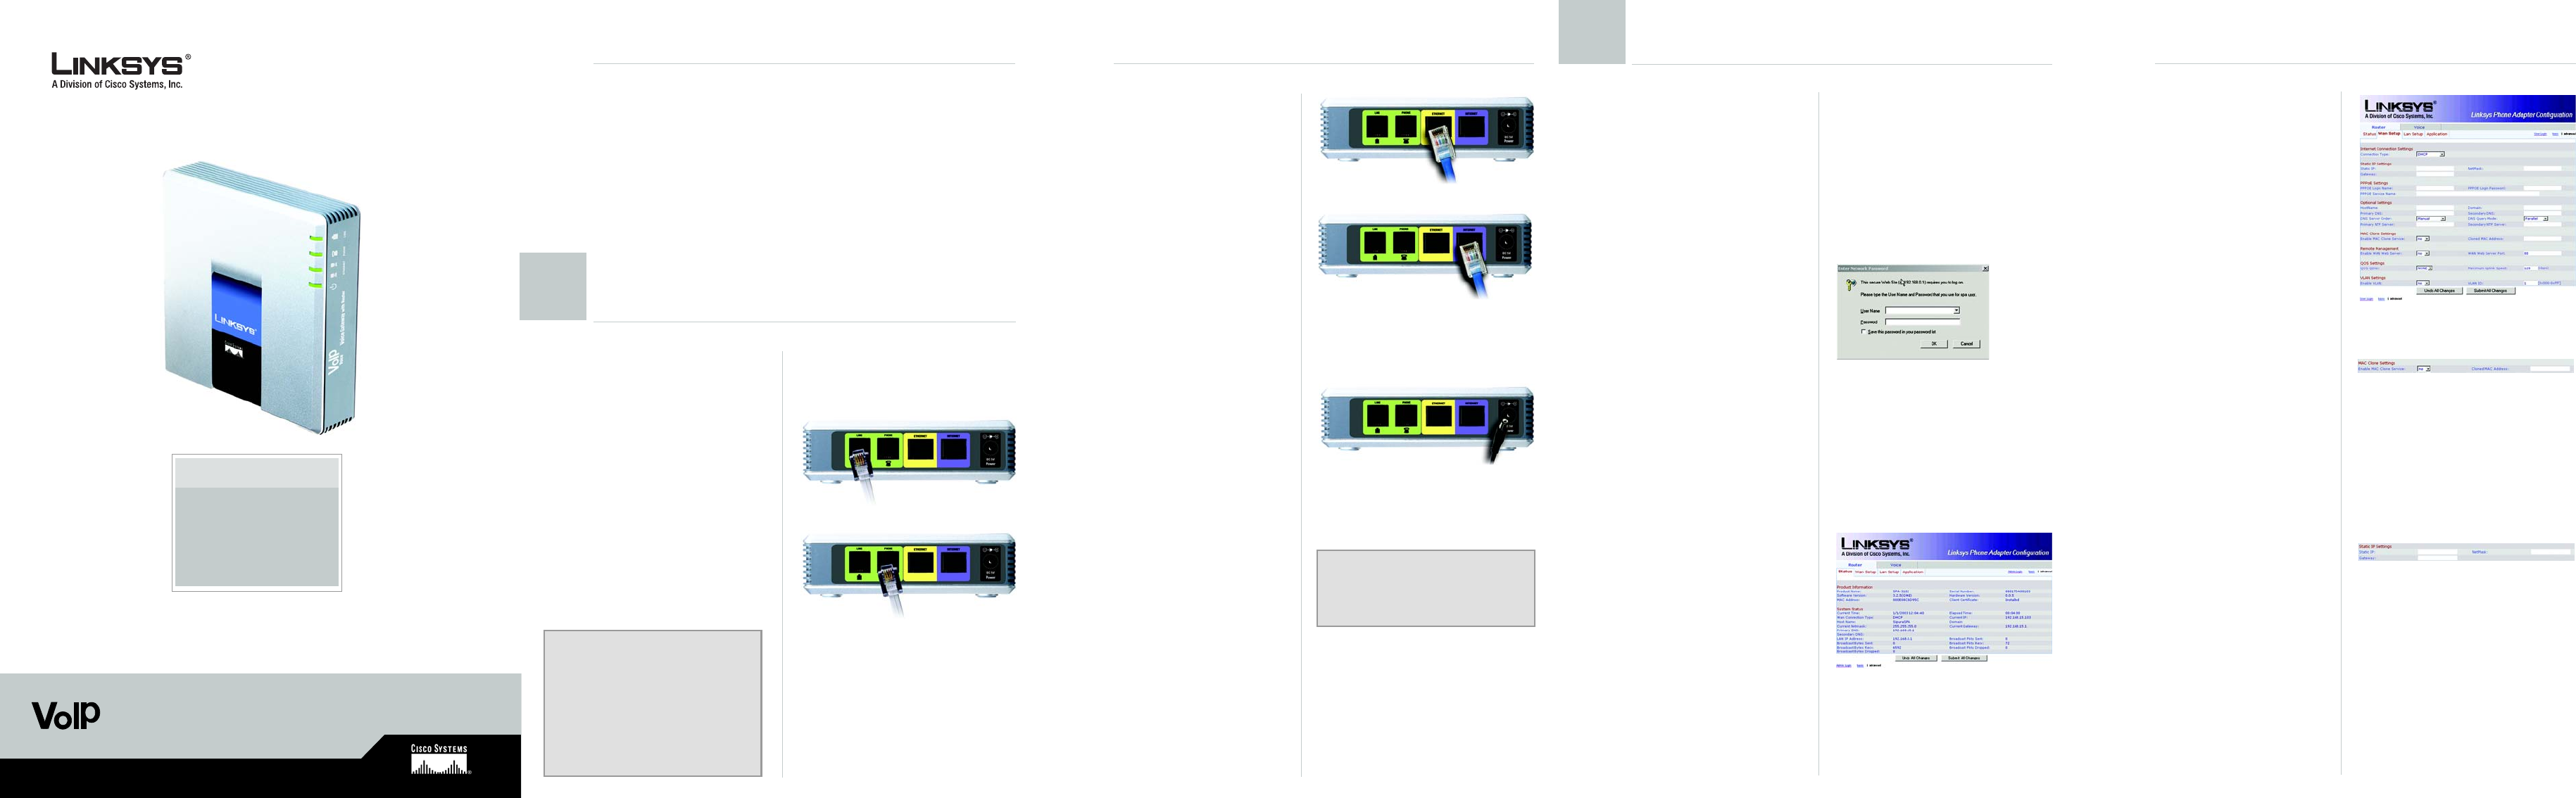
D Connect one end of an
Ethernet network cable
(included) to the ETHERNET
port of the Voice Gateway.
Connect the other end to
the Ethernet port of your PC.
E Connect one end of a
different Ethernet network
cable to the INTERNET port
of the Voice Gateway.
Connect the other end to
your cable/DSL modem.
F Power on the broadband
modem.
G Connect the included
power adapter to the Voice
Gateway’s power port, and
then plug the power
adapter into an electrical
outlet. The power LED on the
front panel will light up as
soon as the Voice Gateway
powers on.
H Power on your PC.
A Launch the web browser on
the PC.
B Enter 192.168.0.1/
advanced in the Address
field (192.168.0.1 is the
default local IP address of
the Voice Gateway). Then
press the Enter key.
C If your Internet Telephony
Service Provider (ITSP) did
not supply a password, you
will not see a login screen.
Proceed to step D.
If your ITSP supplied a
password, you will see a
login screen. In the User
Name field, enter user, the
default user name for user
access (this cannot be
changed). Then enter the
password supplied by your
ITSP.
D The Router - Status screen
will appear. Click the WAN
Setup tab.
SPA3102
Voice Gateway with Router
C
E Proceed to the appropriate
instructions for your Internet
Connection Type: DHCP,
Static IP, or PPPoE.
DHCP
1 Select DHCP for the
Connection Type.
2 If you use a cable modem,
you may need to configure
the MAC Clone Settings.
(Contact your ISP for more
information.)
Enable MAC Clone
Service. If your service uses
a specific PC MAC address,
then select yes from the
Enable MAC Clone Service
setting. Then enter the PC’s
MAC address in the Cloned
MAC Address field.
3 Click Submit All Changes.
Static IP
1 Select Static IP for the
Connection Type.
2 In the Static IP Settings
section, enter the IP
address in the Static IP field,
the subnet mask in the
NetMask field, and the
default gateway IP address
in the Gateway field.
Package Contents
• Voice Gateway with Router
• Ethernet Cable
• RJ-11 Phone Cable
• Power Adapter
•User Guide on CD
• Quick Installation
D
E
G
NOTE: Make sure your PC’s
Ethernet adapter is set to obtain an IP
address automatically. For more
information, refer to Windows Help.
A Power off your network
devices, including your
modem and PC.
B Connect the RJ-11 phone
cable (included) to the
Voice Gateway’s LINE port
and your telephone wall
jack.
C Connect one end of a
different RJ-11 phone cable
to the Voice Gateway’s
PHONE port. Connect the
other end to your analog
telephone or fax machine.
1
Connect the Voice Gateway
Make sure you have the following:
• An active Internet connection
• An active Internet phone service account and its settings
• cable/DSL modem
• One computer for configuration of the Voice Gateway
• Analog telephone or fax machine with an RJ-11 phone cable
C
B
IMPORTANT: Do not connect the
PHONE port to a telephone wall jack.
Make sure you only connect a
telephone or fax machine to the
PHONE port. Otherwise, the Voice
Gateway or the telephone wiring in
your home or office may be
damaged.
Configure the Voice Gateway
2
E
MAC Clone Settings
D
Static IP


