


/
INSTRUCTIONSHEETNO
Y
INSTRUCTIONS FOR ASSEMBLING AND INSTALLING FIXTURE IS:6590
0889
READ AND UNDERSTAND THESE INSTRUCTIONS BEFORE INSTALUNG FIXTURE.
This
fixture is intended for installation in accordance with the National Electrical Code and local regulations.
To assura full compliance with local codas and regulations, check with your local electrical inspector before
installation. To prevent electrical shock, turn off electricity at fuse box before proceeding.
Retein these instructions for maintenance reference.
CAUTION: FOR WET LOCATIONS, IN
ACCORDANCE WITH UNDERWRITERS
LABORATORIES REQUIREMENTS, A LINE OF
CAULKING COMPOUND SUCH AS ACRYLIC
LATEX OR BUTYL MUST BE PLACED AROUND
THE BACK OF THE FIXTURE OR AROUND THE
GASK~ IN ORDER TO SEAL OUT WATER.
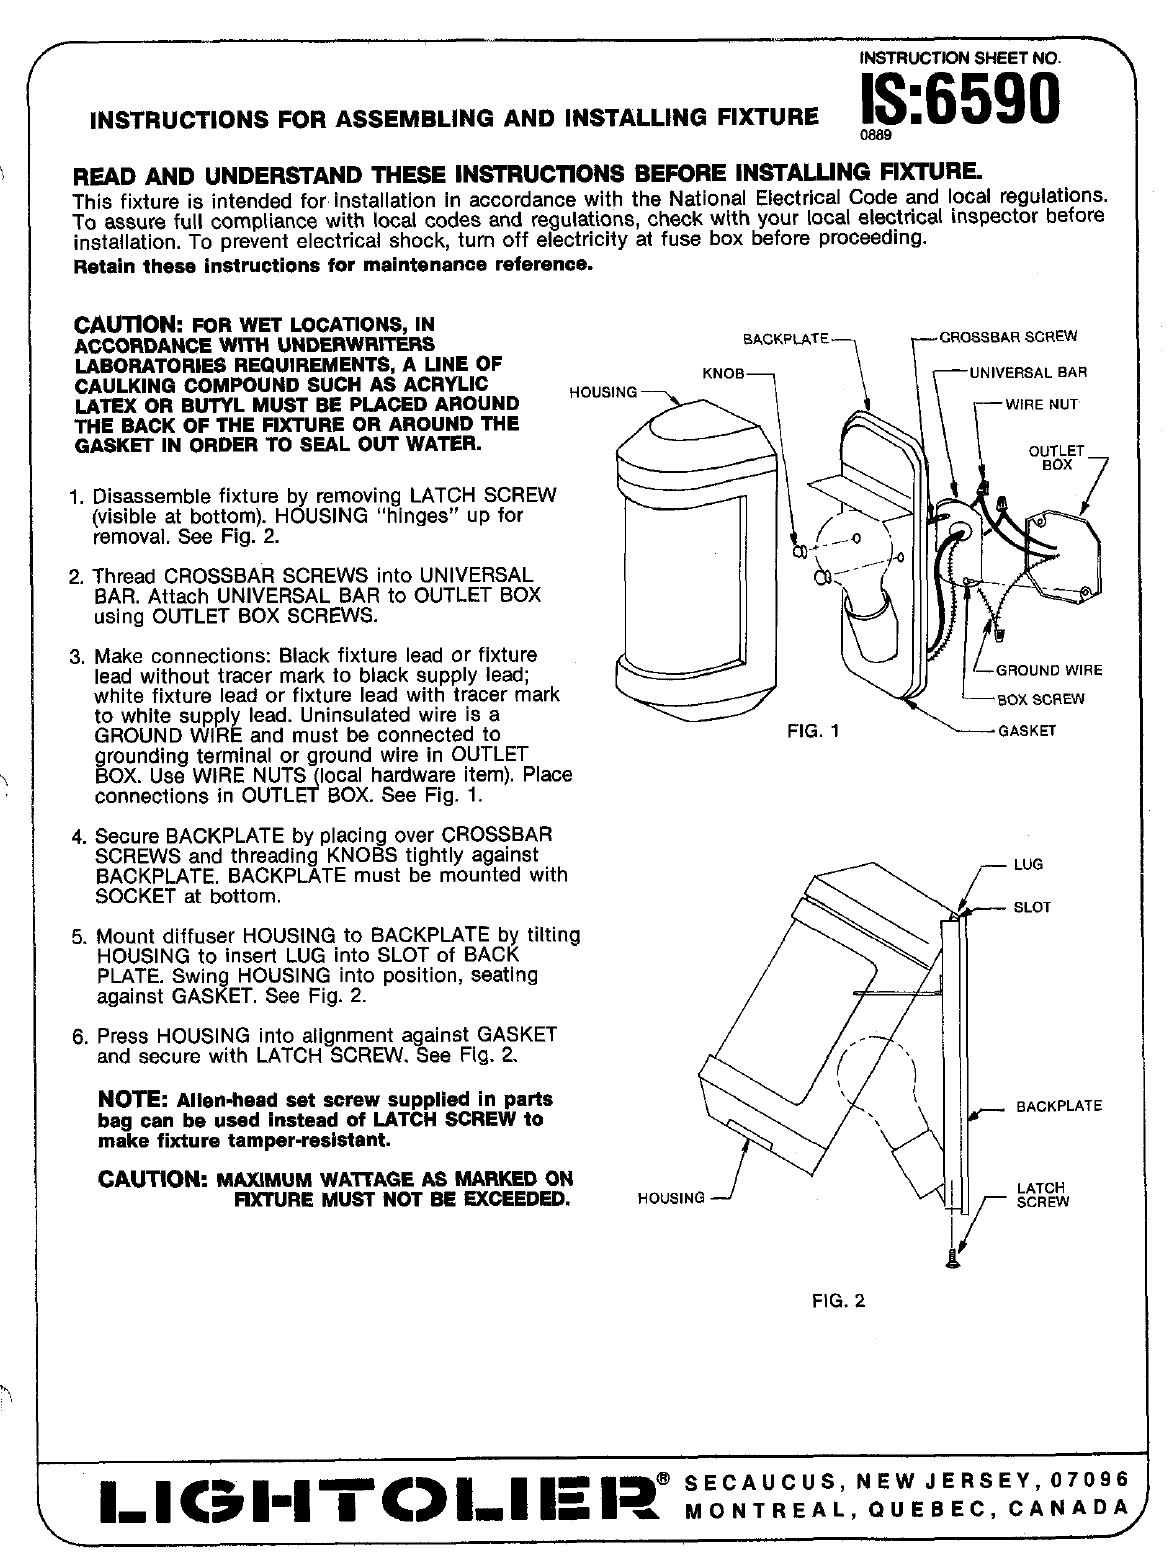
1. Disassemble fixture by removing LATCH SCREW
(visible at bottom). HOUSING “hinges” up for
removal. See Fig. 2.
8ACKPLATE
7
KNOB—
HOUSING
e
2. Thread CROSSBAR SCREWS into UNIVERSAL
BAR. Attach UNIVERSAL BAR to OUTLET BOX
using OUTLET BOX SCREWS.
3, Make connections: Black fixture lead or fixture
lead without tracer mark to black supply lead;
white fixture lead or fixture lead with tracer mark
to white supply lead. Uninsulated wire is a
GROUND WIRE and must be connected to
80X. Use WIRE NUTS (local hardware item). Place
rounding terminal or ground wire in OUTLET
connections in OUTLET BOX. See Fig, 1.
L
‘r-
CROSS6ARSCREW
\ \
~uNl”ERsAL BAR
~ BOX SCREW
FIG. 1
“--GASKET
4. Secure BACKPLATE by placing over CROSSBAR
SCREWS and threading KNOBS tightly against
BACKPLATE, BACKPLATE must be mounted with
SOCKET at bottom.
5. Mount diffuser HOUSING to BACKPLATE by tilting
HOUSING to insert LUG into SLOT of BACK
PLATE. Swing HOUSING into position, seating
against GASKET, See Fig. 2.
6. Press HOUSING into alignment against GASKET
and secure with LATCH SCREW. See Fig. 2.
NOTE: Allerr-hesd set aoraw supplied in psrts
beg cen be used instesd of LATCH SCREW to
mske fixture tsmper-resistent.
CAUTION. MAXIMUM WAlTAGE AS MARKED ON
FIXTURE MUST NOT BE SXCEEDED.
J
FIG. 2
r- ‘UG
—
SLOT
— BACKPLATE
LATCH
~ SCREW