


9
NOTE: DIAGRAMS & ILLUSTRATIONS ARE NOT TO SCALE.
zero ClearanCe fireplaCe installation
This insert may be installed in a masonry or factory built/zero
clearance (ZC) fireplace. When installing in a ZC fireplace,
the ZC grate must be removed and the ZC damper must be
removed or secured open. The ZC doors, screen, refractory
or masonry lining, baffles, and smoke shelf may be removed,
if necessary, to install the gas insert. However, do not cut
or alter the fireplace components. The removal of any parts
to facilitate installation must not alter the integrity of the
inner or outer shells of the fireplace cabinet. See Fireplace
Requirments on page 4.
glass door removal
See page 17 for Glass Door Removal Instructions.
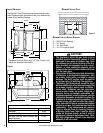
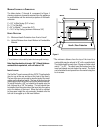
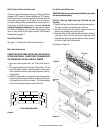
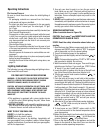
briCk liner installation
HANDLE THE BRICK PANELS WITH CARE (SEE FIGURE 8)
AS THEY ARE FRAGILE. DO NOT FORCE THE PANELS INTO
THE FIREBOX AS THEY WILL BREAK IF FORCED.
1. Open and remove glass door, see “Front Door Remov
-
al”
2. The longest panel goes in the rear of the firebox. Tilt the
top of the panel forward, insert the bottom of the panel
in the brick panel retainer and push the panel to the up-
right position.
3. Install the side panels by sliding the top of the panel into
the top side brick retainer and then dropping the bottom
of the panel into the bottom retainer. The rounded edge
on the side brick panels goes toward the front.
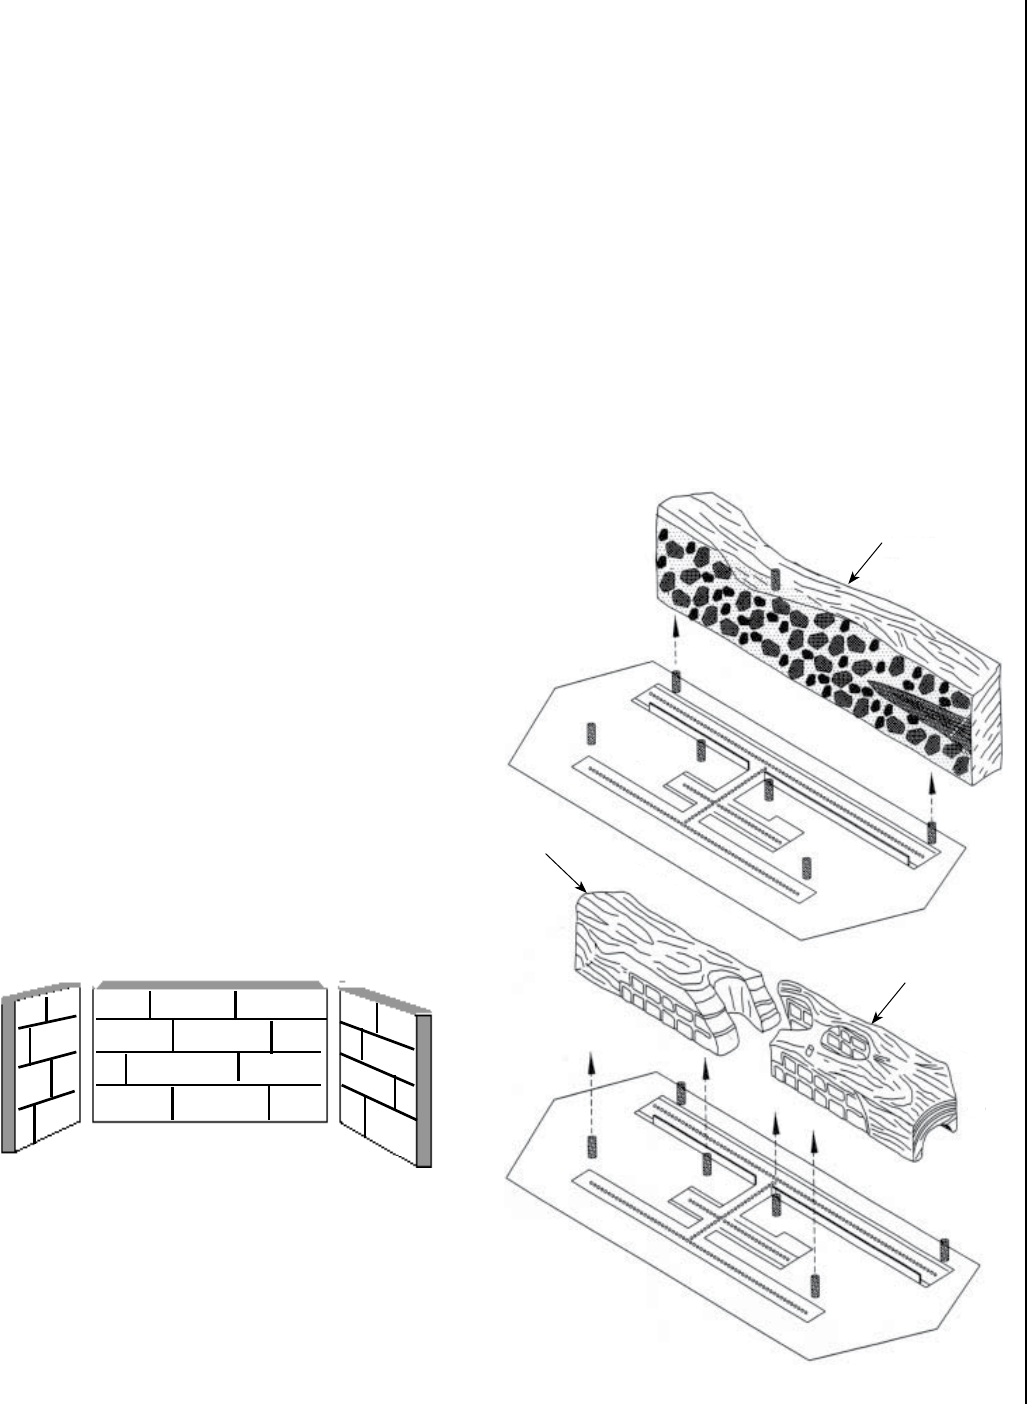
3-Piece Brick Panel Set
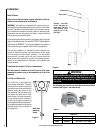
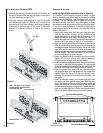
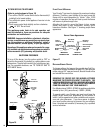
log installation instruCtions
CAUTION: If the logs are not properly installed, your insert
will not function properly.
Part list: Rear log, Right Front log, Left Front log, and
Top Twig
1. Remove the logs from the box and carefully unwrap them.
The logs are fragile, so handle them with care.
2. Place the rear log with the charred surface forward, on
the two rear locating pins (see Figure 9).
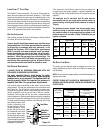
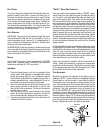
3. Place the left front log, with the charred surface forward,
(see Figure 10) on the two left front locating pins. Next
place the right front log, with the charred surface forward,
on the two right front locating pins.
Continued on Page 10...
Right Front Leg
Figure 2
Left Front Leg
Figure 1
Rear Log
Right Front Leg
Figure 2
Left Front Leg
Figure 1
Rear Log
Rear Log
Left Front
Log
Right Front
Log
Figure 8
Figure 10
Figure 9