


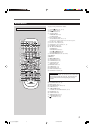

10
AUDIOTV
SLEEPDIMMER
DVD FM/AM
TV CH
AUX
TV/VIDEO
MUTING
CONTROL
TEST TONE
TOP
MENU
MENU
PTY
NEWS/INFO
PTY SEARCH
CHOICE/TIME
AUDIO
SLOW RETURN PL
RDS
RM-STHA25R
DVD CINEMA SYSTEM
SUBTITLE ANGLE ZOOM
ON SCREEN
TV VOL
AUDIO VOL
1234
5678
9
TV
0
MEMORY
CANCEL
ENTER
SOUND
/
REPEAT
FM MODE
STEP
PTY
DOWN - TUNING - UP
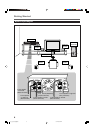
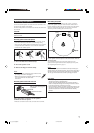
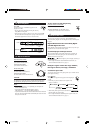
Basic Disc Operations
This manual mainly explains operations using the buttons on
the remote control. You can also use the buttons on the center
unit if they have the similar names (or marks) as those on the
remote control.
If operations using the center unit are different from those
using the remote control, they are then explained.
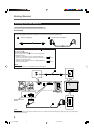
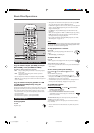
1
Turn On the Power
Before turning on the system, turn on your TV and select the correct
video input. (See the manual supplied with your TV.)
• When you use a JVC’s TV, you can turn on your TV by pressing
TV
on the remote control, and select the video input by
pressing TV/VIDEO.
• For changing the OSD messages—the information on the TV
screen—into the desired language, see “Setting the System
Preferences” on page 37.
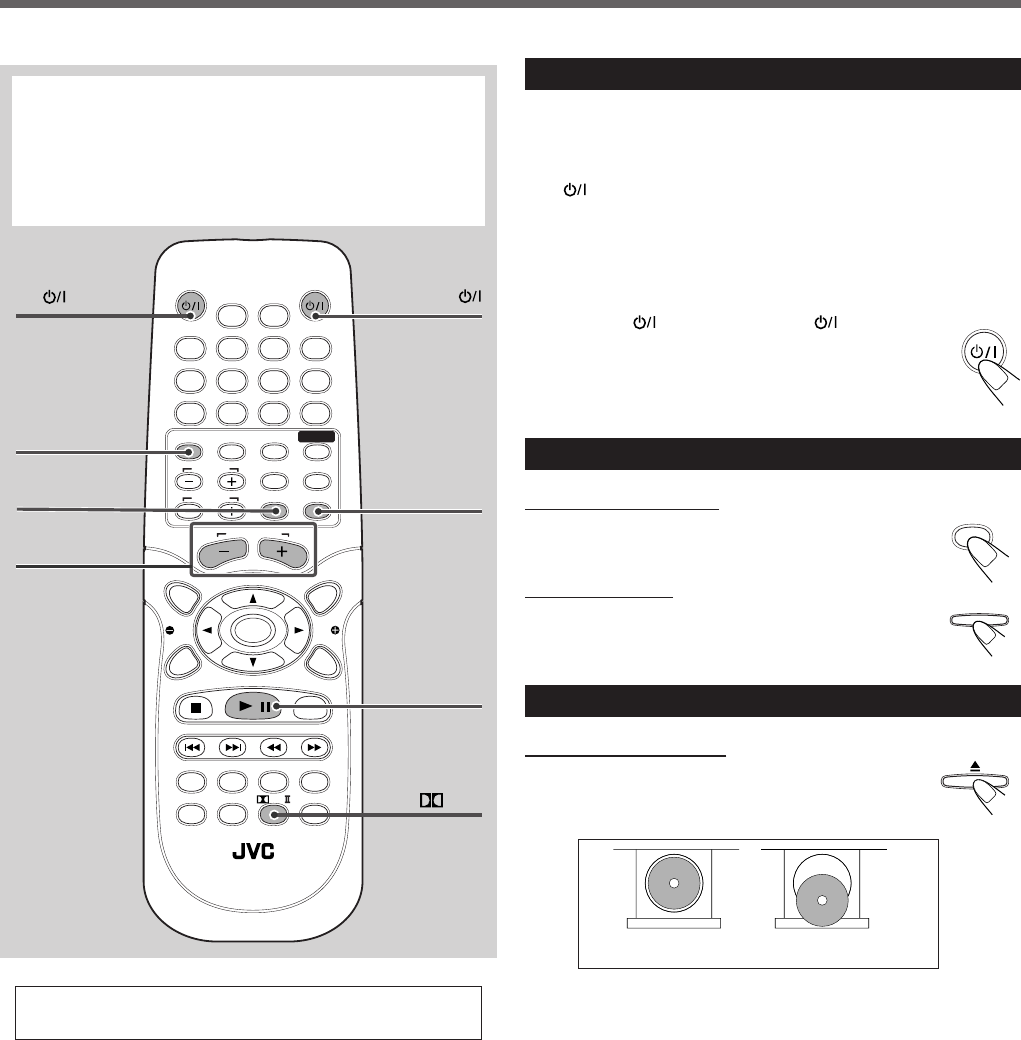
Press AUDIO
(or STANDBY/ON on the front
panel).
The STANDBY lamp goes off.
The source indication selected previously appears on the
display.
2
Select the Source
From the remote control:
Press DVD.
The source changes to the DVD/CD player.
On the front panel:
Press SOURCE repeatedly until “DVD/CD” appears
on the display.
3
Load a Disc
On the front panel ONLY:
Press 0 to open the disc tray, then place a disc
correctly with its label side up (for double-sided DVD,
the side you want to playback up).
• When using an 8 cm disc, place it on the inner circle of the disc
tray.
• Continued use of irregular shape discs (heart-shape, octagonal,
etc.) can damage the center unit.
• DO NOT use the disc stabilizer.
For in-depth information about disc operations, see
pages 20 to 31.
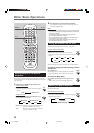
1
AUDIO
TV
5
AUDIO VOL
+/–
TV/VIDEO
6
PL II
MUTING
4
3/8
DVD
2
DVD
SOURCE
AUDIO
CORRECT INCORRECT
10_14_TH_A25[B].p65 03.7.28, 8:05 PM10